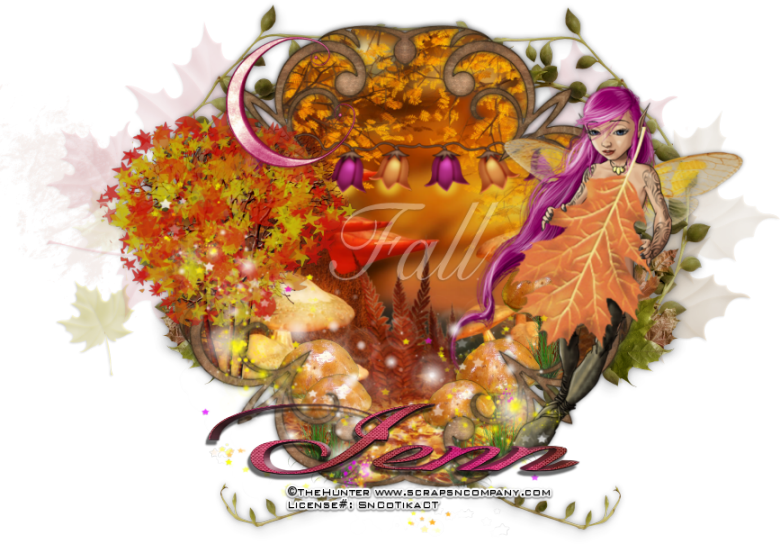
Saturday, July 26, 2014

Fall Whimsy


Fall Whimsy
written 7/26/2014

Supplies Needed :


Scrap Kit by Ginnibug Designz. You can get it at http://scrapsncompany.com/index.php?main_page=product_info&products_id=4886

Font of your choice. I am using Cygnet Round and Cursivessca Kursive Kursive.

Lets Begin:
Open af60 from the kit.
Shift+d to duplicate.
Close the original.
Resize by 85%.
Make your canvas large enough to work with.
Center the frame in the canvas.
Using your magic wand select the inside of the frame.
Selections modify and expand by 2.
Layers new raster layer and drag under the frame.
Open afp1 and copy and paste into selection.
Selections select none.
Open your tube and resize and copy and paste as a new layer and move to the far right of the frame.
Add a slight drop shadow.
Open af11 and copy and paste as a new layer.
Move over to the far left so it is peeking out from behind the frame.
Duplicate and image flip horizontal.
Move the duplicate to the right side.
Merge these 2 layers together and add a drop shadow.
Open af12 and resize by 50% 2x.
Copy and paste as a new layer into the frame above your paper but under the frame.
Place along the bottom and duplicate a few times and just place them randomly.
Open af62 and resize by 60%.
Copy and paste as a new layer and move to the far left side. I made it look like it was coming out of the frame.
Open af96 and copy and paste as a new layer.
Resize and move over to the top left.
Add a drop shadow.
Open af100 and copy and paste as a new layer and move over to the far left.
Drag to the very bottom.
Duplicate and move this layer to the far right.
Open af95 and resize so they fit nicely in the frame near the top.
Open af84 and resize so it fits nicely along the bottom of the frame and goes up the left side.
If you want to add some text to the center like I did that is up to you.
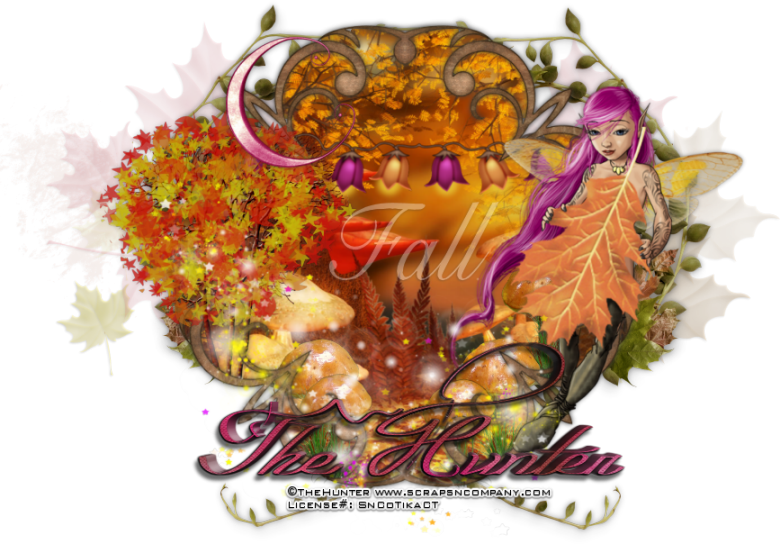
Add your name.
Add your copyright and licensing information.
Crop and save.


Rebel Fairy


Rebel Fairy
written 7/26/2014

Supplies Needed:


Mask of your choice. I am using mask #254 by Wescotlass Creations. You can get her masks at http://weescotslasscreations.blogspot.com/2009/04/masks.html

Font of your choice. I am using GE Ballantine Script Normal. You can get it at http://www.fontpalace.com/font-details/GE+Ballantine+Script+Normal/


Lets Begin:
Open the wire frame from the kit and shift+d to duplicate.
Close the original.
Rotate the frame to the right.
Resize by 80%.
Make your canvas large enough to give you room to work with.
Center the frame in the canvas.
You will notice that this is 2 frames on top of each other with one slightly skewed.
Using your selection tool set to point to point select the outside edges and make sure you are getting both frames in there so we can place the paper in both.
Layers new raster layer and drag under the frame.
Open paper 4 and edit copy.
Paste into selection.
Selections select none.
Add a nice drop shadow to the frame.
I used
0
0
9.00
black
Open your tube and resize her so she will fit nicely on the side of the frame.
Copy and paste as a new layer and move to the left side of the frame.
Add a nice drop shadow but you don't want it to be too dark as the wings are semi transparent.
I used
5
-3
60
medium grey color
Open paper 11 and copy and paste as a new layer and drag to the bottom.
Apply your mask. Delete the mask layer and merge the group.
Open clouds from the kit and resize if you need to so it will fit along the top of your frame.
Copy and paste as a new layer on top of your frame but under your tube.
You will notice that the top clouds have a straight line so to make this look ok line it up along the top of your frame.
Open elves2 element and resize if you need to but you want this along the bottom of the frame but on the outside.
Copy and paste as a new layer and drag under your clouds but on top of y our frame.
Place along the bottom.
Add a soft drop shadow.
I used
0
0
6.50
the dark green from the grass.
Open the fox from the kit and resize so it will fit nicely behind the grass on the right hand side.
The object is to give this some dimension.
Add the same drop shadow as above but change the color to black.
Open the flowes element and resize so it will fit nicely on the far right in front of your grass.
Add the same drop shadow as above.
Open grass element and copy and paste as a new layer just above the paper in your frame layer.
Resize so it will fit nicely in the frame.
Add the same drop shadow as above but change the color to the darker color in the grass.
Open lamp2 from the kit and resize so it will fit nicely on the far right of the frame.
I wanted mine a lil large; again creating dimension here.
I erased bits of the circle at the top so it looked like it was hooked onto the wire in the frame.
Open magicpotions from the kit and resize so it is smaller than the flowers.
Copy and paste as a new layer and move to the bottom left of the flowers.
Open mushroom from the kit and resize.
Flip horizontal.
Copy and paste as a new layer and move under your tube and move to the left.
Add a drop shadow using the darker color in the mushroom.
Open sparkles2 and resize so it will fit nicely right on top of your tag so the sparkles go from bottom left to top right.
Add your name.
Add your copyright and licensing information.
Crop and save.


Thursday, July 24, 2014

Back To School


Back To School
written 7/24/2014

Supplies Needed:


Font of choice. I am using A Song For Jennifer. You can get it at http://www.dafont.com/a-song-for-jennifer.font

Lets Begin:
Open a blank canvas that will give you plenty of room to work with and build your tag.
You can crop and resize when you are done.
Open blackboard element and resize by 75%.
Copy and paste as a new layer and move to the top right side of your canvas.
Open paint element and copy and paste as a new layer and move under your blackboard.
Add a drop shadow to the blackboard element.
Using your freehand selection tool set to point to point select just the black space on the blackboard.
Open the closeup of the tube and copy and paste as a new layer.
Position in the selected area.
Selections invert and hit delete.
Selections select none.
Change the properties of this layer to luminance legacy.
Lower the opacity of this layer to 40.
Open the full tube and copy and paste as a new layer.
Resize until she fits nicely to the left of the blackboard.
Add a drop shadow.
Open book 2 element.
Resize by 40%.
Copy and paste as a new layer and drag under your full tube.
Place at the bottom behind her right foot.
Duplicate and resize by 75%.
Duplicate again and resize by 75%.
Merge all 3 books together.
Open globe and resize so it will fit nicely on your top book.
Copy and paste as a new layer and add a drop shadow.
Open glasses and resize so they fit nicely in front of your books.
Copy and paste as a new layer and add a drop shadow.
Open the ipod and resize.
Copy and paste as a new layer.
Drag under the glasses layer.
Image rotate to the right by 22 degrees.
Sharpen.
Add a drop shadow.
Open black pencil and resize so it will fit along the bottom of your frame.
Copy and paste as a new layer and drag down under all the other elements and your full tube.
Place along bottom of frame.
Add a drop shadow.
Open stars and copy and paste as a new layer and place on top across the blackboard and other elements and tube.
Add your name so it sits on top of the pencil.
Add your copyright and licensing information.
Crop and resize if you need to.
Save as png.


Wednesday, July 23, 2014

Create Your Happiness


Create Your Happiness
written 7/23/2014

Supplies Needed:


Scrap Kit by Disturbed Scraps. You can get this kit at http://scrapsncompany.com/index.php?main_page=product_info&products_id=4689

Mask of your choice. I am using Doodle Mask 3 by Cat. You can get this mask at http://insatiabledreams.net under resources.

Font of your choice. I am using Playful Print.

Lets Begin:

Open element 86. Shift + D to duplicate.
Close the original.
Resize by 85% 2x.
Center in your canvas.
Make your canvas large enough to give you room to work with.
Open paper 3 and copy and paste as a new layer.
Drag under the frame.
Apply the mask of your choice.
Delete the mask layer and merge the group.
Resize if you need to.
Center your frame in the mask.
Make your frame layer active and using your magic wand select the inside of the frame.
Go to selections modify and expand by 10.
Layers new raster layer and drag under the frame.
Open paper 7 and edit copy paste into selection.
Selections select none.
Open your tube and resize.
Copy and paste as a new layer and move to the far left of the frame.
Add a drop shadow.
Open element 26 and resize by 90%.
Copy and paste as a new layer and drag under your tube.
Move down so your tube is sitting on it.
Add a drop shadow.
Open element 70.
Resize and flip horizontal.
Copy and paste as a new layer to the right side and so it looks to be coming out of the frame but sitting on the grass.
Add a drop shadow.
Open element 71 and resize and then flip horizontal.
Copy and paste as a new layer.
Drag under the bench and position to the right so it looks to be hanging over the bench.
Add a drop shadow.
Open element 91 and resize by 75%.
Copy and paste as a new layer and place so it appears to be coming behind the bench but on top of the frame so you can read it.
Add a slight drop shadow to help it stand out.
Open element 44 and resize by 50% 2x.
Copy and paste as a new layer and place in front of the right legs of the bench.
Duplicate and flip horizontal.
Move to the left of your tube.
Add a drop shadow to both.
Add your name right in the center of the frame.
Add your copyright and licensing information.
Crop.
If you are going to create and add the animation follow the steps below.
Layers new raster layer and drag to the bottom.
Flood fill with white.
Hide this white layer and merge visible all your other layers.
Unhide the white layer.
Open element 65 and resize by 50% 2x.
Copy and paste into animation shop as a new animation.
Go to effects insert image effect using the following settings:

Rotate the animation 22 degrees to the right.
Back to your tag in psp and edit copy merged and bring the entire tag into animation shop and duplicate the frames to match the frames in the animation you just created.
Mine has 21 frames.
Select all frames in your animation and your tag.
Grab frame 1 of your animation and drag it onto frame 1 of your tag.
Place so it is sitting on the bench.
Change the frame properties of your tag to 5.
Optimize and save.


Drinkin' Rum


Drinkin' Rum
written 7/23/2014

Supplies Needed:

Scrap Kit by Made By Justine. You can get this kit at http://scrapsncompany.com/index.php?main_page=product_info&products_id=4833

Template is by me. You can get this template at http://www.4shared.com/photo/DAnK5sIKce/DrinkinRumTemplate_2014tbt.html

Brushes of your choice. The brushes I got are from FxSanyi and you can get them at http://www.deviantart.com/art/Pirate-Skull-Tattoo-Brushes-105310424

Font of your choice. I am using Pirouette LT Std.

Lets Begin:
Open the tag template and shift+D to duplicate so you can use the template again later.
Close the original.
Remove the creators info layer.
Make your canvas large enough to work with.
You can crop and resize when you are done.
Make your black rectangle layer active and go to selections select all float and defloat.
Open paper 11 and copy and paste as a new layer.
Selections invert and hit delete.
Selections invert again.
Layers new raster layer.
Now apply the brushes of your choice using black as the color.
When you are done selections select none.
Delete the bottom black layer.
Merge your brush and bottom paper layer together.
Add a drop shadow.
Make your grey rectangle layer active and selections select all float and defloat.
Open paper 12 and paste as a new layer.
Selections invert and hit delete.
Selections select none.
Delete the grey rectangle layer.
Add a drop shadow to the new paper layer.
Make your grey circles layer active and selection select all float and defloat.
Open paper 5 and copy and paste as a new layer.
Selections select none.
Delete the original grey circles layer.
Add a drop shadow to the new circles layer.
Make your Rum layer active and add noise at 100% uniform and monochrome.
Add a drop shadow.
Repeat the above steps to your Pirate layer.
Make the grey word art layer active and go to selections select all float and defloat.
Layers new raster layer.
Open paper 11 and edit copy and paste into selection.
Selections modify and expand by 3.
Layers new raster layer and drag under the paper layer.
Flood fill with black.
Add noise like you did above.
Selections select none.
Delete the original grey word art layer.
Add a drop shadow to both the black noise layer and the paper layer.
Open your full body tube and resize by 75% 2x.
Copy and paste as a new layer and move to the far right side of the tag.
Add a drop shadow.
Open treasurechest01 and resize by 50%.
Copy and paste as a new layer and place on the far left of the center rectangle layer.
Add a drop shadow.
Open skullcandle01 and resize by 50% and then again by 75% and copy and paste as a new layer and move to the far left of the treasure chest.
Add a drop shadow.
Open map01 and resize by 50% 2x and copy and paste as a new layer and move to the bottom right of the treasure chest.
Add a drop shadow.
Open palmtree01. Resize by 50%. Image flip horizontal.
Place behind your tube and the word art.
Erase any bits that show up in between your tubes legs.
Add a drop shadow.
Open flag01 and resize by 50%.
Copy and paste as a new layer behind your tube but coming out the left side.
Add a drop shadow.
Open bird01 and resize by 50%.
Copy and paste as a new layer and move to the top in front of the palm tree.
Add a drop shadow.
Add your name.
Add your copyright and licensing information.
Crop and resize if you want.
Save!


Sunday, July 20, 2014

Summer Bride


Summer Bride
written 7/20/2014

Supplies Needed:


Scrap Kit is by Bibi's Collection and you can get it at http://scrapsncompany.com/index.php?main_page=product_info&products_id=4768

Font of your choice. I am using Kavya Confident. You can get it at http://www.1001freefonts.com/kavya_confident.font

Mask of your choice. I am using one by Simply Sunsational. You can get this mask at http://simplysunsational.net/Masks8.html I am using the second mask on that page.

Lets Begin:
Open paper 6 and shift+D to duplicate.
Close the original.
Apply the mask of your choice.
If you are using my mask then once it is applied and you have deleted the mask layer and merged the group; use your magic wand and select the inside of the frame right in the center.
Selections modify and expand by 2.
Layers new raster layer and drag under the frame.
Open paper 8.
Copy and paste into selection.
Selections select none.
Add a slight drop shadow to the frame layer.
Merge these 2 layers together.
Image rotate to the left by 90 degrees.
Open your tube and resize her so she will fit nicely next to the frame.
Copy and paste as a new layer and add a drop shadow.
Open element 8 and resize by 70%.
Copy and paste as a new layer and place on the far right side.
Add a drop shadow.
Open element 12 and resize by 60%.
Rotate to the left.
Copy and paste as a new layer and drag under your tube but above the glass and position farther to the right than the left.
Add a drop shadow.
Open element 24 and resize by 40%.
Copy and paste as a new layer and place on the top right of the frame.
Add a drop shadow.
Open element 43 and resize by 50%.
Copy and paste as a new layer and position on the lower right corner in front of the glass.
Add a drop shadow.
Open element 50 and resize by 50% and then again by 85%.
Copy and paste as a new layer and place in the framed area at the top.
Add a drop shadow.
Add your name.
Add your copyright information.
Crop and save.


Sunday, July 6, 2014

In The Club


In The Club
written 7/6/2014

Supplies Needed:

Tube of your choice. I am using Lolita Rocker by Di_Halim. You can get this tube at http://scrapsncompany.com/index.php?main_page=product_info&cPath=161&products_id=4560

Scrap kit is a matching kit by Bibi's Collection. You can get the kit at the same link as above.

Brushes of your choice. Preferably music ones to go along with the tag. You can find some great brushes at http://deviantart.com

Font of your choice. I am using Club Fluffy

Plugins:
Eye Candy 4000 Gradient Glow

Lets Begin:

Open element 45 and shift +D to duplicate.
Close the original.
This is going to be the base of your tag so resize to the size you want.
Using your magic wand select the inside of the star.
Selections modify and expand by 15.
Layers new raster layer and drag under the frame.
Open paper 2 and copy and paste into selection.
Selections select none.
Layers new raster layer and drag to the bottom.
Apply some brushes of your choice.
Open your tube and resize by 80%.
Copy and paste as a new layer and move to the far right side of the tag.
Add a drop shadow to your tube and the frame.
Open element 10 and copy and paste as a new layer and resize by 75%.
Move to the far left side of the frame area on top.
Add a drop shadow and a nice white gradient glow of your choice.
Open element 8 and resize by 75%.
Copy and paste as a new layer and center at the bottom of the star and drag behind your tube.
Open element 44 and resize so it fits nicely looking like its hanging from the top of the star.
Open element 22 and resize so it will fit nicely at the top of your star.
Copy and paste as a new layer and add a drop shadow.
Add your name.
Add your copyright and licensing information.
Crop and save.