Oh L'Amour
written
4/28/2015
Supplies
Needed:
Tube by
Soul Designer. You can get it at
http://scrapsncompany.com/index.php?main_page=product_info&cPath=113_434&products_id=9628
Scrap Kit
by Bibi's Collection. You can get it
http://scrapsncompany.com/index.php?main_page=product_info&products_id=9629
Mask of
your choice. I am using one by Rocked By Rachel. You can get it at
https://rockedbyrachel.wordpress.com/2015/04/13/new-masks-3/
Font of
your choice. I am using Thank you Drf. You can get it at
http://www.fontspace.com/poemhaiku/thank-you-drf
Plugins:
NONE
Let's
Begin:
Open
element 44 and shift +D to duplicate.
Close the
original.
Re-size by
85%.
Make your
canvas large enough to work with.
Open paper
2 and copy and paste as a new layer.
Drag under
the frame.
Apply your
mask.
Delete the
mask layer and merge the group.
Using your
magic wand select the inside of the frame.
Take note
there are several little places within the frame you need to select
also.
Selections
modify and expand by 1.
Layers new
raster layer and drag under the frame.
Open paper
1 and edit copy and paste into selection.
Leave
selected.
Open your
tube and copy and paste as a new layer and position within the framed
area.
Selections
modify and invert and erase any bits you do not want hanging out of
the frame.
Once you
are done selections select none.
Add a drop
shadow to your tube and to the frame.
Open
element 94 and copy and paste as a new layer and drag down to just
above your mask layer.
Move to
the far left side so it is behind the frame but peeking out around.
Duplicate
and image flip horizontal.
Move this
duplicate to the right side.
Merge
together and add a drop shadow.
Open
element 80 and re-size by 75% 2x.
Copy and
paste as a new layer and drag down to just above the other leaves.
Place on
the left hand side near the bottom in the gap between the pink
leaves.
Add a drop
shadow.
Duplicate
and image flip vertical.
Move this
one to the top left side.
Merge
together.
Duplicate
and image flip horizontal.
Move this
duplicate to the right side in the same places.
Open
element 70.
Re-size by
75%.
Copy and
paste as a new layer and drag to just above your frame.
Place in
one of the gap areas.
Duplicate
a few times and move them randomly around the frame.
Merge
together and add a drop shadow.
Open
element 49 and re-size by 50% and then again by 75%.
Copy and
paste as a new layer.
Place
around the frame.
Duplicate
a few times and randomly place them.
Merge
together.
Add a drop
shadow.
Open
element 43 and re-size by 50% and then again by 60%.
Copy and
paste as a new layer and repeat all of the above steps.
Open
element 40 and re-size by 50% 2x.
Copy and
paste as a new layer and place around the frame but under the frame
so they are peeking out from behind.
Merge
together and add a drop shadow.
Open
element 12 and re-size by 50% 2x and copy and paste as a new layer.
Place at
the top on both left and right add a drop shadow to both and merge
together.
Open
element 11 and re-size by 50%.
Copy and
paste as a new layer and place on the left side.
Open
element 83 and re-size by 50% and copy and paste as a new layer.
Move to
the right side.
Add a drop
shadow.
Open
element 87 and re-size by 75%.
Copy and
paste as a new layer at the top and drag to the bottom of the tag.
Add a
slight drop shadow.
Open
element 67 and copy and paste as a new layer.
Place in
the center of the bow. Duplicate and move the duplicate to the other
bow.
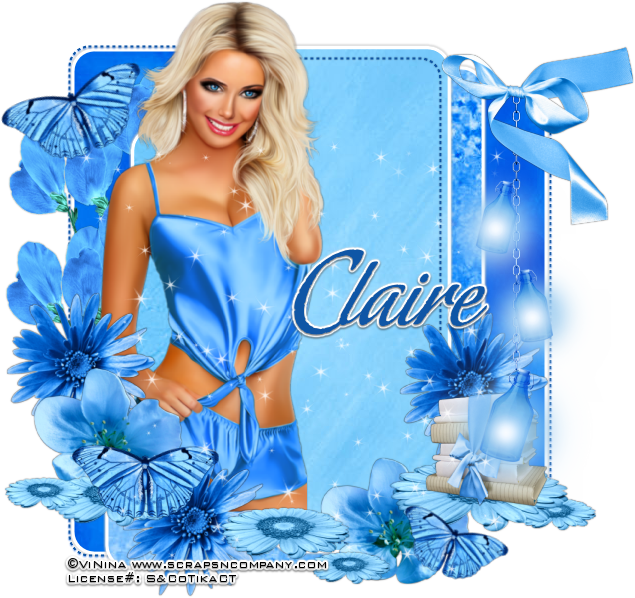
Add your
name along the bottom.
Add your
copyright and licensing information.
Crop and
save.