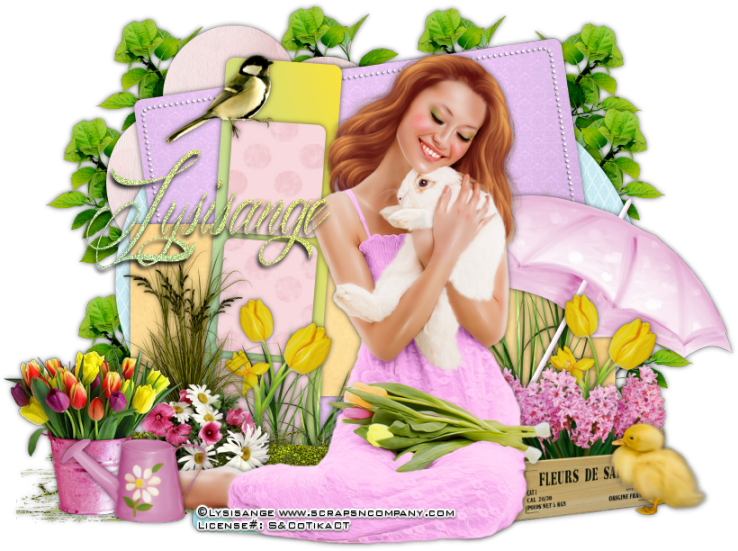
Sunday, February 28, 2016

Love Bunny


Love Bunny
written 2/28/2016

This tutorial is meant purely as a guide. Feel free to make your tag unique by using your own choice of tube and/or scrap kit. If you want your tag to look just like mine then use the same supplies I have used. Any resemblance to any other tag or tutorial is purely coincidental.
This tutorial assumes you have knowledge of paint shop pro.

Supplies Used:


Matching scrap kit by Chachaz Creationz. You can purchase it at http://scrapsncompany.com/index.php?main_page=product_info&cPath=112_117&products_id=17756

Tag template by Brutal Designs. You can download it at http://thebrutaldesigns.blogspot.ca/2015/08/new-spring-templates.html

Font of your choice. I am using Mardian. You can download it at http://www.dafont.com/mardian-demo.font

Plugins:
NONE

Let's Begin:
Open your tag template and shift+D to duplicate.
Close the original.
Delete the following layers:
copyright, Beauty, Spring, flower bottom, flower top, and background.
Make your canvas large enough to work with.
Lets start off by getting all of the layers of the template filled with papers from the kit.
Once you do this add a drop shadow to each layer.
Open your tube and copy and paste as a new layer.
Re-size as needed so it fits within the size of the tag template and how large you want your tag to be when complete.
Add a drop shadow to your tube once she is in place.
Now lets dress up the tag with elements from the kit.
I will list the elements I used and placement is up to you.
You can also choose to use other elements.
If you want your tag to look just like mine use my tag for reference on where the elements should be placed.
Elements I used:
9
21
27
32
33
37
41
48
52
56
Add your name.
Add your copyright and licensing information.
Crop and save.


Hello Spring


Hello Spring
written 2/28/2016

This tutorial is meant purely as a guide. Feel free to make your tag unique by using your own choice of tube and scrap kit. If you want your tag to look just like mine then use the same supplies I have used. Any resemblance to any other tutorial or tag is purely coincidental.
This tutorial assumes you have a basic knowledge of paint shop pro.

Supplies Used:

Tube by Vadis. You can purchase her at http://picsfordesign.com

Scrap kit by Purple Dreams Scraps which can also be purchased at http://picsfordesign.com

Tag template by Simple Expressions. I am using template_01. You can download it at http://simpleexpressions58.blogspot.com/2016/01/setemplate01.html

Mask of your choice. I am using mask #451 by Vix. You can download her amazing masks at http://www.freewebs.com/vixpsp/

Font of your choice. I am using Brigent Script. You can purchase it at https://thehungryjpeg.com/product/7170-brigent-script/

Plugins:
Penta Dot and Cross

Let's begin:
Open the tag template and shift+D to duplicate.
Close the original.
Delete the following layers:
Raster 1, frame, and white background.
Make your canvas large enough to work with.
Open paper 7 and copy and paste as a new layer.
Drag to the bottom.
Apply your mask.
Delete the mask layer and merge the group.
I moved my mask to sit behind the circle in the template but this is completely up to you and depending on what mask you use how it looks.
Now lets fill each of the template layers using papers from the kit.
Once you are done delete all the original template layers.
Add a drop shadow to each layer.
I chose to add the face of my tube to each of the circle layers and change the layer property to luminance legacy.
I also applied Penta Dot and Cross using the default settings.
I also added noise to the scalloped layer but this is completely up to you also.
Now copy and paste your tube as a new layer.
Re-size as needed.
Position within the center of the tag to the right side.
Add a drop shadow.
Now lets dress this beauty up with some of the great elements from the kit.
I will list the elements I used and you can either use the same elements or choose others.. its completely up to you.
Use my tag for reference on placement of the elements if you are wanting your tag to look just like mine.
Elements used:
1
3
8
14
15
21
23
27
36
Add your name.
Add your copyright and licensing information.
Crop and save.

Saturday, February 27, 2016

Mermaids Have More Fun


Mermaids Have More Fun
written 2/27/2016

This tutorial is meant purely as a guide. Feel free to make your tag unique by using your own choice of tube and scrap kit. If you want your tag to look just like mine then use the same supplies that I have used. Any resemblance to any other tag or tutorial is purely coincidental.

Supplies Used:

Matching Scrap Kit by Blissful Designs. You can purchase it at http://scrapsncompany.com/index.php?main_page=product_info&products_id=17379

Tag Template by Dangerously Delicious Designz. You can download it at http://dangerouslydeliciousdesignz.blogspot.ca/2015/06/template167mermaid.html

Animation By Love Shack. You can download it at http://loveysshack.blogspot.com.ar/2011/07/animations-for-today_19.html

Font of your choice. I am using Violet Bee. You can purchase it at https://thehungryjpeg.com/product/381-violet-bee-font/

Plugins:
NONE

Let's Begin:
Open the tag template and shift+D to duplicate.
Close the original.
Remove the following layers from the template:
Raster1, font info, mermaid blue, mermaid white, mermaid d/s, be your own kind of white, be your own kind d/s and bg.
Make your canvas large enough to work with.
Starting at the bottom and working up fill each of the layers with papers from the kit.
On the bottom oval layer add another layer underneath it and make it a little large and fill with white and apply noise.
On the waves layer add the same noise as you did to the white layer.
On the inner blue circle and outer blue circle apply the same noise.
Once done add a drop shadow to all layers.
Open your tube and copy and paste as a new layer at the top and re-size if necessary.
Position in the center of the tag template.
Add a drop shadow.
Open element 71 and re-size by 80%.
Copy and paste as a new layer and drag under your tube.
Move to the bottom and set so your mermaid is sitting in the clamshell.
Add a drop shadow.
Open element 67 and copy and paste as a new layer.
Drag under the clamshell.
Move to the far left so it is peeking out from behind the bottom of the clamshell.
Add a drop shadow.
Duplicate and image flip horizontal.
Move this one to the top right of the clamshell.
Open element 59 and re-size by 50% and then again by 60%.
Copy and paste as a new layer drag under the clamshell.
Move to the right side and make it peek out from the side of the shell.
Open element 48 and copy and paste as a new layer.
Re-size as you wish.
I duplicated mine a few times and re-sized each of them and placed them randomly around the tag.
Open element 24 and copy and paste as a new layer.
Drag down to just above the squarish layer.
Move to the far left side so it is peeking out behind the wheel layers.
Add a drop shadow.
Duplicate and image flip horizontal.
Move to the far right.
Add your name.
Add your copyright and licensing information.
Crop.
Now lets get ready to add the animation.
Merge together all layers from the top down to your tube (include your tube in this first set of merged layers.
Hide this new layer.
Merge together the rest of the layers.
Layers new raster layer and drag to the bottom.
Flood fill with white.
Copy merged the white layer and the layer with the clamshell on it.
Open animation shop and right click and paste as a new animation.
Open the animation you are going to use.
I am using the bubble fountain.
Take note of the amount of frames in the animation. For me its 18.
Duplicate your tag layer to match the frames.
Select all frames in both your animation and your tag.
Grab frame 1 of the animation and drag it onto frame 1 of your tag.
Place where you want.
Now back to psp and copy the layer that has your tube on it.
Back to animation shop and paste this as a new animation.
Repeat the same steps as above.
Duplicate and drag onto the tag.
View your animated tag.
Optimize and save.


Friday, February 26, 2016

Swag In The City


Swag In The City
written 2/26/2016

This tutorial is meant purely as a guide. Feel free to make your tag unique by using your own choice of tube and scrap kit. If you want your tag to look just like mine then use the same supplies I have used. Any resemblance to any other tag or tutorial is purely coincidental.

Supplies Used:


Matching scrap kit by Mariel Designs and you can purchase it at http://scrapsncompany.com/index.php?main_page=product_info&products_id=17726

Mask of your choice. I am using mask #424 by Vix. You can get her awesome masks at http://www.freewebs.com/vixpsp/

Font of your choice. I am using Bromello. You can download it at http://www.fontspace.com/alit-design/bromello

Plugins:
Xero Porcelain

Let's Begin:
Open paper 8 and shift+D to duplicate.
Close the original.
Promote background layer to a raster layer.
Make your canvas large enough to give you plenty of room to work with.
Apply your mask to the paper layer .
Delete the mask layer and merge the group.
On your mask layer selection select all float and defloat.
Open your tube and copy and paste as a new layer.
Position her face within the selected area.
Selections invert and hit delete.
Selections select none.
Adjust hue and saturization/colorize and set both values to 0.
Apply the Xero Porcelain filter using the default settings.
Lower the opacity of this tube layer to 60.
Add a drop shadow to both the tube and the mask.
Merge these 2 layers together.
Open element 2 and copy and paste as a new layer.
Drag under the mask layer.
Place so the buildings peek out at the top and sides.
Add a drop shadow.
Open your tube again and copy and paste as a new layer at the top.
Re-size so she is just bigger than the mask layer.
Move to the far right side.
Add a drop shadow.
Open element 34-1 and copy and paste as a new layer.
Re-size by 60%.
Move to the lower left corner and add a drop shadow.
Open element 7-2 and copy and paste as a new layer.
Re-size by 60%.
Drag under the truck layer.
Move to the center part of the truck.
Add a drop shadow.
Open element 13-2 and copy and paste as a new layer.
Re-size by 50% and then again by 75%.
Move to the far left of the sign and add a drop shadow.
Open element 14-2 and copy and paste as a new layer.
Re-size by 50% and move to the right side of the truck behind it.
Add a drop shadow.
Open element 44-1 and copy and paste as a new layer.
Re-size by 75% and move to the bottom of the tag.
Add a drop shadow.
Open element 51 and copy and paste as a new layer.
Re-size by 50%.
Drag under your tube.
Move to the far right side of your tube behind and peeking out.
Add a drop shadow.
Open element 67 and copy and paste as a new layer layer.
Re-size by 50% and drag to the bottom.
Place behind your tube's head.
Duplicate and move down and to the right so it peeks out behind your tube and the fire hydrant.
Duplicate again and move to the far left so it peeks out behind the sign and truck.
Add a drop shadow to each of these layers and then merge them together.
Open element 78 and copy and paste as a new layer.
Drag to the bottom.
Move to the bottom of the tag so it appears the tube is standing on it along with the fire hydrant.
Open element 68 and copy and paste as a new layer.
Image flip horizontal.
Place at the top across the tube and the truck.
Add your name.
Add your copyright and licensing information.
Crop and save.

Wednesday, February 24, 2016

My Favorite Color Is Ireland


Favorite Color Is Ireland
written 2/24/2016

This tutorial is meant purely as a guide. Feel free to make your tag unique by using your own choice of tube and scrap kit. If you want your tag to look just like mine then use the same supplies I have used. Any resemblance to any other tutorial or tag is purely coincidental.

Supplies Used:


Scrap Kit by Lil Mz Brainstorm. You can purchase it at http://scrapsncompany.com/index.php?main_page=product_info&products_id=17752

Font of your choice. I am using Catharsis Macchiato and Celtic Garamond and Celtic Hand.

Plugins:
NONE

Let's begin:
Open element 2 from the kit and shift+D to duplicate.
Close the original.
Re-size if you choose.
Make your canvas large enough to work with.
Using your magic wand select the inside of the frame.
Selections modify expand by 5.
Layers new raster layer and drag under the frame.
Open paper 19 and copy and paste into selection.
Selections select none.
Add a drop shadow to the frame.
Open your tube and re-size so she is just larger than the frame.
Copy and paste as a new layer and move to the far right hand side.
Add a drop shadow.
Open element 18 and re-size.
Copy and paste as a new layer.
Place in the top right hand corner of the frame and drag under your tube.
Add a drop shadow.
Duplicate and image flip horizontal.
Move this duplicate to the top left hand corner.
Open element 34 and copy and paste as a new layer.
Drag down under the frame.
Place at the bottom.
Erase any bits hanging outside of the frame on both sides.
Add a drop shadow.
Open element 89 and re-size.
Copy and paste as a new layer and place at the top center of the frame.
Add a drop shadow.
Open element 93 and re-size.
Image flip horizontal.
Copy and paste as a new layer and place in the lower left corner.
Add a drop shadow.
Open element 90 and re-size.
Copy and paste as a new layer.
Drag under the leprechaun.
Add a drop shadow.
Open element 87 and re-size.
Image free rotate to the right 20 degrees.
Adjust sharpen.
Copy and paste as a new layer and place in the top left area of the frame.
Add a drop shadow.
Add some text if you choose to the inside of the frame at the top.
Add your name.
Add your copyright and licensing information.
Crop and save.


Monday, February 22, 2016

Angel Of Music


Angel of Music
written 2/22/2016

This tutorial is meant purely as a guide. Feel free to make your tag unique by using your own choice of tube and scrap kit. If you ant your tag to look just like mine then use the same supplies that I have used. Any resemblance to any other tutorial or tag is purely coincidental.

Supplies Used:


Scrap Kit by Blissful Designs. You can purchase it at http://scrapsncompany.com/index.php?main_page=product_info&products_id=17751

Mask of your choice. I am using mask #248 by Vix. You can get her amazing masks at http://www.freewebs.com/vixpsp/

Font of your choice. I am using Billy Argel Font.

Plugins:
Penta Color Dot

Let's Begin:
Open BD-F-4 from the kit.
Shift+D to duplicate.
Close the original.
Re-size by 85%.
Make your canvas large enough to work with.
Duplicate the frame layer again.
Re-size this duplicate by 60%.
Image free rotate to the left 26 degrees.
Adjust sharpen.
Move this copy to the top left corner.
Make the large frame layer active again.
Duplicate again.
Re-size this duplicate by 50%.
Image re-size by 50%.
Free rotate to the right 19 degrees.
Adjust sharpen.
Move over to the far right.
Make your large frame layer active again and using your magic wand select the inside of the frame.
Selections modify expand by 3.
Open BD-P-7 from the kit and copy and paste as a new layer.
Drag to the bottom.
Selections invert and hit delete.
Selections select none.
Make the next frame layer active and repeat the above steps but use BD-P-4.
Make the next frame layer active and repeat the above steps but use BD-P-2.
Open BD-P-1 from the kit and copy and paste as a new layer and drag to the bottom.
Apply the mask of your choice.
Delete mask layer and merge the group.
I duplicated my mask layer and image flip vertical and moved to the bottom of the tag. This is not necessary unless you use the same mask as I have.
Add a drop shadow to each of the frame layers except the top one.
Make that top frame layer active and using your magic wand select the inside.
Selections modify expand by 1.
Open your tube and copy and paste as a new layer and position her face within the selected framed area. If your tube has a close up use this.
Selections invert and hit delete.
Selections select none.
Change the properties of this layer to luminance legacy.
Apply the Penta Color Dot plugin to this tube layer using the following settings:

Now add a drop shadow to this frame.
Open your full body tube and copy and paste as a new layer.
Position to the right of the face in the top frame.
Add a drop shadow.
Now lets dress this up with some of the awesome elements from this kit.
I will list the elements I used so you can use the same ones if you want.
Use my tag for reference on the placement.
Elements I used:
BD-E-5
BD-E-6
BD-E-7
BD-E-15
BD-E-16
BD-E-17
BD-E-19
BD-E-48
BD-E-58
BD-E-61
BD-E-75
Add your name.
Add your copyright and licensing information.
Crop and save.


Irish In A Few Beers


Irish In A Few Beers
written 2/22/2016

This tutorial is meant purely as a guide. Feel free to make your tag unique by using your own choice of Tube and Scrap Kit. If you want your tag to look exactly like mine then use the same supplies that I have used. Any resemblance to any other tutorial or tag is purely coincidental.

Supplies Used:

Tube by Amber Kelso. I got this tag when the artist was at CILM. I am not sure where to get her tubes now sorry.

Scrap kit is by Purple Dreams Scraps. It is called Irish and you can purchase it at http://picsfordesign.com/en/catalogue/id_116578_irish.pix

Animation by Love Shack Animations and PSP Tutorials. You can get it at http://loveysshack.blogspot.com.ar/2012/01/st-pattys-day-animations.html

Font of your choice. I am using Sistah Ysse you can get it at http://www.fontspace.com/vvb-designs/sistah-ysse

Plugins:
NONE

Let's Begin:
Open element 18 and shift+D to duplicate.
Close the original.
Image free rotate and rotate in either direction 90 degrees.
Make your canvas large enough to work with.
Using your magic wand select the inside of the frame.
Selections modify and expand by 3.
Open paper 5 and copy and paste as a new layer.
Drag under the frame.
Selections invert and hit delete.
Selections select none.
Add a drop shadow of
4
-2
85
5.00
black
to the frame.
Open your tube and copy and paste as a new layer at the top.
Position at the bottom center of the frame.
Add the same drop shadow to the tube.
Now lets dress it up with some of the fun elements from this awesome kit.
Open element 4.
Image rotate to the right.
Copy and paste as a new layer and drag to just above your frame.
Move to the far right side and make it peeking out from behind your tube.
Duplicate and image flip horizontal.
Move this duplicate to the far left side.
Merge these 2 layers together and add a drop shadow.
Open element 21 and copy and paste as a new layer.
Drag behind your tube.
Move to the far left side bottom.
Re-size as needed.
Add a drop shadow.
Open element 5 and copy and paste as a new layer.
Drag behind your tube.
Re-size as needed.
Place to the far left bottom in front of the cauldron.
Add a drop shadow.
Duplicate and image rotate to the right 90 degrees.
Move this layer above your tube and place in front of the first bottle and your tube.
Duplicate the standing bottle and move to the far right of your tube.
Add some wordart text if you choose.
Add your name.
Add your licensing and copyright information.
Crop.
Merge all layers visible.
Add a new raster layer and drag to the bottom.
Flood Fill with white.
Copy Copy Merged
Open animation shop and right click and paste as a new animation.
Open your animation.
Take note of the number of frames in your animation and duplicate your tag to have the same amount of frames.
Be sure to remove the first frame of the animation that is black.
Re-size the animation if you need to to fit over the top of the pot of gold in your tag.
Select all frames in both the animation and in the tag.
Grab frame 1 of the animation and drag it onto frame 1 of the tag .. Position where you want and drop.
View your animated tag.
If you are happy save. If not undo and repeat until you get it just right.
Save your tag once you are happy.


Your Lucky Charm


Your Lucky Charm
written 2/8/16

This tutorial is meant purely as a guide. Feel free to make your tag unique by using your own choice of tube and scrap kit. If you would like your tag to look just like mine then use the same supplies that I have used. Any resemblance to another tag or tutorial is purely coincidental.

Supplies Used:

Tube by Kajenna. I purchased this tube at the Inzpired Creationz Store but I am not sure where to purchase it now.

Scrap kit is a freebie by Melissaz Creationz. You can download it at http://melissazcreationz.blogspot.ca/2015/03/new-st-pattys-kit-st-pattys-party.html

Tag Template by Cakes Creations. You can download it at http://cakescreations.blogspot.ca/2015/02/tag-template-lucky.html?zx=68a952236f881a8

Font of your choice. I am using Accarita. This is a PTU font which you can purchase at https://fontbundles.net/

Plugins:
NONE

Let's Begin:
Open the tag template and shift+D to duplicate.
Close the original.
Delete the info layer.
Make your canvas large enough to give you room to work with.
Start at the bottom and fill each layer of the template using the different papers from the kit except the outline layers.
On the outline layers add noise.
Add a drop shadow to each layer.
Open your tube and copy and paste as a new layer.
Re-size if needed.
Position so she is in the center rectangle.
Add a drop shadow.
Open element 21 and copy and paste as a new layer.
Drag under your tube.
Move to the far left side.
Open element 13 copy and paste as a new layer.
Re-size as needed.
Move to the far left hand side.
Add a drop shadow.
Open element 8 and copy and paste as a new layer.
Drag down under the word art.
Place to the far left.
Duplicate and move this copy to the far right.
Merge together and add a drop shadow.
Open element 5 and copy and paste as a new layer.
Drag under the shamrocks you just placed.
Add a drop shadow.
Add your name.
Add your copyright and licensing information.
Crop and save.

Shot Through The Heart


Shot Through The Heart
written 1/28/2016

This tutorial is meant purely as a guide. Feel free to make your tag unique by using your own choice of tube and scrap kit. If you want your tag to look just like mine then use the same supplies I have used.

Supplies Used:

Tube by Vadis. It is called “Dressing Fairies” you can get it at http://picsfordesign.com

Scrap kit is a freebie by Designz by Anorie. It is called I love you. You can get it at http://anorie.blogspot.ca/2015/01/i-love-you-kit-freebie.html

Font of your choice. I am using Beluccia Pro. This is a PTU font. You can purchase it at https://www.myfonts.com/fonts/correspondence-ink/belluccia/

Cloud tube of your choice. I am using one by Rainbow Coffi. You can get it at http://www.psp-playground.com/

Plugins:
NONE

Let's Begin:
Open frame04 and shift+D to duplicate.
Close the original.
Re-size if you wish.
Make your canvas large enough to work with.
Using your magic wand and select the inside of the frame.
Selections modify and expand by 4.
Open paper 05 and copy and paste as a new layer and drag under the frame.
Selections invert and hit delete.
Selections select none.
Add a drop shadow to the frame.
Open element 32 and copy and paste as a new layer.
Drag to the bottom.
Move to the far left.
Duplicate and image flip horizontal.
Move the duplicate to the far right.
Merge these 2 layers together.
Add a drop shadow.
Open your tube and copy and paste as a new layer.
Position in the center of the frame.
Add a drop shadow.
Open the cloud tube and using your lasso tool select the cloud you want to use.
Copy and paste as a new layer and drag behind your tube.
Move to the bottom of the frame and the far left side.
Duplicate and move the duplicate to the far right side.
Open element 07 and copy and paste as a new layer.
Position where you want.
I placed mine so it looked to be hanging from the bow.
Open element 01 and copy and paste as a new layer.
Drag down to just above your frame.
Center behind your tube.
Open element 11 and copy and paste as a new layer.
Re-size by 50% 2x.
Move to the bottom far left.
Duplicate several times and place all along the bottom.
Repeat the above steps with element 12.
Merge them all together and add a drop shadow.
Add your name.
Add your copyright and licensing information.
Crop and save.

Wednesday, February 17, 2016

Spring Beauty


Spring Beauty
written 2/17/2016

This tutorial is meant purely as a guide. Feel free to make your tag unique by using your own choice of tube and scrap kit. If you would like your tag to look just like mine then use the same supplies that I have used. Any resemblance to any other tutorial or tag is purely coincidental.

Supplies Used:


Scrap Kit by Design By Joan. You can purchase it at http://scrapsncompany.com/index.php?main_page=product_info&products_id=17358

Mask of your choice. I am using mask # 176 by Vix. You can get her awesome masks at http://www.freewebs.com/vixpsp/ they can be found under Goodies.

Font of your choice. I am using Hickory Jack. You can get it at http://www.fontspace.com/brittney-murphy-design/hickory-jack

Drop shadow used:
0
0
75
6.50
Black

Plugins:
NONE

Let's Begin:
Open paper 1 and shift+D to duplicate.
Close the original.
Promote the background layer to a raster layer.
Re-size if you wish.
Apply your mask.
Delete the mask layer and merge the group.
Open your tube and copy and paste as a new layer.
Re-size as needed.
Place at the bottom in the center of the mask layer.
Add a drop shadow.
Open element 10.
Re-size by 50%.
Copy and paste as a new layer and drag behind your tube.
Move to the far right side so it is peeking out from behind her back.
Add a drop shadow.
Open element 13.
Copy and paste as a new layer.
Re-size by 50%.
Drag under your tube.
Move to the left side above her skirt.
Add a drop shadow.
Open element 14.
Re-size by 50%.
Copy and paste as a new layer and drag down to just above the 2 hearts.
Move to the far right side in front of the hearts.
Add a drop shadow.
Open element 16.
Re-size by 50%.
Copy and paste as a new layer at the top.
Move to the bottom left in front of her foot.
Add a drop shadow.
Open element 17 and shift+D to duplicate.
Close the original.
Re-size by 60%.
Using your magic wand select the inside of the frame.
Selections modify and expand by 3.
Open paper 4 and copy and paste as a new layer.
Drag under the frame.
Selections invert and hit delete.
Selections invert again.
Open your tube and copy and paste as a new layer.
Position her face within the selected framed area.
Selections invert and hit delete.
Selections select none.
Change the properties of this layer to luminance legacy.
Add a drop shadow to the tube and the frame.
Merge all of these layers together.
Copy and paste as a new layer onto your tag.
Image free rotate to the left 28 degrees.
Adjust sharpen.
Drag down to just above your mask layer.
Place on the left side to the top sorta.
Open element 20.
Re-size by 50% and then again by 75%.
Copy and paste as a new layer at the top.
Move to the top left corner of the frame.
Add a drop shadow.
Open element 22.
Re-size by 50%.
Copy and paste as a new layer and drag down to just above the frame.
Move to the far left side of the frame.
Add a drop shadow.
Open element 23.
Re-size by 85%.
Copy and paste as a new layer and drag to just above your tube.
Move to the bottom and place along the bottom edge of your tube.
Add a drop shadow.
Open element 54.
Re-size by 50% and then again by 75%.
Copy and paste as a new layer and move to the neck piece of the instrument.
Add a drop shadow.
Open element 78.
Re-size by 75% 3x.
Copy and paste as a new layer at the top.
Move to the bottom edge of your tag.
Open element 81.
Re-size by 50%.
Move down to just above your mask.
Place at the top right corner of the framed image so it is peeking out.
Add your name.
Add your copyright and licensing information.
Crop and save.