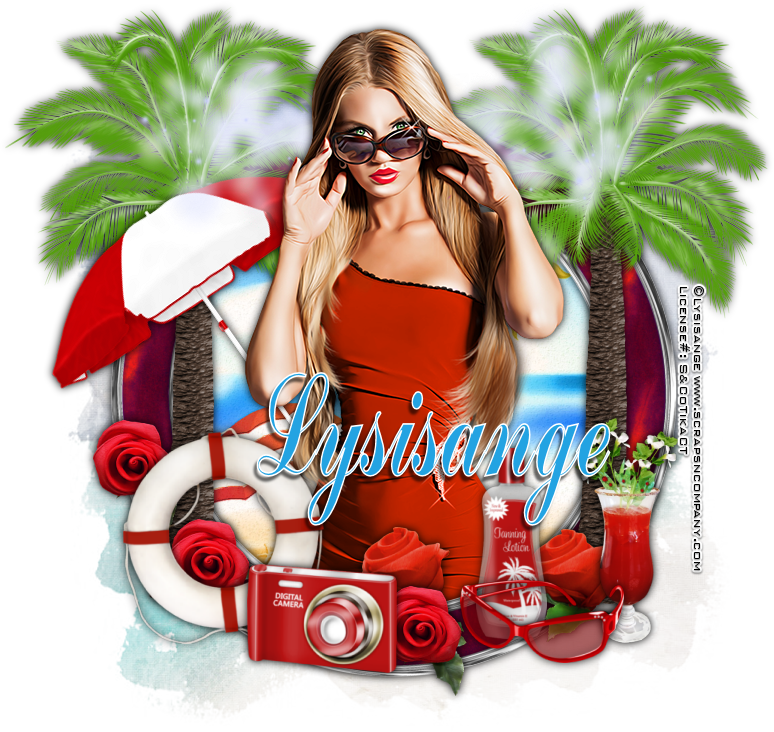
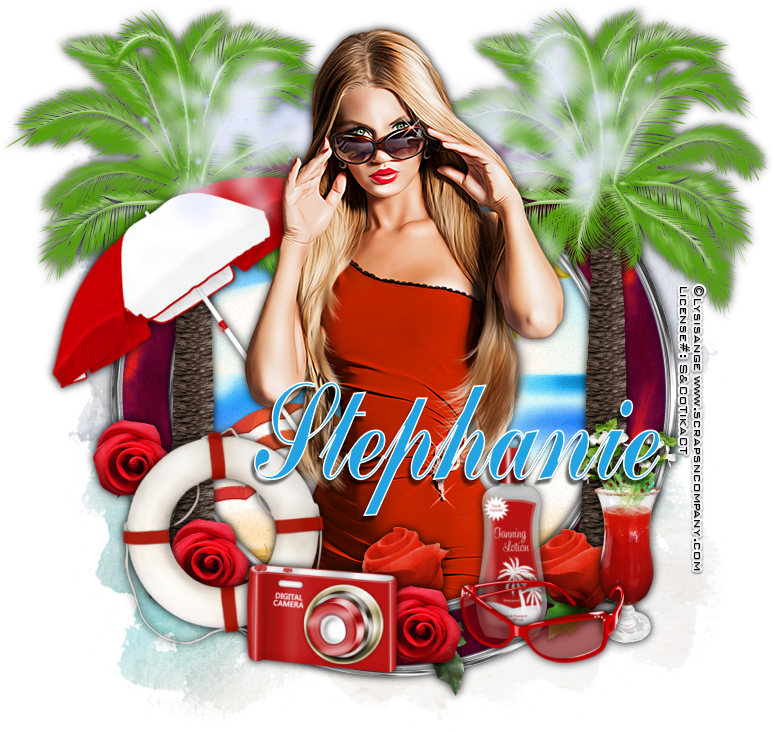
Monday, June 27, 2016

Dark Night


Dark Night
Written 6/27/2016
This tutorial is meant purely as a guide. Feel free to use your own choice of tube or scrap kit to make your tag unique. If you want your tag to look just like mine them use the same supplies I have used. This tutorial assumes you have a knowledge of paint shop pro. Any resemblance to any other tag or tutorial is completely coincidental.
Supplies Used:
Tube of your choice. I am using a tube by Alex Prihodko. It is called Dark Queen. You can purchase this tube at http://picsfordesign.com
Scrap Kit is called Punk Girls by Amy Marie’s Kits. You can purchase this kit at http://amymarieskits.com/store/
Font of your choice. I am using Real Prizes. You can download it at http://www.dafont.com/realprizes.font
Plugins:
Xero Mistifier
DSB Flux Linear Transmission
Drop shadow used throughout:
0 0 100 15.00 black

Let's Begin:
Open element 84 and shift+D to duplicate. Close the original. Make your canvas large enough to work with. Using your magic wand select the inside of the frames. Selections modify and expand by 3. Open paper 10 and copy and paste as a new layer. Drag under the frame and selections invert. Hit delete. Selections select none. Using your magic wand again select the inside of only one side of the frame. Selections modify and expand by 2. Open your tube and copy and paste as a new layer. Position within the frame. Selections invert and hit delete. Selections select none. Repeat with the other frame. Change layer property to Luminance Legacy on both tubes. Merge these 2 tube layers together. Apply the Xero Mistifier plugin using the default settings. Add a drop shadow to the frame. Merge all the layers visible. Duplicate. On the bottom layer go to adjust blur Gaussian blur at 12.00. Resize this bottom layer by 105%. Apply the DSB Flux Linear Transmission plugin using the following settings:

Add noise to this layer using uniform monochrome and 25%.
Open your tube again and copy and paste as a new layer at the top. Re-size as needed. Position in the center of the frames. Apply the Xero Mistifier plugin again the same as before. Add a drop shadow.
Now let’s dress the tag up with elements from the kit. I will list the elements I used. Feel free to use other elements to make your tag unique. Placement of the elements is completely up to you. If you want your tag to look just like mine then use my tag for reference.
Elements I used:
9
36
39
40
57
77
105
108
112
126
Add your name.
Add your copyright and licensing information.
Crop and save.


All American


All American
Written 6/27/2016
This tutorial is meant purely as a guide. Feel free to use your own choice of tube or scrap kit to make your tag unique. If you want your tag to look just like mine them use the same supplies I have used. This tutorial assumes you have a knowledge of paint shop pro. Any resemblance to any other tag or tutorial is completely coincidental.
Supplies Used:
Tube of your choice. I am using the artwork of Andy Cooper. This tube is called American Short and you can purchase her at http://scrapsncompany.com/index.php?main_page=product_info&cPath=113_652_304&products_id=20699
Fun matching scrap kit is also called American Short and is by Blissful Designs. You can purchase this kit at http://scrapsncompany.com/index.php?main_page=product_info&products_id=20703
Mask of your choice. I am using patriotic mask 1 by Dangerously Delicious Designs. You can get the mask at http://dangerouslydeliciousdesignz.blogspot.ca/2014/06/patriotic-masks.html
Font of your choice. I am using Amira Beauty. This is a PTU font.
Plugins:
NONE
Drop shadow used throughout:
0 0 100 11.50 black or dark blue

Let's Begin:
Open element 58 and shift+D to duplicate. Close the original. Make your canvas large enough to give you plenty of room to work with. Open paper 10 and copy and paste as a new layer. Drag under the frame. Apply the mask of your choice. Delete the mask layer and merge the group. I added a slight drop shadow using the following settings : 1 -1 100 2.00 dark blue to the mask layer to help it stand out a bit. Using your magic wand and select the inside of the frame. Selections modify and expand by 3. Layers new raster layer and drag under the frame. Open paper 12 and copy and paste into selection. Leave selected. Open your tube and copy and paste as a new layer. Re-size as needed. Position within the frame and erase any bits that you do not want hanging outside of the frame. Add a drop shadow to both the tube and the frame.
Now let’s dress the tag up with elements from the kit. I will list the elements I used. Feel free to use other elements to make your tag unique. Placement of the elements is completely up to you. If you want your tag to look just like mine then use my tag for reference.
Elements I used:
4
20
22
23
54
73

84
Add your name. 
Add your copyright and licensing information. 
Crop and save. 


When You're Gone


When You’re Gone
Written 6/27/2016
This tutorial is meant purely as a guide. Feel free to use your own choice of tube or scrap kit to make your tag unique. If you want your tag to look just like mine them use the same supplies I have used. This tutorial assumes you have a knowledge of paint shop pro. Any resemblance to any other tag or tutorial is completely coincidental.
Supplies Used:
Tube of your choice. I am using the work of Marco Guaglione. I purchased this tube when he was selling at MPT when they were in business. As far as I know you can no longer purchase his work in psp tube form.
Scrap Kit is called Black and White by Amy Marie’s Kits. You can purchase this kit at http://amymarieskits.com/store/
Sparkle tubes of your choice. You can get some at http://www.hypergurl.com/sparklestubes.html
Font of your choice. I am using Great Vibes. You can get it at https://www.fontsquirrel.com/fonts/great-vibes

Plugins:
NONE
Drop shadow used throughout:
0 0 100 12.00 black

Let's Begin:
Open element 40 and shift+D to duplicate. Close the original. Re-size if you wish. This is going to be the base of your tag. Make your canvas large enough to work with. Using your magic wand select the inside of the frame. Selections modify and expand by 6. Layers new raster layer and drag under the frame. Open paper 11 and copy and paste into selection. Selections select none.
Open your tube and copy and paste as a new layer. Center within the frame and erase any bits you do not want hanging out of the frame.
Add a drop shadow to both the frame and the tube.
Open element 42 and re-size by 75%. Copy and paste as a new layer and place in the lower left corner of the frame in front of your tube. Add a drop shadow.
Layers new raster layer. Apply some sparkle tubes to this layer over the black rose. I made a few and re-sized some of them.
Open element 70 and re-size by 75%. Copy and paste as a new layer and move to the bottom left corner in front of the rose. Add a drop shadow.
Open element 71 and re-size by 60%. Copy and paste as a new layer. Move to the bottom and to the right of the glass. Add a drop shadow.
Open element 81 and copy and paste as a new layer. Drag to just above the rose. Move to the bottom of the frame. Add a drop shadow.
Open element 95 and re-size by 50% 2x. Copy and paste as a new layer and move to the stem of the rose. Add a drop shadow.
Open element 66 and re-size by 50% 2x. Copy and paste as a new layer and place wherever you want on the tag. Duplicate many times and move all over the tag. Once you are done add a drop shadow to all of them.
Add some wordart if you choose to.
Add your name.
Add your copyright and licensing information.
Crop and save.


Friday, June 24, 2016

High Society


High Society
Written 6/24/2016
This tutorial is meant purely as a guide. Feel free to use your own choice of tube or scrap kit to make your tag unique. If you want your tag to look just like mine them use the same supplies I have used. This tutorial assumes you have a knowledge of paint shop pro. Any resemblance to any other tag or tutorial is completely coincidental.

Supplies Used:
Tube of your choice. I am using the work of Daniel Esparza. I bought this tube at CILM when it was in business. I know he also used to sell at CDO but don’t believe you can purchase his work as tubes any longer. If you can I am not sure where.
Scrap kit is by Amy Marie’s Kits. It is called Pinky and you can get it at http://amymarieskits.com/store/
Font of your choice. I am using Twister Script. This is a PTU font.
Plugins:
NONE
Drop shadow used throughout:
0 0 100 12.00 black

Let's Begin:
Open element 63 and shift+D to duplicate. Close the original. Make your canvas large enough to work with. Using your magic wand select the inside of the frame and go to selections modify and expand by 3. Open paper 7 and copy and paste as a new layer. Drag under the frame and selections invert and hit delete. Open element 100 and copy and paste as a new layer. Move to the left side of the frame and then using your eraser tool erase any bits that you do not want hanging outside of the frame. Selections select none. Add a drop shadow to both the frame and the buildings.
Open your tube and re-size if needed. Copy and paste as a new layer and move to the far left side in front of the frame and buildings. Add a drop shadow.
Open element 103 and copy and paste as a new layer. Drag under your tube. Move to the bottom of the frame. Add a drop shadow.
Open element 86 and re-size. Copy and paste as a new layer and move to the far right side of the tag. Add a drop shadow.
Open element 32 and copy and paste as a new layer. Move to the top and drag to the bottom of the layer palette so you can see it around the buildings at the top.
Open element 98 and re-size. Copy and paste as a new layer and move to the bottom left in front of your tube. Add a drop shadow.
Open element 96 and re-size. Copy and paste as a new layer and drag under the necklace element and place to the far left. Add a drop shadow.
Open element 74 and re-size. Copy and paste as a new layer and I placed so it appeared to be hanging from one of the buildings. You can accomplish this effect by using your eraser tool. Add a drop shadow.
Open element 65 and re-size so it is very small. Copy and paste as a new layer and place wherever you want on the tag. Duplicate a few times and rotate them different directions and scatter them all over your tag. Add a drop shadow to each of them when you are done.
Open element 26 and re-size. Copy and paste as a new layer. Place over on top of part of the car. Duplicate and image flip horizontal and move this one on top of the buildings near your tube.
Add your name.
Add your copyright and licensing information.
Crop and save.


Tuesday, June 21, 2016

Night To Remember


Night To Remember
Written 6/21/2016
This tutorial is meant purely as a guide. Feel free to use your own choice of tube or scrap kit to make your tag unique. If you want your tag to look just like mine them use the same supplies I have used. This tutorial assumes you have a knowledge of paint shop pro. Any resemblance to any other tag or tutorial is completely coincidental.
Supplies Used:
Tube of your choice. I am using one called Smoking by Andy Cooper. You can get this tube at http://scrapsncompany.com/index.php?main_page=product_info&cPath=113_652_304&products_id=20174
Scrap kit is called Directly from my Heart by Disturbed Scraps. You can get the kit at http://scrapsncompany.com/index.php?main_page=product_info&products_id=20342
Tag Template # 3 by Rachel Designs. You can get it at https://racheldesignsblog.wordpress.com/2016/05/08/tag-template-3-5/
Font of your choice. I am using Sexy Shout which you can get at http://www.dafont.com/sexy-shout.font
Plugins:
NONE
Drop shadow used throughout:
0 0 90 10.00 black

Let's Begin:
Open the tag template and shift+D to duplicate. Close the original. Make the canvas large enough to work with. Remove the following layers from the template: Raster 1 and background. Fill the layers of the template using your colors, gradients and papers from the kit of your choice. Add a drop shadow to each of the layers.
Open your tube and copy and paste as a new layer. Position in the center of the template. Add a drop shadow.
Now let’s dress the tag up with elements from the kit. I will list the elements I used. Feel free to use other elements to make your tag unique. Placement of the elements is completely up to you. If you want your tag to look just like mine then use my tag for reference.
Elements I used:
2
11
12
18
28
37
39
40
58
77
Add your name.
Add your copyright and licensing information.
Crop and save.



Those Moments


Those Moments
Written 6/21/2016
This tutorial is meant purely as a guide. Feel free to use your own choice of tube or scrap kit to make your tag unique. If you want your tag to look just like mine them use the same supplies I have used. This tutorial assumes you have a knowledge of paint shop pro. Any resemblance to any other tag or tutorial is completely coincidental.
Supplies Used:
Tube of your choice. I am using an older tube by Keith Garvey. I purchased this tube at MPT when they were in business but you can purchase his tubes at http://garv-girlspsptubes.pinnaclecart.com/
Scrap Kit is called Sweet Hannah by Amy Marie’s Kits. You can purchase this kit at http://amymarieskits.com/store/
Mask of your choice. I am using mask #201 by Insatiable Dreams. You can get her masks at http://insatiabledreams.net under resources.
Font of your choice I am using Angelique Rose. You can get it at http://www.dafont.com/angelique-rose.font

Plugins:
Alien Skin Xenofex 2 Burnt Edges
Drop shadow used throughout:
0 0 85 16.00 black

Let's Begin:
Open element 52 and shift+D to duplicate. Close the original. Re-size if you wish. Make your canvas large enough to give you plenty of room to work with. Open paper 19 and copy and paste as a new layer and drag under the frame. Apply the mask of your choice. Delete the mask layer and merge the group. Using your magic wand select the inside of the frame and go to selections modify and expand by 5. Open paper 16 and copy and paste as a new layer and drag under the frame selections invert and hit delete. Selections invert again and selections modify and contract by 4. Open your tube and copy and paste as a new layer and place within the selected framed area. Erase any bits you do not want. Selections select none. Add a drop shadow to the frame and the tube.
Merge together the frame, your tube and the paper within the frame. Duplicate this merged layer. On the top copy go to adjust blur Gaussian blur and blur at 12.00. Lower the opacity of this layer to 60.
Open element 65 and copy and paste as a new layer and move to the top of the frame. Add a drop shadow. Duplicate and image flip vertical. Move this duplicate to the bottom of the frame.
Open element 107 and copy and paste as a new layer. Re-size by 75% 2x. Image free rotate to the left 10 degrees. Adjust sharpen. Drag under the bottom flowers. Move to the far left side of the frame. Add a drop shadow.
Open element 108 and copy and paste as a new layer and re-size by 75%. Image free rotate to the right 17 degrees. Adjust sharpen. Drag under the bottom flowers. Move to the far right of the frame. Add a drop shadow.
Open element 120 and shift+D to duplicate. Close the original. Re-size by 50%. Make your canvas larger. Apply the Xenofex 2 Burnt edges filter using the following settings:
<<Insert SS1>>
Copy and paste as a new layer onto your tag. Re-size as needed. Image free rotate to the right 20 degrees. Adjust sharpen. Drag under the violin. Move to the far right. Add a drop shadow.
Open element 112 and re-size by 75%. Copy and paste as a new layer and move to the bottom just above the flowers. Add a drop shadow.
Open element 88 and copy and paste as a new layer. Re-size by 50% and then again by 70%. Copy and paste as a new layer and place to the far right by the violin and on top of the paper. Add a drop shadow.
Open element 110 and copy and paste as a new layer. Re-size by 50% and then again by 70%. Move to the bottom left corner. Add a drop shadow.
Open element 102 and copy and paste as a new layer and re-size by 50% 2x. Move to the bottom in front of the boxes. Add a drop shadow.
Repeat above steps with element 55.
Open element 94 and copy and paste as a new layer and re-size by 50%. Move below the flowers and the boxes. Drag down and place to the right of the boxes. Add a drop shadow.


Monday, June 20, 2016

Summer Paradise


Summer Paradise
Written 6/19/2016
This tutorial is meant purely as a guide. Feel free to use your own choice of tube or scrap kit to make your tag unique. If you want your tag to look just like mine them use the same supplies I have used. This tutorial assumes you have a knowledge of paint shop pro. Any resemblance to any other tag or tutorial is completely coincidental.
Supplies Used:
Tube of your choice. I am using one called Hot Summer by Very Many. You can purchase this tube at http://verymanytubes.com/
Scrap Kit is called Summer Rose by Amy Marie’s Kits. You can purchase this kit at http://amymarieskits.com/store/
Tag Template is by Millie’s PSP Madness. You can get the template at http://milliespspmadness.blogspot.com.au/2015/08/template-779-and-tag-with-laguna-and.html
Font of your choice. I am using Fullsize Sans. You can get it at http://www.1001freefonts.com/fullsize_sans.font
Plugins:
Xero Porcelain
Penta.com Dot and Cross
Drop shadow used throughout:
0 0 85 6.00 black

Let's Begin:
Open the tag template and shift+D to duplicate. Close the original. Remove the following layers : temp by millie and background. Make your canvas large enough to work with.
Create a gradient from either elements in the kit or your tube. Using a darker and lighter color. This is what we will fill our template with.
Make Layer 1 active and selections select all float and defloat. Layers new raster layer and flood fill with your gradient. Selections select none. Delete the original layer. Adjust Add/Remove noise and add noise with the following settings. Uniform and Monochrome and 65%.
Make Layer 2 active and selections select all float and defloat. Layers new raster layer and flood fill with the darker color. Leave selected. Open your tube and copy and paste as a new layer and position within the selected area. Selections invert and hit delete. Selections select none. Delete the original layer. Change the properties of the tube to luminance legacy. Apply the Xero Porcelain filter using the default settings. Apply the penta.com Dot and Cross filter and change the top value to 40.
Make Layer 3 active and selections select all float and defloat. Layers new raster layer and flood fill with the darker color. Selections select none and delete the original layer.
Make layer 4 active and selections select all float and defloat. Layers new raster layer and fold fill with the lighter color. Selections select none and delete the original layer.
Make layer 5 active and selections select all float and defloat. Layers new raster layer and flood fill with your gradient again. Leave selected. Open your tube and copy and paste as a new layer. Re-size if needed. Position however you want in the selected area. Erase any bits hanging out that you do not want. Selections select none. Delete the original raster 5 layer. Make the gradient filled layer active and apply the Penta.com Dot and Cross filter again using the same settings as before.
Make layer 6 active and apply noise same as before.
Make layer 7 active and selections select all float and defloat. Layers new raster layer. Flood fill with white. Selections select none. Delete the original layer. Add noise same as before.
Now add a drop shadow to each layer.
Now let’s dress the tag up with elements from the kit. I will list the elements I used. Feel free to use other elements to make your tag unique. Placement of the elements is completely up to you. If you want your tag to look just like mine then use my tag for reference.
Elements I used:
24
31
32
35
39
43
49
54
74
Add your name.
Add your copyright and licensing information.
Crop and save.
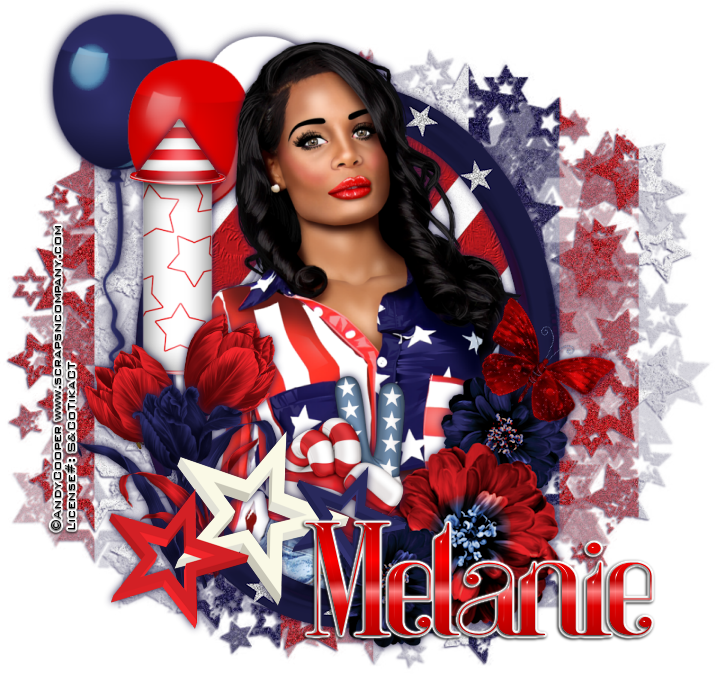

Sunday, June 19, 2016

Beach Beauty


Beach Beauty
Written 6/19/2016
This tutorial is meant purely as a guide. Feel free to use your own choice of tube or scrap kit to make your tag unique. If you want your tag to look just like mine them use the same supplies I have used. This tutorial assumes you have a knowledge of paint shop pro. Any resemblance to any other tag or tutorial is completely coincidental.
Supplies Used:
Tube of your choice. I am using one called Beach Party by Lysisange. You can purchase this tube at http://scrapsncompany.com/index.php?main_page=product_info&cPath=113_562&products_id=20020
Matching scrap kit by Lil Mz Brainstorms. It is also called Beach Party.  You can purchase it at http://scrapsncompany.com/index.php?main_page=product_info&products_id=20179
Font of your choice. I am using Commercial Script.
Plugins:
NONE
Drop shadow used throughout:
0 0 100 14.00 black

Let's Begin:
Open element 90 and shift+D to duplicate. Close the original. Make your canvas large enough to work with. Using your magic wand select the inside of the frame. Selections modify and expand by 3. Layers new raster layer and drag under the frame. Open paper 4 and copy and paste into selection. Leave selected. Open your tube and copy and paste as a new layer and position within the frame area that is selected. Erase any bits that are hanging out of the frame that you do not want. Selections select none. Add a drop shadow to both the frame and the tube.
Open element 104 and re-size by 85%. Copy and paste as a new layer and drag to the bottom. Position behind your tag.
Now let’s dress the tag up with elements from the kit. I will list the elements I used. Feel free to use other elements to make your tag unique. Placement of the elements is completely up to you. If you want your tag to look just like mine then use my tag for reference.
Elements I used:
13
14
28
29
32
42
57
65
80
81
Add your name.
Add your copyright and licensing information.

Crop and save.
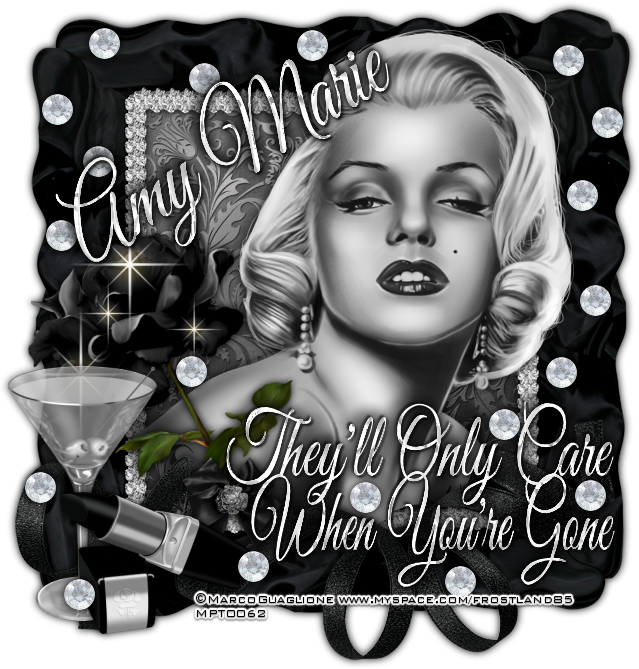

Saturday, June 18, 2016

Cozumel


Cozumel
Written 6/18/2016
This tutorial is meant purely as a guide. Feel free to use your own choice of tube or scrap kit to make your tag unique. If you want your tag to look just like mine them use the same supplies I have used. This tutorial assumes you have a knowledge of paint shop pro. Any resemblance to any other tag or tutorial is completely coincidental.
Supplies Used:
Tube of your choice. I am using a tube by Michael Calandra. You can purchase this tube at http://cdoestore.com
Fun scrap kit by Amy Marie’s Kits. It is called Hello Sunshine. You can purchase this kit at http://amymarieskits.com/store/
Mask of your choice. I am using mask #97 by Vix. You can download her masks at http://www.freewebs.com/vixpsp/
Font of your choice. I am using Twister Script. This is a PTU font
Plugins:
NONE
Drop shadow used throughout:
0 0 100 12.00  I used the pink color in my tag but the color is up to you

Let's Begin:
Open element 32 and shift+D to duplicate. Close the original. Using your magic wand select the inside of the frame and go to selections modify and expand by 5. Open paper 12 and copy and paste as a new layer. Drag under the frame and selections invert and hit delete. Open paper 6 and copy and paste as a new layer and drag under the frame but on top of the first paper. Delete. Selections select none. On the top paper apply the mask. Delete the mask layer and merge the group.
Using your magic wand select the inside of the frame again and go to selections modify and expand by 2. Open your tube and copy and paste as a new layer and position within the frame. Erase any bits hanging out of the frame that you do not want. Add a drop shadow to the tube and the frame.
Now let’s dress the tag up with some of the fun elements from this wonderful kit. I will list the elements I used. Feel free to use other elements to make your tag unique. Placement of the elements is completely up to you. If you want your tag to look just like mine then use my tag for reference.
Elements I used:
1
24
34
35
42
52
70
73
99
101
Add your name
Add your copyright and licensing information
Crop and save


Wings Of Enchantment


Wings Of Enchantment
Written 6/18/2016
This tutorial is meant purely as a guide. Feel free to use your own choice of tube or scrap kit to make your tag unique. If you want your tag to look just like mine them use the same supplies I have used. This tutorial assumes you have a knowledge of paint shop pro. Any resemblance to any other tag or tutorial is completely coincidental.
Supplies Used:
Tube of your choice. I am using a tube by Anna Marine. You can purchase this tube at http://cdoestore.com
The beautiful scrap kit is by Amy Marie’s Kits. It is called Fairy Garden. You can purchase it at http://amymarieskits.com/store/
Cloud brushes of your choice. You can find some awesome brushes at http://www.deviantart.com/browse/all/?section=&global=1&q=cloud+brushes
Mask of your choice. I am using mask #81 by moonbeams and spiderwebs. You can get this mask at http://moonbeamsandspiderwebs.blogspot.com/search/label/Masks
Font of your choice I am using Nafeeza Script. This is a PTU font.
Plugins:
Animation Shop
Drop shadow used throughout:
0 0 70 15.00  Dark Grey
**NOTE: This is an animated tag and choosing to animate or not is completely up to you. There are many ways to animate tags and accomplish different animations. I simply show the way that I do it however if you know of a different way to accomplish the same thing then feel free to do it your way. **

Let's Begin:
Open paper  12 and shift+D to duplicate. Close the original. Promote the background layer to a raster layer. Re-size if you wish. Make your canvas large enough to give you room to work with. Apply the mask of your choice. Delete the mask layer and merge the group.
Open our tube and copy and paste as a new layer. Position within the center of the mask area. We are going to build the tag out around the tube. Re-size if needed. Add a drop shadow.
Open element 67 and copy and paste as a new layer. Drag under your tube. Move to the bottom so your tube is standing on it. Add a drop shadow.
Open element 107 and re-size by 85%. Copy and paste as a new layer and drag under the leaves layer. Move to the bottom behind the tube and the leaves. DO NOT ADD A DROP SHADOW to this layer.
Open element 148 and copy and paste as a new layer. Move to the far right of the tag behind your tube. Add a drop shadow.
Open element 116 and re-size by 65%. Copy and paste as a new layer. Move to the bottom left of the tag in front of your tube. Add a drop shadow.
Open element 91 and copy and paste as a new layer and drag under the water element. Place behind it but so you can see it. Add a drop shadow.
Open element 60 and copy and paste as a new layer. Move so it appears to be hanging from the right side of the archway. NO DROP SHADOW ON THIS ELEMENT.
Open element 50 and re-size by 75% 2x. Copy and paste as a new layer and place behind the water element but in front of the grass and to the right closer to your tube. Add a drop shadow.
Open element 41 and re-size by 60% and then again by 75% 2x. Copy and paste as a new layer and place in nearly the same place as the last element but so it is showing out the left of the water element. Add a drop shadow.
Open element 11 and re-size by 50% 3x and copy and paste as a new layer and move to the bottom in front of the right side of the archway. Add a drop shadow.
Open element 96 and re-size by 50%. Copy and paste as a new layer and place at the bottom on the right side of the water element. Add a drop shadow.
Layers new raster layer. Apply the cloud brush or brushes of your choice. Drag down to under the archway and of course position at the top of the tag.
Open element 138 and re-size. Copy and paste as a new layer and place so it appears to be sitting on the water element feature to the left. This is the part we are going to animate. DO NOT ADD A DROP SHADOW.
Add your name.
Add your copyright and licensing information.
Now let’s get ready to animate:
Crop your tag.
Hide the butterfly layer.
Merge visible all other layers.
Layers new raster layer and drag to the bottom and flood fill with white.
Unhide your butterfly layer and copy it and open animation shop and paste as a new animation. Go to Effects Insert Image Effect and select compress. Use the settings below:

Select all frames in the butterfly animation.
Back to psp and hide the butterfly layer and edit copy merged the other 2 layers. Open animation shop and edit paste as a new animation. Take note of the amount of frames in your butterfly animation. Should be 8. Duplicate your tag frames to have the same amount. Select all frames. Go to Animation and frame properties and change the value to 20. Now grab the first frame of the butterfly animation and drag it onto the first frame of the tag. Once you have it where you think you want it let go of your mouse button. View your animated tag. If you are happy then optimize and save. If you are not happy you can undo and redo until you are happy.
Once you are done re-size your tag if needed/wanted.

You’re all done!!

Friday, June 17, 2016

Daily Affirmations


Daily Affirmations
Written 6/17/2016
This tutorial is meant purely as a guide. Feel free to use your own choice of tube or scrap kit to  make your tag unique. If you want your tag to look just like mine them use the same supplies I have used. This tutorial assumes you have a knowledge of paint shop pro. Any resemblance to any other tag or tutorial is completely coincidental.
Supplies Used:
Tube of your choice. I am using one called Dressing Fairies by Vadis. You can purchase her at http://picsfordesign.com
Beautiful scrap kit by Amy Marie’s Kits. It is called White Floral. You can purchase this kit at http://amymarieskits.com/store/
Mask of your choice. I am using a mask by Kisses N Dreams. You can get it at http://kissesndreams.blogspot.co.uk/2015/09/random-masks.html
Font of your choice. I am using Guarddilla Typeface. This is a PTU font.
Plugins:
Xero Porcelain
Drop shadow used throughout:
0 0 85 13.00 black

Let's Begin:
Open element 37 and shift+D to duplicate. Close the original. Make your canvas large enough to work with. Open paper 10 and copy and paste as a new layer. Drag to the bottom. Apply the mask of your choice. Delete the mask layer and merge the group. Re-size your mask if you need to so it looks nice behind the frame. Using your magic wand select the inside of the frame. Selections modify and expand by 5. Layers new raster layer and drag under the frame. Open paper 11 and copy and paste into selection. Leave selected. Open your tube and copy and paste as a new layer. Position within the frame. Selections invert and hit delete. Selections select none. On your tube layer adjust hue and saturation colorize and set both values to 0. Apply the Xero Porcelain filter using the default settings. Lower the opacity on the tube layer to 70. Add a drop shadow to both the tube and the frame. Merge all of these layers together EXCEPT the mask layer.
At this time copy and paste your tube again as a new layer at the top. Re-size. Image flip horizontal. Move to the far left of the frame. Add a drop shadow.
Open element 126 and copy and paste as a new layer and drag under the frame layer. Place so it is peeking out around the frame. Duplicate and flip horizontal and vertical until you have enough to go all the way around the frame. Merge them all together and add a drop shadow.
Open element 51 and re-size. Copy and paste as a new layer. Place behind your tube. Duplicate a few times and place randomly around the tag. Add a drop shadow to each one.
Open element 74 and re-size. Copy and paste as a new layer and place with the flowers. Add a drop shadow.
Open element 122 and re-size and copy and paste as a new layer behind your tube and move to the far left of your tube. Add a drop shadow.
Open element 135 and copy and paste as a new layer at the top. Move to the bottom of the tag.
Add your name.
Add your copyright and licensing information.
Crop and save.


Thursday, June 16, 2016

Blue Lagoon


Blue Lagoon
Written 6/16/2016
This tutorial is meant purely as a guide. Feel free to use your own choice of tube or scrap kit to  make your tag unique. If you want your tag to look just like mine them use the same supplies I have used. This tutorial assumes you have a knowledge of paint shop pro. Any resemblance to any other tag or tutorial is completely coincidental.
Supplies Used:
Tube of your choice. I am using one called Fashion Mermaid by Arthur Crowe. You can purchase her at http://arthurcrowesfactory.com/store/
Beautiful Scrap Kit is called Lagoon Romance by Amy Maries Kits. You can purchase it at http://amymarieskits.com/store/
Mask of your choice. I am using mask #1 by horseplay pasture designs. You can get it http://horseplayspasturedesigns.blogspot.com.au/
Font of your choice. I am using Lina Script. You can get it at http://www.dafont.com/lina-script.font
Plugins:
NONE
Drop shadow used throughout:
0 0 75 11.00 black
Let's Begin:
Open element 46 and shift+D to duplicate. Close the original. Make your canvas large enough to work with.
Open paper 18 and copy and paste as a new layer and drag to the bottom. Apply the mask of your choice. Delete the mask layer and merge the group. If you need to re-size the mask so it is nicely proportioned with your frame.
Using your magic wand select the inside of the frame and selections modify and expand by 3. Layers new raster layer and drag under the frame. Open paper 10 and copy and paste into selection. Leave selected and open your tube. Copy and paste as a new layer and position within the framed area. Erase any bits hanging out that you do not want. When happy selections select none. Add a drop shadow to both the frame and the tube.
Lets dress the tag up with some of the beautiful elements from this amazing kit. I will list the elements I used. Feel free to use other elements to make your tag unique. Placement of the elements is completely up to you. If you want your tag to look just like mine then use my tag for reference.
Elements I used:
5
6
26
28
57
65
66
74
81
94
100
101
127
131
Add your name.
Add your copyright and licensing information.
Crop and save.



Bronzed Beauty


Bronzed Beauty
Written 6/14/2016
This tutorial is meant purely as a guide. Feel free to use your own choice of tube or scrap kit to  make your tag unique. If you want your tag to look just like mine them use the same supplies I have used. This tutorial assumes you have a knowledge of paint shop pro. Any resemblance to any other tag or tutorial is completely coincidental.
Supplies Used:
Tube of your choice. I am using a tube called Lili by Souldesigner. You can purchase this tube at http://scrapsncompany.com/index.php?main_page=product_info&cPath=113_434&products_id=20170
Beautiful matching scrap kit by Bibi’s Collection. You can purchase it at http://scrapsncompany.com/index.php?main_page=product_info&products_id=20169
Mask of your choice. I am using mask #5 by Allisons Addictions. You can get it at http://allisonsaddictions.blogspot.com/
Font of your choice. I am using LillyBelle. You can download it at http://www.dafont.com/lillybelle.font
Plugins:
NONE
Drop shadow used throughout:
0 0 85 11.00 dark brown

Let's Begin:
Open paper 7 and shift+D to duplicate. Close the original. Promote background layer to a raster layer. Re-size as needed. Make your canvas large enough to work with. Apply the mask of your choice. Delete the mask layer and merge the group. Add a drop shadow.
Open element 5 and re-size. Copy and paste as a new layer and place in the lower left of the mask area. Add a drop shadow.
Open your tube and re-size. Copy and paste as a new layer and place to the right of the car. Add a drop shadow.
Open element 41 and image flip horizontal. Copy and paste as a new layer and drag under the car layer. Move so it is behind the car and the tube. Add a drop shadow.
Open element 55 and re-size so it fits nicely within the masked area. Copy and paste as a new layer and move to the bottom of the tag.
Open element 26 and re-size. Image flip horizontal. Copy and paste as a new layer and place on the roof of the car. Add a drop shadow.
Open element 29 and copy and paste as a new layer and re-size. Move behind the car. Duplicate a few times and place randomly behind the car and your tube. Add a drop shadow to each one.
Open element 8 and re-size. Copy and paste as a new layer at the top and place across your tag.
Add your name.
Add your copyright and licensing information.
Crop and save.
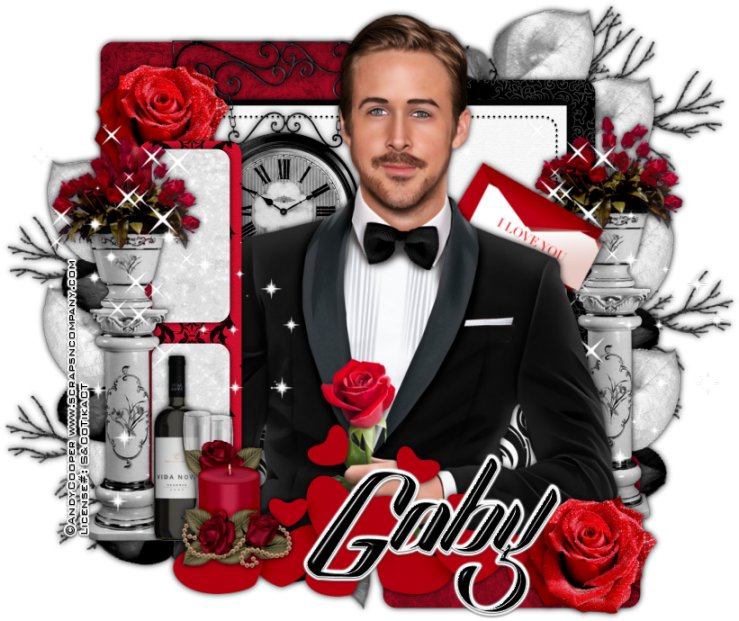


Tuesday, June 14, 2016

Sunset Beauty


Sunset Beauty
Written 6/14/2016
This tutorial is meant purely as a guide. Feel free to use your own choice of tube or scrap kit to  make your tag unique. If you want your tag to look just like mine them use the same supplies I have used. This tutorial assumes you have a knowledge of paint shop pro. Any resemblance to any other tag or tutorial is completely coincidental.
Supplies Used:
Tube is called Sunny Day by Very Many Tubes. You can purchase her at http://verymanytubes.com
Scrap Kit is called Summer Sunset by Amy Marie’s Kits. You can purchase it at http://amymarieskits.com/store/
Tag Template is template #1 by Cakes Creations. You can download it at http://cakescreations.blogspot.ca/2016/05/tag-template-1.html?zx=d3c95450d1a51630
Font of choice. I am using Beach Type which you can download at http://www.dafont.com/beach-type.font

Plugins:
NONE
Drop shadow used throughout:
0 0 85 15.00 black

Let's Begin:
Open the tag template and Shift+D to duplicate. Close the original. Remove the following layers from the template: Cakes Creations and background. Make your canvas large enough to work with.
Grab outer circle 5 and drag it down to above outer circle 5. Merge these 2 layers together. Merge circle 5 and circle 6 together. Merge rectangle 1 and rectangle 2 together. Merge circle 3 and circle 4 together. Merge Diamonds 1 and Diamonds 2 together. Fill all layers with papers from the kit or colors of your choice EXCEPT the rectangles and diamonds. In the 2 smaller circles copy and paste your tube and position her face within the circles. Change the properties to whatever you like. I chose to use overlay in the bottom one and then luminance legacy in the top one.
Lower the opacity of the rectangles to 55. Add a drop shadow.
Add noise to the diamonds. Add a drop shadow.
Open your tube and copy and paste as a new layer. Re-size as needed. Place in the center of the tag template. Add a drop shadow.
Open element 69 and copy and paste as a new layer and re-size by 110%. Drag under your tube and center over the top smaller circle. Add a drop shadow.
Open element 12 and re-size by 75%. Copy and paste as a new layer and drag under your tube and place in the top left corner. Add a drop shadow.
Open element 16 and copy and paste as a new layer and drag down to the bottom of your tag. Add a drop shadow.
Now lets add some of the awesome elements from this kit. I will list the elements I have used. Feel free to use other elements to make your tag unique. Placement of the elements is completely up to you. If you want your tag to look just like mine then use my tag for reference.
Elements I used:
2
13
36
39
40
41
64
Add your name.
Add your copyright and licensing information.
Crop and save.