Saturday, August 27, 2016

"Fall" 'ing Apples - Forum Set


“Fall”ing Apples – Forum Set
Written 8/25/2016
This tutorial is meant purely as a guide. Feel free to use your own choice of tube or scrap kit to make your tag unique. If you want your tag to look just like mine them use the same supplies I have used. This tutorial assumes you have a knowledge of paint shop pro. Any resemblance to any other tag or tutorial is completely coincidental.
Supplies Used:
No tubes used in this tutorial however if you wish to use one that is up to you. I have used the bears from the scrapkit.
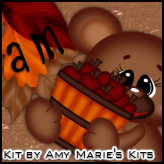
Adorable scrap kit by Amy Marie’s Kits. It is called Apple Of My Eye. You can purchase it at http://amymarieskits.com/store/
Font of your choice. I am using Kids Play. You can download it at http://www.fontspace.com/jonathan-s-harris/kids-play
Plugins:
NONE
Drop shadow used throughout:
0 0 85 5.00 Black

Let's Begin:
We are going to start off with the tag itself.
Open a new blank canvas that will give you plenty of room to work with. Make sure it is a transparent canvas.
Using your rectangle preset tool turn off the background color and set the foreground color to whatever color you choose. Set the width to 4.50. Draw out a rectangle to the size you want for the base of your tag.
Using your magic wand to select the inside of the rectangle. Selections modify and expand by 1. Open a paper of your choice from the kit and copy and paste as a new layer and drag under the frame. Selections invert and hit delete. Selections select none. Add a drop shadow to the frame.
Open element 8 and copy and paste as a new layer. Place to the left side of your canvas. Add a drop shadow.
Open element 6 and re-size by 50% and then again by 85%. Copy and paste as a new layer and place to the right of the tree. Add a drop shadow.
Open element 12 and re-size by 50% and then again by 75% and copy and paste as a new layer and place to the left of the tree. Add a drop shadow.
Open element 9 and re-size by 50%. Copy and paste as a new layer and place at the top of the frame to the right of the tree. Add a drop shadow.
Open element 19 and re-size by 75%. Copy and paste as a new layer and drag to the bottom. Move to the far right side of the frame. Make it appear to be coming out of the word “Fall”. Add a drop shadow.
Open element 33 and re-size by 50%. Copy and paste as a new layer and move to the far bottom right of the frame. Add a drop shadow.
Add your name in the center.
Add your copyright and licensing information.
Crop and save.
Now lets make our avatar to match.
Open a blank canvas the size you want it to be. Usually a good avatar size is 150x150.
Open the paper of your choice from the kit and copy and paste as a new layer.
Open the tube from the kit or the tube you are using and copy and paste as a new layer and re-size. Place in the bottom right corner of the avatar. Add a drop shadow.
Add any another elements you want.
Add a 2 pixel width border in the color that you wish.
Add your name or initial.
Add your copyright and licensing information.
Crop and save. 

Friday, August 26, 2016

Fight Strong


Fight Strong
Written 8/24/2016
This tutorial is meant purely as a guide. Feel free to use your own choice of tube or scrap kit to make your tag unique. If you want your tag to look just like mine them use the same supplies I have used. This tutorial assumes you have a knowledge of paint shop pro. Any resemblance to any other tag or tutorial is completely coincidental.
Supplies Used:
Tube of your choice. Preferably one with a close up. I am using the work of Andy Cooper. This tube is called Angel Pink and you can purchase her at http://scrapsncompany.com/index.php?main_page=product_info&cPath=113_652_304&products_id=21402
The scrap kit is also called Angel Pink and is by Designz By Sue. You can purchase it at http://scrapsncompany.com/index.php?main_page=product_info&products_id=21458
Mask of your choice. I am using mask 56 by Vix. You can get her masks at http://www.freewebs.com/vixpsp/
Font of your choice. I am using Hattenschweiler and Twister Script(this is a PTU font)
Plugins:
Penta.com Jeans
Drop shadow used throughout:
0 0 85 9.50 Using a dark pink for the color.

Let's Begin:
Open element 19. Shift+D to duplicate. Close the original. Make your canvas large enough to work with.
Open paper 17 and copy and paste as a new layer. Drag under the frame. Apply the mask of your choice. Delete the mask layer and merge the group. Add a drop shadow to the mask using a pink from the paper for your color.
Using your magic wand select the inside of the frame. Selections modify and expand by 3. Open paper 13 and copy and paste as a new layer. Drag under the frame. Selections invert and hit delete. Selections invert again. Open the close up of your tube and copy and paste as a new layer. Position within the frame. Selections invert and hit delete. Selections select none. Change the properties of this layer to luminance legacy. Add a drop shadow to the tube. Merge the tube and paper layers together. Apply penta.com Jeans plugin but change the top value to 10.
Add a drop shadow to the frame.
You can merge the frame layer down to the tube/paper layer if you wish if you like to keep your layer palette clean.
Open your full size tube and copy and paste as a new layer. Re-size until she is just slightly larger than the frame. Move to the far right side of the frame and add a drop shadow.
Now let’s dress the tag up with elements from the kit. I will list the elements I used. Feel free to use other elements to make your tag unique. Placement of the elements is completely up to you. If you want your tag to look just like mine then use my tag for reference.
Elements I used:
2
11
12
38
39
Once you have all the elements you want on the tag then using your preset elipse tool draw out a circle around the outside of the frame. Now place any text you would like on it.
Add your name.
Add your copyright and licensing information.
Crop and save.


Thursday, August 25, 2016

Good Bye Summer Hello Fall


Goodbye Summer Hello Fall
Written 8/24/2016
This tutorial is meant purely as a guide. Feel free to use your own choice of tube or scrap kit to make your tag unique. If you want your tag to look just like mine them use the same supplies I have used. This tutorial assumes you have a knowledge of paint shop pro. Any resemblance to any other tag or tutorial is completely coincidental.
Supplies Used:
Tube of your choice. I am using the work of Very Many. This tube is called Angelica. You can purchase her at http://verymanytubes.com/
The beautiful scrap kit is by Tiny Turtle Designs. The kit is called Alisa. You can purchase it at http://tinyturtledesigns.com/store/
Template by Millie’s PSP Madness. You can download it at http://milliespspmadness.blogspot.com/2016/03/template-808-and-tag-w-zlatas-new-tube.html
Font of your choice. I am using Marbelia Evolutions. This is a PTU font.
Plugins:
NONE
Drop shadow used throughout:
0 0 80 10.00 black

Let's Begin:
Open the template and shift+D to duplicate. Close the original. Remove Millie’s information layer from the template. Make your canvas large enough to work with.
Fill each of the layers of the template using your choice of papers from the kit and/or colors and gradients. Add a drop shadow to each layer.
Open your tube and copy and copy and paste as a new layer. Position in the center of the middle circle. Add a drop shadow to the tube.
Now let’s dress the tag up with elements from the kit. I will list the elements I used. Feel free to use other elements to make your tag unique. Placement of the elements is completely up to you. If you want your tag to look just like mine then use my tag for reference.
Elements I used:
1
3
11
16
23
38
40
46
52
65
81
92
96
104
Add your name.
Add your copyright and licensing information.
Crop and save.

Monday, August 22, 2016

Falling Leaves


Falling Leaves
Written 8/22/2016
This tutorial is meant purely as a guide. Feel free to use your own choice of tube or scrap kit to make your tag unique. If you want your tag to look just like mine them use the same supplies I have used. This tutorial assumes you have a knowledge of paint shop pro. Any resemblance to any other tag or tutorial is completely coincidental.
Supplies Used:
Tube of your choice. I am using the work of Zlata M and this tube is called Autumn Blues. You can purchase this tube at http://zlatam.com/
Scrap Kit is by Amy Marie’s Kits and is called Autumn Days. You can purchase this kit at http://amymarieskits.com/store/
Tag template is by Dangerously Delicious Designz. You can get it at http://dangerouslydeliciousdesignz.blogspot.de/2016/07/template-176-summertime-with-3-word-art.html
Mask of your choice. I am using vix big mask 001. You can get this mask at http://vixpsp.blogspot.com/
Font of your choice. I am using Aqualita. This is a PTU font.
Plugins:
NONE
Drop shadow used throughout:
0 0 85 6.50 black

Let's Begin:
Open the tag template and shift+D to duplicate. Close the original. Delete the following layers : info and bg. Make your canvas large enough to work with. Now lets clean up this layer palette a bit and merge some of the layers together. Merge together: bottom right yellow square and top left lt blue square, merge together top and bottom orange squares, merge together left blue square and right blue square.
Now fill each of the layers with either papers from the kit or colors and gradients of your choice. Once you get them all filled then add a drop shadow to each layer.
Open your tube and copy and paste as a new layer. I placed mine in the smaller of the 2 circles at the top. Add a drop shadow.
Using some of the elements from the kit add them to the 3 fames of the template.
Open the paper of your choice and copy and paste as a new layer and drag to the bottom. Apply the mask of your choice. Delete the mask layer and merge the group.
Now let’s dress the tag up with elements from the kit. I will list the elements I used. Feel free to use other elements to make your tag unique. Placement of the elements is completely up to you. If you want your tag to look just like mine then use my tag for reference.
Elements I used:
1
3
9
31
38
40
41
49
79
83
Add your name.
Add your copyright and licensing information.

Crop and save.