Showing posts with label Amy & Leahs Gimptastic. Show all posts

Sunday, January 24, 2016

Baby It's Cold


Baby It's Cold
written 1/14/2016

This tutorial is meant purely as a guide. Feel free to make your tag unique by using your own choice of tube and scrap kit. If you want your tag to look just like mine then use the same supplies I have used.

Supplies Used:

I am using a tube by Michael Landefeld. I got this tube when he was licensed with CILM but you can now purchase his tubes at http://cdoestore.com


Font of your choice. I am using Hattenschweiler.

Plugins:
Eye Candy Nature Snow Drift (optional)

Let's Begin:
Open your template and shift+D to duplicate.
Close the original.
Delete the following layers from the template.
Raster 1, and white background.
Make your canvas large enough to work with.
I colorized everything to match my tube and this is completely up to you.
Make your layer 6 active.
Selections select all float and defloat.
Open paper 7 and copy and paste as a new layer.
Selections invert and hit delete.
Selections select none.
Delete the original layer.
Repeat the above steps with all layers of the template.
Using the papers of your choice.
Add a drop shadow to each of the layers.
Open your tube and copy and paste as a new layer.
Move to the far right side of the template.
Re-size if needed.
Open the tree and copy and paste as a new layer and move down below the very top rectangle.
Place to the far left.
Add a drop shadow.
Open swirl 1 and copy and paste as a new layer.
Move to the bottom.
Open snowflake 1 and copy and paste as a new layer.
Center in the template.
Add a drop shadow.
Open flower and re-size so it will fit nicely at the bottom of the template.
Copy and paste as a new layer.
Place at the bottom left.
Duplicate several times and place all along the bottom.
Add a drop shadow to each.
Open ice skates.
Image flip horizontal.
Copy and paste as a new layer.
Move to the far left in front of the tree.
Add a drop shadow.
Open lantern.
Re-size and copy and paste as a new layer.
Place at the top in the center of the long rectangle that is vertical.
Add a drop shadow.
Open bow1 and re-size.
Copy and paste as a new layer and place at the top of the lantern.
Add a drop shadow.
Add your name.
Add your license and copyright information.
Crop and save.

Monday, January 11, 2016

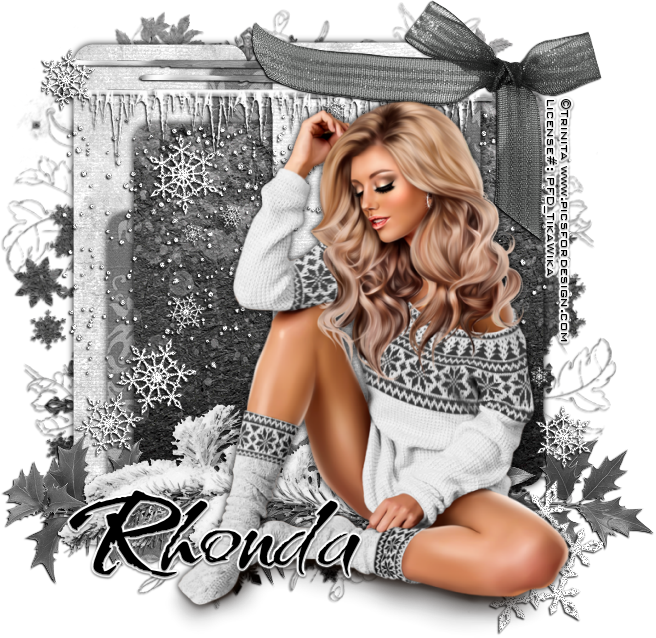
Muted Winter


Muted Winter
written 12/30/15

This tutorial is meant purely as a guide. Feel free to make your tag unique by using your own choice of Tube and Scrap Kit. If you want your tag to look exactly like mine then use the same supplies that I have used.

Supplies Used:

Tube by Trinita called My Pets. You can get this tube at http://picsfordesign.com

Scrap Kit is a freebie by Amy & Leah's gimptastic. It is called Gothic Winter and you can get it at http://amyleahsgimptastictuts.blogspot.com/2015/12/the-fantastically-free-blog-train.html

Mask of your choice. I am using one by Moonbeams and spiderwebs. You can get it at http://moonbeamsandspiderwebs.blogspot.com/2015/12/mask-82.html

Template is template #731 by Millies PSP Madness. You can get it at http://milliespspmadness.blogspot.com/2015/01/template-731-and-natasha-coming-soon.html

Font of your choice. I am using Kolker Brush ROB

Plugins:
NONE

Let's Begin:
Open your template in psp and shift+D to duplicate.
Close the original.
Delete the following layers:
cr, 9, 3, 1, and background
Make your canvas large enough to work with.
Make layer 2 active and selections select all float and defloat.
Open paper 6 and copy and paste as a new layer.
Selections invert and hit delete.
Selections select none.
Delete layer 2.
Repeat the above steps with layer 8.
Make layer 4 active selections select all float and defloat.
Open paper 4 and copy and paste as a new layer and selections invert and hit delete.
Selections select none.
Repeat the above steps with layer 7.
Make layer 5 active and selections select all float and defloat.
Open paper 2 and copy and paste as a new layer.
Selections invert and hit delete.
Selections select none.
Delete layer 5.
Repeat the above steps with layer 6.
Add a drop shadow of
0 0 100 10 black
to each layer of the tag template.
Open your tube and copy and paste as a new layer and position in the center of the tag template.
Add the same drop shadow.
Open element 30 and copy and paste as a new layer.
Place at the top of the tag template.
Add a slight drop shadow of
1 -1 100 2 black
Open element 24 and copy and paste as a new layer.
Drag under your tube and place along the bottom of the tag template and to the left of your tube.
Duplicate and move this copy to the right.
Add a drop shadow to both.
Open element 16 and copy and paste as a new layer and drag under your tube.
Add noise.
Add a drop shadow.
Open element 10 and copy and paste as a new layer.
Drag under your tube and move down to the bottom and peeking out the left side of your tube.
Add a drop shadow.
Open element 3 and image flip horizontal.
Copy and paste as a new layer and move to the top right corner of the tag template.
Add a drop shadow.
Open paper 4 and copy and paste as a new layer.
Drag to the bottom.
Apply your mask.
Delete the mask layer and merge the group.
Add a drop shadow to the mask.
Add your name.
Add your copyright and licensing information.
Crop and save.