Showing posts with label Bibi's Collection. Show all posts

Wednesday, February 15, 2017

Shot Through The Heart


Shot Through The Heart
Written 2/14/2017
This tutorial is meant purely as a guide. Feel free to use your own choice of tube or scrap kit to make your tag unique.
If you want your tag to look just like mine, then use the same supplies I have used. This tutorial assumes you have a knowledge
of paint shop pro. Any resemblance to any other tag or tutorial is completely coincidental.

Supplies Used:

Tube of your choice. I am using the work of Di Halim. This tube is called Cupid in Pink and you can purchase her at http://scrapsncompany.com/index.php?main_page=product_info&cPath=113_133_166&products_id=25991
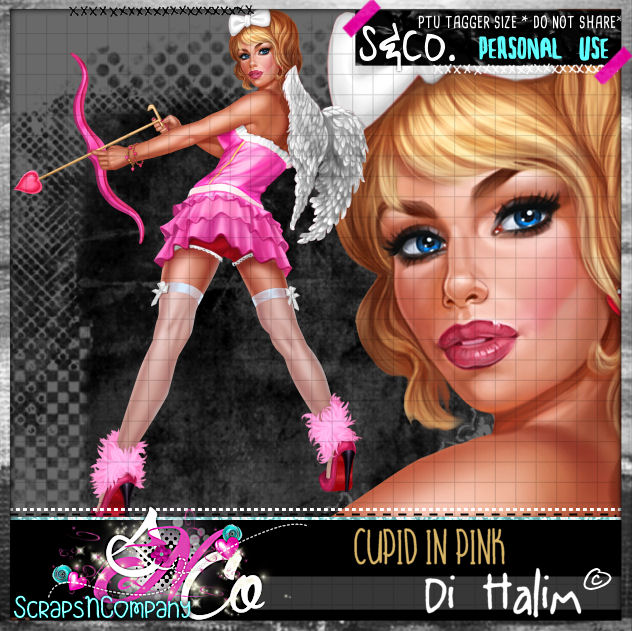
Scrap Kit is by Bibi’s Collection. It is called Cupid In Pink. You can purchase it at http://scrapsncompany.com/index.php?main_page=product_info&products_id=26002

Mask of your choice. I am using one by a member at my forum. This mask was made by Bev. You can find our forum at http://thetaggerslounge.forumotion.com/ Come join us and check out all the goodies and fun!!

Font of your choice. I am using Guarddilla Typeface. This is a PTU font.
Animation is by Divine Intentionz. You can get it at http://divineintentionz.blogspot.com/

Plugins:
NONE

Let's Begin:
Open paper 8 from the kit. Shift+D to duplicate. Close the original. Re-size as needed/wanted. Promote the background layer to a raster layer. Apply the mask of your choice. Delete the mask layer and merge the group. I added a slight drop shadow to the mask layer to help it stand out just a bit more but this is completely up to you.

Open your tube and copy and paste as a new layer. Re-size until she is just slightly larger than the mask layer. Add a drop shadow.

Now let’s dress the tag up with elements from the kit. I will list the elements I used. Feel free to use other elements to make your tag unique. Placement of the elements is completely up to you. If you want your tag to look just like mine, then use my tag for reference.

Elements I used:
8
29
37
39
42
76
121
Add your Name.

Add your copyright and licensing information.

Let’s Get ready to add the animation:

Crop your tag.

Merge all the layers together except the mask layer.

Layers new raster layer and move to the bottom.
Flood fill with white.

Copy the white background and the mask layer to animation shop.
Duplicate the number of frames to match the number of frames in  your animation. In my case its 20.

Drag the first frame of your animation onto the first frame of your tag. Once happy with the placement go back to psp and copy the rest of your tag. Bring into animation shop. Duplicate and drag to the animated tag. Once you are done view your completed animated tag. If you are happy optimize and save.
♥♥♥

Monday, August 15, 2016

Haunted Beauty


Haunted Beauty
Written 8/15/2016

This tutorial is meant purely as a guide. Feel free to use your own choice of tube or scrap kit to make your tag unique. If you want your tag to look just like mine them use the same supplies I have used. This tutorial assumes you have a knowledge of paint shop pro. Any resemblance to any other tag or tutorial is completely coincidental.
Supplies Used:
Tube of your choice. I am using a store exclusive tube for Scraps N Company by Chris Pastel called Fiona 3. You can purchase her at http://scrapsncompany.com/index.php?main_page=product_info&products_id=21567
The awesome matching scrap kit is by Bibi’s Collection. It is also called Fiona 3 and you can purchase it at http://scrapsncompany.com/index.php?main_page=product_info&products_id=21649
Tag template is by Rachel Designs. It is Tag Template 2 and can found at https://racheldesignsblog.wordpress.com/2016/05/05/tag-template-2/
Mask of your choice. I am using one found at the Creative Misfits Blog. I am using the first mask that can be found at http://creativemisfitscreations.blogspot.com/2016/07/new-masks.html
Font of your choice. I am using Cherish. This is a PTU font.
Plugins:
NONE
Drop shadow used throughout:
0 0 85 11.00 black

Let's Begin:
Open the tag template and shift+D to duplicate. Close the original. Remove the following layers Raster 1 and Background. Make your canvas large enough to work with. Merge layers Rectangle 1 and Rectangle 2 together. Merge layers Rectangle 3 and Rectangle 4 together. Now fill all layers with either color, gradient or paper from the kit of your choice. Add a drop shadow to each layer.
Open paper 5 and copy and paste as a new layer and drag to the bottom. Apply the mask of your choice. Delete the mask layer and merge the group. Add a drop shadow to the mask layer.
Open your tube and re-size as needed. Copy and paste as a new layer. Move to the far left. Add a drop shadow.
Now let’s dress the tag up with elements from the kit. I will list the elements I used. Feel free to use other elements to make your tag unique. Placement of the elements is completely up to you. If you want your tag to look just like mine then use my tag for reference.
Elements I used:
3
6
9
18
39
47
55
59
66
78
Add your name.
Add your copyright and licensing information.
Crop and save.


Thursday, June 16, 2016

Bronzed Beauty


Bronzed Beauty
Written 6/14/2016
This tutorial is meant purely as a guide. Feel free to use your own choice of tube or scrap kit to  make your tag unique. If you want your tag to look just like mine them use the same supplies I have used. This tutorial assumes you have a knowledge of paint shop pro. Any resemblance to any other tag or tutorial is completely coincidental.
Supplies Used:
Tube of your choice. I am using a tube called Lili by Souldesigner. You can purchase this tube at http://scrapsncompany.com/index.php?main_page=product_info&cPath=113_434&products_id=20170
Beautiful matching scrap kit by Bibi’s Collection. You can purchase it at http://scrapsncompany.com/index.php?main_page=product_info&products_id=20169
Mask of your choice. I am using mask #5 by Allisons Addictions. You can get it at http://allisonsaddictions.blogspot.com/
Font of your choice. I am using LillyBelle. You can download it at http://www.dafont.com/lillybelle.font
Plugins:
NONE
Drop shadow used throughout:
0 0 85 11.00 dark brown

Let's Begin:
Open paper 7 and shift+D to duplicate. Close the original. Promote background layer to a raster layer. Re-size as needed. Make your canvas large enough to work with. Apply the mask of your choice. Delete the mask layer and merge the group. Add a drop shadow.
Open element 5 and re-size. Copy and paste as a new layer and place in the lower left of the mask area. Add a drop shadow.
Open your tube and re-size. Copy and paste as a new layer and place to the right of the car. Add a drop shadow.
Open element 41 and image flip horizontal. Copy and paste as a new layer and drag under the car layer. Move so it is behind the car and the tube. Add a drop shadow.
Open element 55 and re-size so it fits nicely within the masked area. Copy and paste as a new layer and move to the bottom of the tag.
Open element 26 and re-size. Image flip horizontal. Copy and paste as a new layer and place on the roof of the car. Add a drop shadow.
Open element 29 and copy and paste as a new layer and re-size. Move behind the car. Duplicate a few times and place randomly behind the car and your tube. Add a drop shadow to each one.
Open element 8 and re-size. Copy and paste as a new layer at the top and place across your tag.
Add your name.
Add your copyright and licensing information.
Crop and save.


Tuesday, May 17, 2016

Avast! Me Hearty!


Avast! Me Hearty!
Written 5/17/2016
This tutorial is meant purely as a guide. Feel free to use your own choice of tube and scrap kit to make your tag unique. If you want your tag to look just like mine then use the same supplies I have used. This tutorial assumes you have knowledge of paint shop pro. Any resemblance to any other tag or tutorial is purely coincidental.
Supplies Used:
Tube is a commission by Lady Mishka for Scraps N Company called Pirate Joey. You can purchase her at http://scrapsncompany.com/index.php?main_page=product_info&cPath=490_554&products_id=19815
Scrap kit is an awesome kit by Bibi’s Collection. It is called Be My Pirate and you can purchase it at http://scrapsncompany.com/index.php?main_page=product_info&products_id=19814
Mask of your choice. I am using mask 1 from Vix first set of big masks. You can download them at http://vixpsp.blogspot.com/2011/03/new-masks-for-2011-vix-big-set-1.html
Font of your choice. I am using Zombis Nigth. This is a PTU font.
Plugins:
NONE
Drop shadow used throughout:
0 0 50 12.00 black
Let’s Begin:
Open paper 6 and shift+D to duplicate. Close the original. Promote the background layer to a raster layer. Re-size if you wish. Make your canvas large enough to give you plenty of room to work with. Apply the mask of your choice. Delete the mask layer and merge the group.
Open element 74 and re-size by 75%. Copy and paste as a new layer and place going from top middle to bottom right. Add a sharp drop shadow to give it a 3D look.
Open element 137 and re-size by 50%. Copy and paste as a new layer and move to the bottom of the mask area. Add a drop shadow.
Open element 114 and re-size by 50% and then again by 65%. Copy and paste as a new layer and drag under the sand layer. Move to the far left so the front of the boat is hidden by some of the sand. Image flip horizontal. Add a drop shadow.
Open element 116 and re-size by 50%. Copy and paste as a new layer and drag under the sand layer. Move to the bottom along the bottom of the boat but above the sand. Image flip horizontal.
Open your tube and copy and paste as a new layer. Re-size. Move to the far right side. Add a drop shadow.
Now lets dress it up with some of the elements from this kit. I will list the elements I used. Feel free to use any elements that I have not used if you wish. Placement is completely up to you. If you want your tag to look like mine then use my tag for reference.
Elements used:
6
19
30
33
61
97
142
Add your name.
Add your copyright and licensing information,
Crop and save.


Thursday, May 5, 2016

Eyes Of A Child


Eyes Of A Child
Written 5/5/2016
This tutorial is meant purely as a guide. Feel free to make your tag unique by using your own choice of tube and scrap kit. If you want your tag to look just like mine then use the same supplies I have used. This tutorial assumes you have a knowledge of paint shop pro. Any resemblance to any other tag or tutorial is purely coincidental.

Supplies Used:
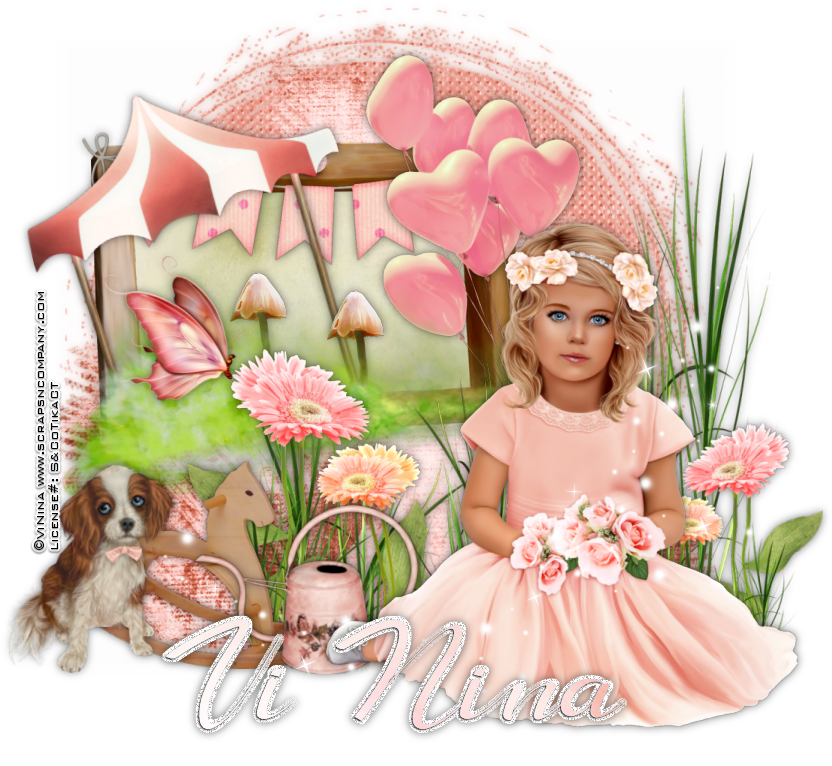
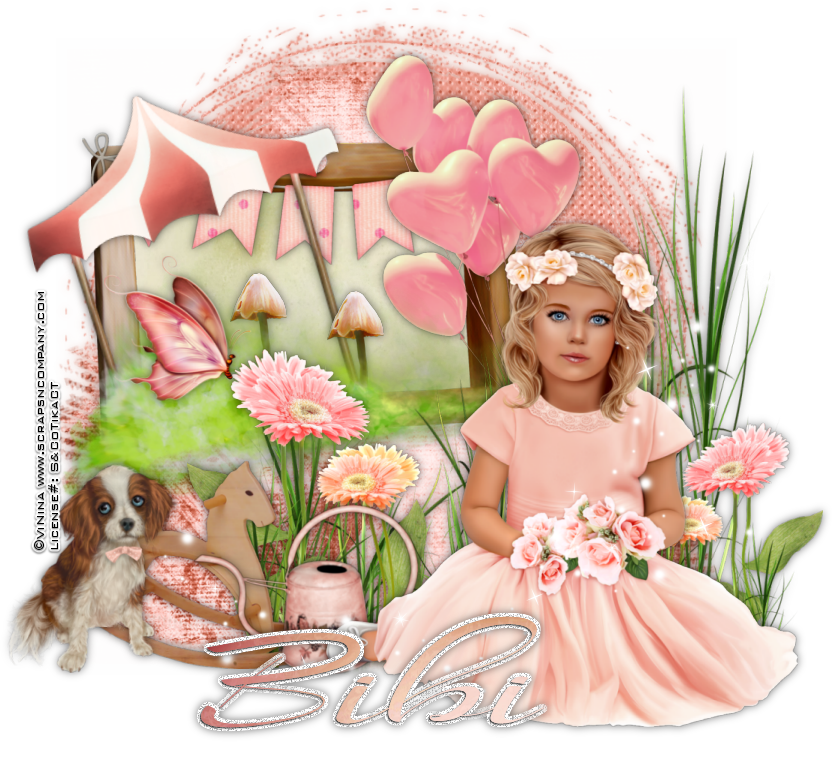
Tube by Vi Nina. She is called Rosie and you can purchase her at http://scrapsncompany.com/index.php?main_page=product_info&cPath=113_294&products_id=19405
The beautiful matching scrap kit is by Bibi’s Collection. It is called Mama. You can purchase it at http://scrapsncompany.com/index.php?main_page=product_info&products_id=19370
Font of your choice. I am using LongShine Script. This is a PTU font.
Plugins:
NONE
Drop shadow used throughout:
0 0 55 13.00 black

Let’s Begin:
Open element 118 and shift+D to duplicate. Close the original.
We are going to use this as the base of the tag so if you want to re-size then feel free.
Make your canvas large enough to work with.
I like to get my tube on the canvas/tag then I can build around it so at this time open your tube and copy and paste as a new layer. Re-size as needed. Place in the lower right corner. Add a drop shadow to the tube and the background piece. I changed the color of the drop shadow on the background to the darker color in the actual piece because the black didn’t look good but this is completely up to you.
Now let’s begin to build our tag using the awesome elements in this kit.
Open element 98 and copy and paste as a new layer. Re-size so it is slightly smaller than your tube. Drag this layer under the tube layer and place to the left and up a bit of the tube.
Using your magic wand select the inside of the frame and go to selections modify and expand by 3.
Open paper 10 and copy and paste as a new layer. Drag under the frame. Selections invert and hit delete. Selections select none.
Open element 105 and image flip horizontal. This way it will be leaning to the left instead of the right. Copy and paste as a new layer. Re-size so it is just slightly larger than the frame. You want it hanging out of the frame and to give it a 3D type of look as if it is popping out of the frame. I used my “pick” tool and tilted it to the left a little more but this is completely up to you. You could also use the image free rotate within psp if you choose. If you do use the second method do not forget to sharpen. Erase any bits hanging out of the frame that you do not want. Once you are happy then add a drop shadow.
Open element 59 and re-size so it fits nicely from one side of the frame to the other. Copy and paste as a new layer and place at the top of the frame and drag under the tent and balloons layers. Add a drop shadow.
Open element 42 and re-size. Copy and paste as a new layer and drag under your tube layer. Place so it is at the top left of your tube and coming out in front of the right side of the frame. Add a drop shadow.
Open element 77 and re-size so it is about the same size as the frame across the bottom. Copy and paste as a new layer. Use either your “pick” tool or image free rotate method and rotate to the left so it lines up with the bottom of the frame. Place along the bottom of the frame. Add a drop shadow.
Open element 78 and copy and re-size so it is small enough to fit within the frame. Copy and paste as a new layer. Drag under the grass. I duplicated this layer so I had 2 and just placed them within the frame area near the tent. Add a drop shadow when done.
Open element 72 and re-size so it is just larger than your tube. Copy and paste as a new layer and drag under your tube. Place behind your tube so it appears she is sitting in the grass. Add a drop shadow.
Open element 61 and re-size. Copy and paste as a new layer. Place on the bottom far left. Drag behind your tube. Add a drop shadow.
Open element 37 and re-size. Copy and paste as a new layer. Drag under your tube and place to the bottom left of the tube between the tube and rocking horse. Add a drop shadow.
Open element 28 and image flip horizontal so it is facing to the right. Re-size and then copy and paste as a new layer. Place so it is near the largest flower to the left of your tube. Add a drop shadow.
Open element 7 and re-size. Copy and paste as a new layer. Place to the far left of the rocking horse. Add a drop shadow.
Open element 117 and copy and paste as a new layer at the top. Place to the far right so it crosses over your tube.
Add your name.
Add your copyright and licensing information.
Crop and save.

Wednesday, April 20, 2016

Play Like A Pirate


Play Like A Pirate
written 4/19/2016

This tutorial is meant purely as a guide. Feel free to make your tag unique by using your own choice of tube and scrap kit. If you want your tag to look just like mine then use the same supplies I have used. This tutorial assumes you have knowledge of paint shop pro. Any resemblance to any other tutorial or tag is purely coincidental.

Supplies Used:


Awesome matching scrap kit by Bibi's Collection. You can purchase it at http://scrapsncompany.com/index.php?main_page=product_info&products_id=19180

Tag template # 153 by Toxic Desirez. You can get it at http://toxicdesirez.blogspot.com

Font of your choice. I am using Black Sam's Gold. You can download it at http://www.fontspace.com/redruths-basement-software/black-sams-gold

Plugins:
4 4 40 10.00 black

Drop shadow used throughout:


Let's Begin:
Open the tag template and shift+D to duplicate.
Close the original.
Delete the following layers from the template:
credits, stars, words, dotted lines2, and background.
Make your canvas large enough to work with.
Merge the 2 glitter rectangle layers together.
Merge the 2 rectangle layers together.
Make the rectangle layer active.
Selections select all float and defloat.
Layers new raster layer.
Open paper 9 and copy and paste into selection.
Selections select none.
Delete the original rectangle layer.
Merge the 2 thin rectangle layers together.
Selections select all float and defloat
Open paper 7 and copy and paste as a new layer.
Selection invert and hit delete.
Selections select none.
Delete the original layer.
Make the oval layer active.
Selections select all float and defloat.
Layers new raster layer.
Open paper 4 and copy and paste into selection.
Selections select none.
Delete the original oval layer.
Make the rectangle layer active.
Selections select all float and defloat.
Layers new raster layer.
Open paper 6 and copy and paste into selection.
Selections select none.
Delete the original rectangle layer.
At this time go ahead and add a drop shadow to all of the layers.
Open element 19 and copy and paste as a new layer.
Re-size so it fits nicely within your tag.
Add a drop shadow.
Open your tube.
Copy and paste as a new layer.
Re-size.
Place so it is standing in the sand.
Add a drop shadow.
Open element 43 and copy and paste as a new layer and drag under your tube.
Re-size.
Move to the far right side so your tube is kind of standing in front of it.
Add a drop shadow.
Open element 46 and copy and paste as a new layer.
Re-size.
Drag down under the sand.
Move to the far left side.
Add a drop shadow.
Open element 18 and copy and paste as a new layer.
Re-size and move to the far right side in front of the bottom of the tree.
Add a drop shadow.
Open element 20 and copy and paste as a new layer.
Re-size.
Move to the top left so it looks to be behind the boat.
Add a drop shadow.
Open element 22 and copy and paste as a new layer.
Re-size.
Move to the bottom right in front of the chest.
Add a drop shadow.
Open element 76 and copy and paste as a new layer.
Using your pick tool rotate it so it is on the same angle as the left side of the sand.
Move to that side and position so it is laying in the sand.
Add a drop shadow.
Open element 83 and copy and paste as a new layer.
Re-size.
Move to the far left down in front of the bottle.
Add a drop shadow.
Add your name.
Add your copyright and licensing information.
Crop and save.


Thursday, April 14, 2016

The Final Victory


The Final Victory
written 4/14/16

This tutorial is meant purely as a guide. Feel free to make your tag unique by using your own choice of tube and scrap kit. If you want your tag to look just like mine then use the same supplies I have used. This tutorial assumes you have knowledge of paint shop pro. Any resemblance to any other tag or tutorial is purely coincidental.

Supplies Used:


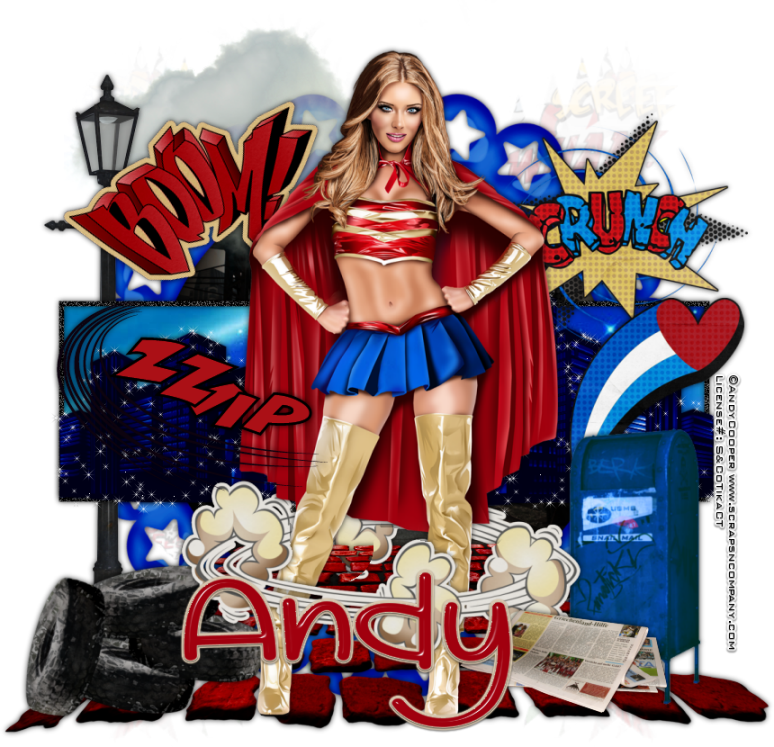
Awesome matching scrap kit by Bibi's Collection. You can purchase it at http://scrapsncompany.com/index.php?main_page=product_info&products_id=18914

Mask of your choice. I am using mask 102 by Vix. You can download her awesome masks at http://www.freewebs.com/vixpsp/

Font of your choice. I am using Lazy Spring Day. You can download it at http://www.dafont.com/de/lazy-spring-day.font

Plugins:
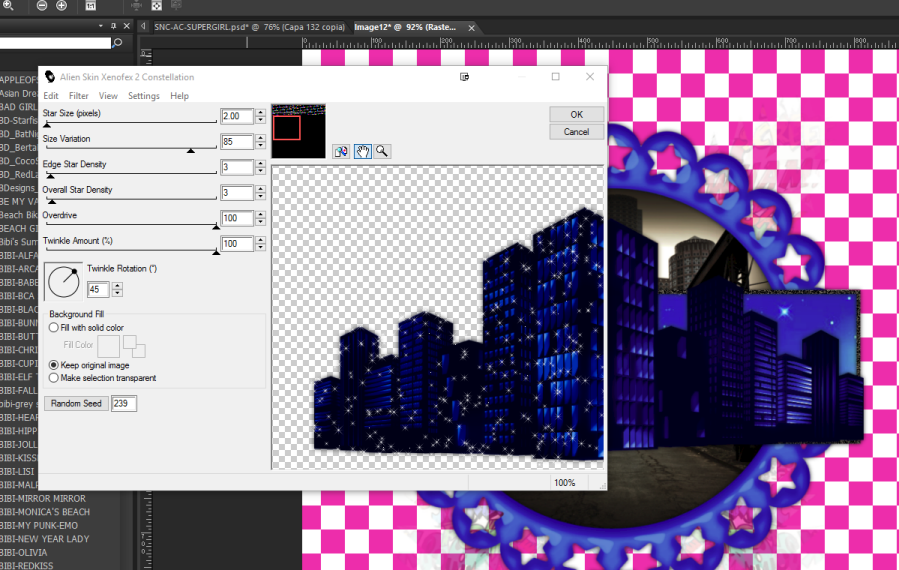
Alienskin Xenofex 2 Constellation.

Drop shadow used throughout:
0 0 75 9.00 black

Let's Begin:
Open element 25 and shift + D to duplicate.
Close the original.
Re-size until you are happy. This will be the base of your tag.
Make your canvas large enough to give you plenty of room to work with.
Open paper 20 and copy and paste as a new layer.
Drag under the frame.
Re-size if needed.
Apply the mask of your choice.
Delete the mask layer and merge the group.
I chose to duplicate the mask layer and image flip horizontal but this is completely up to you.
Using your magic wand select the inside of the frame.
Selections modify and expand by 4.
Layers new raster layer and drag between the frame and your mask.
Open paper 13 and copy and paste into selection.
Selections select none.
Add a drop shadow to the frame.
Using your preset rectangle shape.
Turn off your background color and set your foreground color to black.
Change the width in the settings of the preset shape to 6.50
Draw out a rectangle in the center of the frame and make it overlap outside of the frame on both sides.
Convert to raster layer.
Using your magic wand select the inside of this rectangle.
Selections modify and expand by 1.
Layers new raster layer and drag under the rectangle.
Open paper 8 and copy and paste into selection.
Selection select none.
Add noise to the frame at 100% monochrome and uniform.
Open element 78 and copy and paste as a new layer.
Re-size so it is the same size as your rectangle.
Move so it lines up with the bottom and sides of this frame.
Add a drop shadow.
Apply the Constellation plugin with the following settings:

Merge together the buildings, the rectangle frame and its fill paper together.
Open your tube and copy and paste as a new layer.
Place in the center of the tag.
Re-size so she is just larger than the tag.
Add a drop shadow.
Now lets dress it up with some of the elements from the kit.
I will list the elements I used.
Placement is completely up to you.
Feel free to use other elements that I didn't use.
Elements I used:
1
6
16
86
104
109
111
122
126
129
130 ( I placed this one so it looked to be wrapped around her legs)
Add a drop shadow to all of the elements.
Add your name.
Add your copyright and licensing information.
Crop and save.


Thursday, March 31, 2016

My Emo Dream


My Emo Dream
written 3/31/2016

This tutorial is meant purely as a guide. Feel free to make your tag unique by using your own choice of tube and scrap kit. If you want your tag to look just like mine then use the same supplies that I have used. This tutorial assumes you have a knowledge of paint shop pro. Any resemblance to any other tutorial or tag is purely coincidental.

Supplies Used:

Tube is an exclusive commission by Lady Mishka. You can purchase her at http://scrapsncompany.com/index.php?main_page=product_info&cPath=490_554&products_id=18667

Lovely matching scrap kit by Bibi's Collection. You can purchase it at http://scrapsncompany.com/index.php?main_page=product_info&products_id=18663

Font of your choice. I am using Pocket Monk. You can download it at http://www.fontspace.com/chequered-ink/pocket-monk

Plugins:
Penta Dot and Cross

Drop shadow used throughout:
2 -2 100 2.00 black

Let's Begin:
Open element 51 and shift+D to duplicate.
Close the original.
Re-size by 75%.
Make your canvas large enough to work with.
Using your magic wand select the inside of the frame.
Selections modify and expand by 10.
Open paper 4 and copy and paste as a new layer.
Drag under the frame.
Selections invert and hit delete.
Selections invert again.
Open your tube and copy and paste as a new layer.
Position her face within the frame.
Selections invert and hit delete.
Selections select none.
Change the properties of the layer to luminance legacy.
Apply the Penta Dot and Cross plugin .. change the amount to 70.
Leave the other settings as default.
Add a drop shadow to both the tube and the frame.
Open element 48.
Copy and paste as a new layer.
Drag to the bottom.
Place in the bottom right corner.
Add a drop shadow.
Duplicate a few times and place all around the frame.
Open element 58 and re-size by 50% and then again by 75%.
Copy and paste as a new layer.
Drag down to just above the blue flowers.
Place around the frame.
Duplicate several times and scatter them all around.
Add a drop shadow to all of them.
Open your tube again and copy and paste as a new layer.
Re-size so she is appropriately sized for your tag.
Add a drop shadow.
Open element 92 and copy and paste as a new layer.
Re-size by 75% 2x.
Move to the bottom center of the tag.
Add a drop shadow.
Open element 97 and re-size by 50%.
Copy and paste as a new layer.
Drag down to just above the frame.
Place on the right side.
Add a drop shadow.
Open element 96 and re-size by 50% 2x.
Copy and paste as a new layer at the top.
Place on the far right of the wordart.
Add a drop shadow.
Open element 40 and re-size by 75% 2x.
Drag under your tube.
Move to the bottom so it looks like the tube is leaning against the pillows.
Add a drop shadow.
Add your name.
Add your copyright and licensing information.
Crop and save.


Saturday, March 19, 2016

Countryside Cutie


Countryside Cutie
written 3/19/2016

This tutorial is meant purely as a guide. Feel free to make your tag unique by using your own choice of tube and scrap kit. If you want your tag to look just like mine then use the same supplies that I have used. This tutorial assumes you have a knowledge of paint shop pro. Any resemblance to any other tag or tutorial is purely coincidental.

Supplies Used:


Beautiful matching scrap kit by Bibi's Collection. You can purchase it at http://scrapsncompany.com/index.php?main_page=product_info&products_id=18361

Font of your choice. I am using Swistblnk Duwhoers Brush.

Plugins:
NONE

Drop shadow used throughout
1 -1 75 5.00 black

Let's Begin:
Open element 8 and shift+D to duplicate.
Close the original.
Make your canvas large enough to work with.
Re-size this element if you wish but this will be the focal point of your tag.
Move the window element up to the top portion of your tag.
Using your magic wand select the inside of the window areas.
Selections modify and expand by 5.
Layers new raster layer and drag under the window.
Open paper 17 and copy and paste into selection.
Selections select none.
Add a drop shadow to the window.
Open element 42 and copy and paste as a new layer.
Drag under the window and then re-size so it will fit within the framed window area.
Add a drop shadow.
Open your tube and copy and paste as a new layer.
Place on the far right side of the window.
Re-size so she is just larger than the window.
Add a drop shadow.
Open element 133 and copy and paste as a new layer.
I chose to flip mine horizontal so the larger area was covering her cut off legs but this is completely up to you.
Re-size as needed.
Place along the bottom of the tag.
Open element 90 and copy and paste as a new layer.
Re-size as needed.
Move to the far left side of the tag at the bottom.
Add a drop shadow.
Open element 51 and copy and paste as a new layer.
Re-size as needed.
Place along the bottom of your tag in the grassy area.
Duplicate and place several there to fill in areas and make it look nice.
Add a drop shadow to each one when done.
Open element 84 and copy and paste as a new layer.
Re-size as needed.
Place along the bottom of your tag.
Duplicate a few times and place around.
Add a drop shadow to each when you are done.
Open element 18 and copy and paste as a new layer.
Drag to the bottom.
Place along the top so it is peeking out from behind the window.
Re-size as needed.
I duplicated and placed 2 up there.
Add a drop shadow.
Open element 21 and copy and paste as a new layer.
Re-size as needed and place along the bottom of the tag.
Duplicate if you wish.
Add a drop shadow.
Open element 50 and copy and paste as a new layer.
Re-size as needed.
Place so it is sitting on the edge of the water trough.
Add a drop shadow.
Add your name.
Add your copyright and licensing information.


Saturday, January 30, 2016

Rock Grease Love


Rock, Grease and Love
written 1/29/2016

This tutorial is meant purely as a guide. Feel free to make your tag unique by using your own choice of tube and scrap kit. If you want your tag to look just like mine then use the same supplies that I have used.

Supplies used:

Tube by Souldesigner. It is called Olivia and you can purchase it at http://scrapsncompany.com/index.php?main_page=product_info&cPath=113_434&products_id=16907

Matching scrap kit by Bibi's Collection. You can purchase it at http://scrapsncompany.com/index.php?main_page=product_info&products_id=16914

Tag Template by Millies PSP Madness. You can download it at http://milliespspmadness.blogspot.com/2015/11/template-791-and-tag-w-nocturne-and.html

Font of your choice. I am using Lounge Bait. You can download it at http://www.fontspace.com/font-a-licious/lounge-bait

Plugins:
Eye Candy 4000 Gradient Glow. (Optional)

Let's Begin:

Open your tag template and shift+D to duplicate.
Close the original.
Remove the following layers cr, 10, 9, 8,7,6 & background.
Make your canvas large enough to work with.
Start at the bottom of the canvas and fill each of your layers with a paper from the kit.
The papers and which layer you put them on are completely up to you.
If you want your tag to look just like mine then use my tag for reference of where I placed each paper.
After each layer was filled I deleted the original layers of the template.
Then I added a border to each layer using paper 1 but this is completely up to you.
Add a drop shadow to each layer.
Open element 65 and copy and paste as a new layer.
Drag to the bottom. Position so it can be seen around the template.
Add a drop shadow.
Open element 66 and copy and paste as a new layer drag to just above the scatter.
Re-size so it fits over the scatter.
Add a drop shadow.
Open element 38 and copy and paste as a new layer at the top.
Position in the center of the tag template.
Add a drop shadow.
Open your tube and copy and paste as a new layer.
Re-size so it is within proportion of the rest of your tag.
Position on the tag where you wish.
Add a drop shadow.
Open element 51 and copy and paste as a new layer and move down to just below the last layer in your template.
Re-size.
Place under your tubes feet.
Open element 20.
Copy and paste as a new layer.
Re-size by 60% 2x and move to top left behind the car.
Add a drop shadow.
Open element 1 and copy and paste as a new layer.
Re-size by 60% and then again by 75%.
Move over to the far left behind the car.
Add a drop shadow.
Open element 29 and copy and paste as a new layer.
Re-size so it will fit behind the juke box.
Place to the far left.
Add a drop shadow.
Open element 43 and copy and paste as a new layer and move to the top right of the juke box.
I added a white gradient glow around mine to help them stand out a bit.
This is completely up to you.
Add a drop shadow.
Repeat with element 72.
Open element 40 and copy and paste as a new layer.
Re-size by 60% 2x.
Move to the top center of the tag.
Add a drop shadow.
Open element 35 and copy and paste as a new layer.
Drag behind your tube but in front of the car.
Place along the bottom of the car.
Add a drop shadow.
Open element 55 and copy and paste as a new layer.
Place in front of the piano keys.
Add your name.
Add your copyright and licensing information.
Crop and save.

This tutorial was created by Tika on January 29, 2016
Any resemblance to another tag or tutorial is purely coincidental.