Showing posts with label Rieneke Desgins. Show all posts

Wednesday, July 20, 2016

Down The Rabbit Hole #2


Down the Rabbit Hole
Written 7/19/2016
This tutorial is meant purely as a guide. Feel free to use your own choice of tube or scrap kit to make your tag unique. If you want your tag to look just like mine them use the same supplies I have used. This tutorial assumes you have a knowledge of paint shop pro. Any resemblance to any other tag or tutorial is completely coincidental.

Supplies Used:
Tube of your choice. I am using a store exclusive for Scraps N Company by Lady Mishka. It is called Cute Alice 6. You can purchase this tube at http://scrapsncompany.com/index.php?main_page=product_info&cPath=490_554&products_id=20749
Scrap Kit is called Cute Alice 6 and is by Rieneke Designs. You can purchase it at http://scrapsncompany.com/index.php?main_page=product_info&products_id=20802
Mask of your choice. I am using mask #178 by Vix. You can get her masks at http://www.freewebs.com/vixpsp/
Font of your choice. I am using Doodlesack. This is a PTU font.
Plugins:
NONE
Drop shadow used throughout:
0 0 100 12.50 black

Let's Begin:
Open element 60 and shift+D to duplicate. Close the original. Re-size the frame by 85%. Make your canvas large enough to work with.
Open paper 8 and copy and paste as a new layer. Move to the bottom of the layer palette. Apply the mask of your choice. Delete the mask layer and merge the group.
Using your magic wand select the inside of the frame and go to selections modify and expand by 5. Layers new raster layer and drag under the frame layer. Open paper 2 and copy and paste into selection. Selections select none. Add a drop shadow to the frame.
Open your tube and copy and paste as a new layer. Move to the right side of the frame. Re-size by 75%. Add a drop shadow to the tube.
Now let’s dress the tag up with elements from the kit. I will list the elements I used. Feel free to use other elements to make your tag unique. Placement of the elements is completely up to you. If you want your tag to look just like mine then use my tag for reference.
Elements I used:
1
3
8
15
34
47
49
Add your name.
Add your copyright and licensing information.

Crop and save.


Tuesday, May 24, 2016

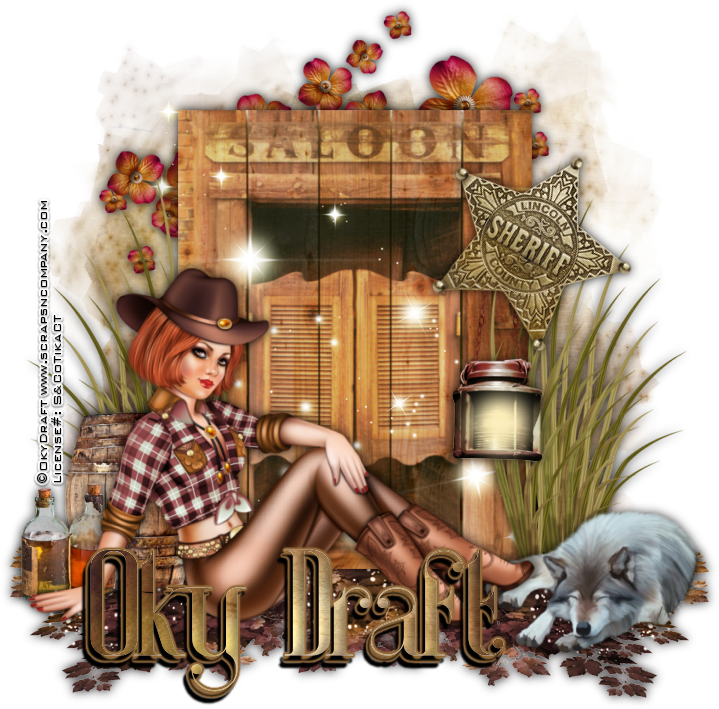
On The Range


On the Range
Written 5/24/2016
This tutorial is meant purely as a guide. Feel free to make your tag unique by using your own choice of tube and scrap kit. If you want your tag to look just like mine then use the same supplies I have used. This tutorial assumes you have a knowledge of paint shop pro. Any resemblance to any other tag or tutorial is purely coincidental.
Supplies Used:
Tube is by Oky Draft. It is called Vaquerita 1 and you can purchase her at http://scrapsncompany.com/index.php?main_page=product_info&cPath=423&products_id=19916
Matching scrap kit is by Rieneke Designs and is also called Vaquerita 1 and can be purchased at http://scrapsncompany.com/index.php?main_page=product_info&products_id=19924&zenid=vgh9s05g50suodg37qtvf3fr60
Mask of your choice. I am using vix big mask 5 from this set that can be downloaded at http://vixpsp.blogspot.com/2011/03/new-masks-for-2011-vix-big-set-1.html
Font of your choice. I am using Amira Beauty. This is a PTU font.
Plugins:
NONE
Drop shadow used throughout:
0 0 85 15.00 black
Let’s Begin:
Open paper 9 and shift+D to duplicate. Close the original. Promote your background layer to a raster layer. Re-size if you wish. Make your canvas large enough to work with. Apply the mask of your choice. Delete the mask layer and merge the group.
Open element 9 and re-size by 85% and then again by 90%. Copy and paste as a new layer and place in the center of the mask. Add a drop shadow.
Open element 67 and copy and paste as a new layer. Drag under the saloon. Move to the bottom left so it is peeking out of the bottom and will give enough room for your tube to sit on. Duplicate. Image flip horizontal this copy. Move to the far right side. Merge these 2 layers together. Add a drop shadow.
Open element 46 and re-size by 75%. Copy and paste as a new layer and place on the far right side of the saloon. Duplicate. Image flip horizontal this copy and move to the far left side. Merge these 2 layers together and add a drop shadow.
At this time lets get your tube added so you can see how you want to position the remaining elements that you add. Open your tube and copy and paste as a new layer. Re-size as need to make her fit nicely. Move to the bottom of the tag to sit on the leaves. I placed mine more to the left side but this is completely up to you and whatever tube you choose to use. Add a drop shadow to your tube once you are done.
Now lets add some more of the awesome elements from this great kit. I will list the elements I use and placement will be up to you depending on the tube you use I suppose. Also feel free to use elements I haven’t used. This is where you get creative and make your tag unique. Once you are done add a drop shadow to all the elements.
Elements I used:
6
10
29
33
37
51
66
Add your name. 

Add your copyright and licensing information.

Crop and save.