Showing posts with label Animated. Show all posts

Thursday, January 19, 2023

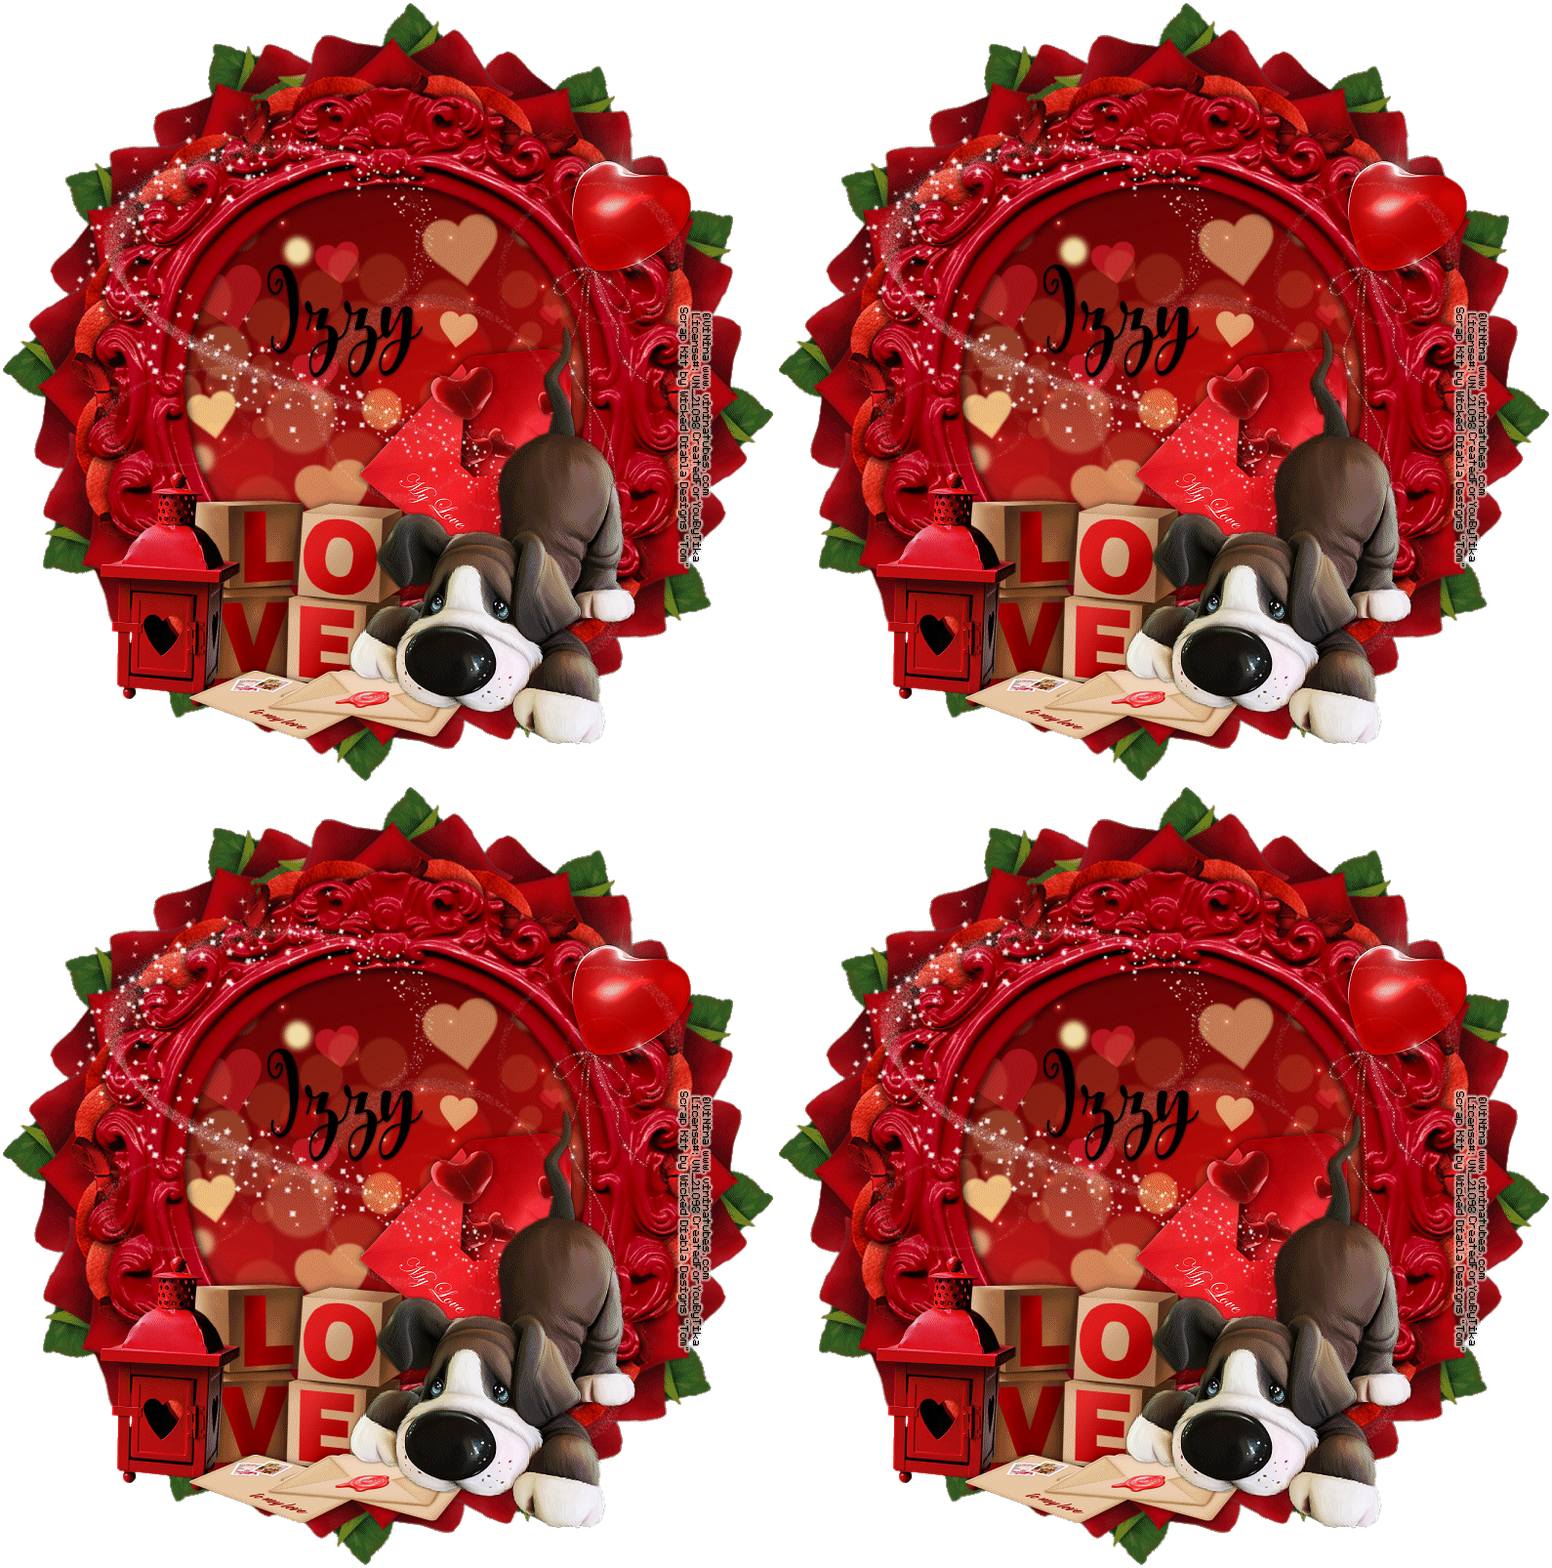
New CT Tag for Wicked Diabla Designs - Tom

New CT Tag for Wicked Diabla Designs

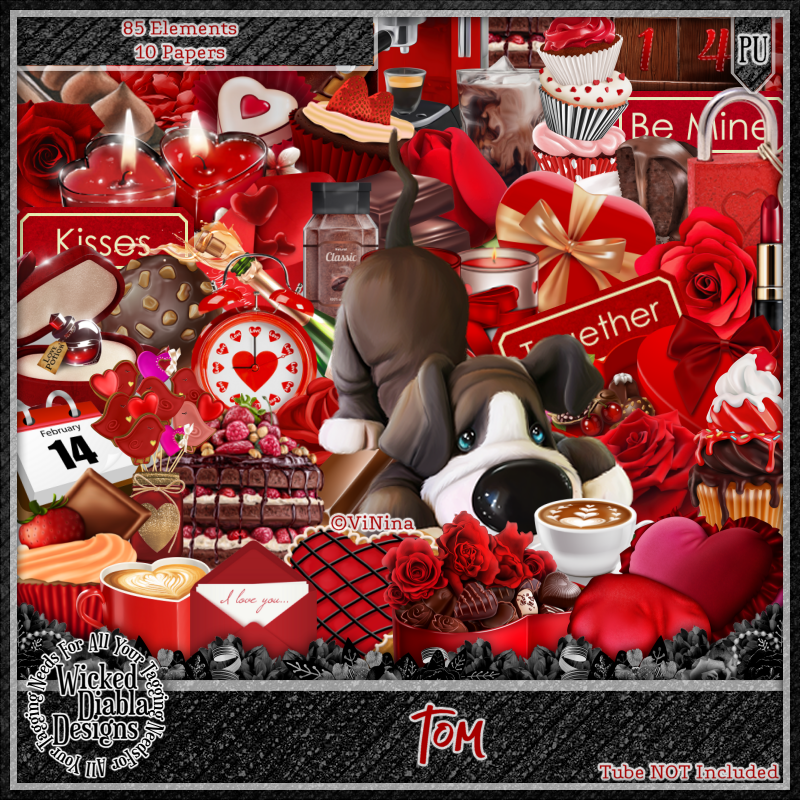
Scrap kit is by Wicked Diabla Designs. It is called "Tom".

This kit is absolutely adorable. So many fun fun elements to create gorgeous and cute Valentines tags or any other type of romantic type tags. The elements and colors are so vibrant and fun!
You can purchase this kit at https://wickeddiabladesigns.com/index.php...
The kit is $1.00 right now!!! You can't beat that deal! Go snag it while you can get it at a great price!!!

The tube I used is by ViNina. It is also called "Tom"
You can get this tube at https://vininatubes.com/


Sunday, January 8, 2023

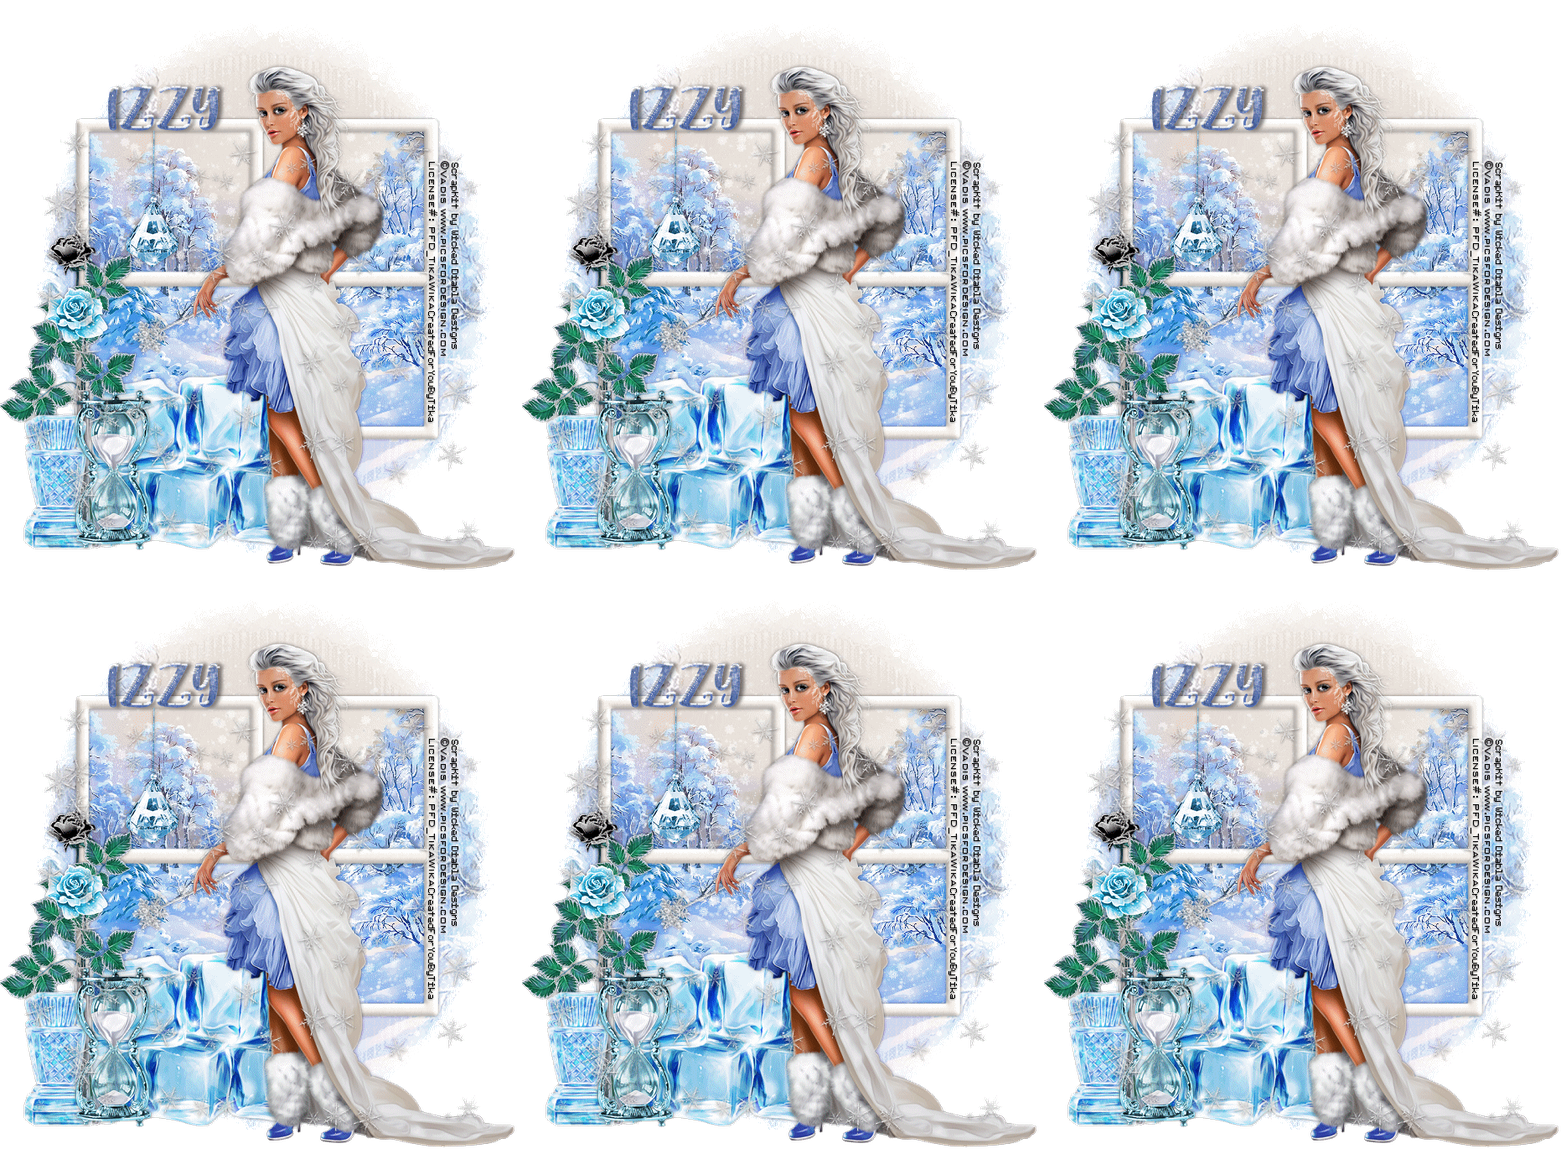
Winters Chill


Winters Chill

Written 1/5/2023

This tutorial is meant purely as a guide. Feel free to use your own choice of tube or scrap kit to make your tag unique.

If you want your tag to look just like mine, then use the same supplies I have used. This tutorial assumes you have a knowledge

of paint shop pro. Any resemblance to any other tag or tutorial is completely coincidental.


Supplies Used:

Tube of your choice. I am using a tube by Vadis. You can purchase this tube at http://picsfordesign.com

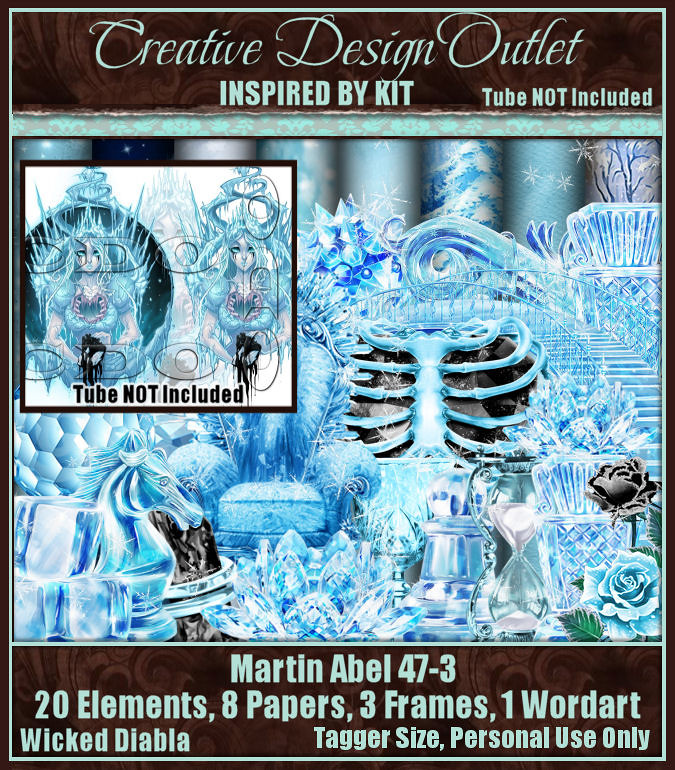
Scrap Kit is by Wicked Diabla Designs. It is called ScrapWD_IB-MartinAbel-47-3. You can purchase this kit at www.cdoestore.com


Mask of your choice. I am using a great mask by Vix. I mean who doesn’t love Vix  masks right?? This is her MaskHalloween2012-8NotHallow mask. You can find her awesome masks at https://vixpsp.blogspot.com/

Font of your choice. I am using Baby Girl Display.

Animation of your choice. I am using a heavy snowfall animation by Simone at Scrappy Bit Of Fun. It is part of her Winter Season 2020 animation pack. You can find all of her awesome animations at http://scrappybitoffun.blogspot.ca

Plugins: (plugins are most generally optional)

NONE


Let's Begin:

Open a blank canvas large enough to give you plenty of room to work with. You can crop and resize your tag when you are done if you wish.

Flood fill the canvas with white. I like to do this because it allows me to see everyone on the canvas as I am creating my tag. I delete this layer when I am all done.

Open frame 2 from the kit and copy and paste as a new layer on what we will call your working canvas from here on out. Resize the frame so that is the size you wish. This will be your backdrop for your tag.

Using your magic wand select the inside of the 4 sections of the window frame. Selections modify expand and expand by 5.

Layers new raster layer and drag under  your frame.

Open paper 1 from the kit and copy and paste into selection. Selections select none.

You should still have this paper in your clipboard so go ahead and paste it again and drag to the bottom. Resize if you wish.

Apply your mask. Delete the mask layer and merge the group.

Open your tube and copy and paste as a new layer. Resize the tube to  your liking. Position in front of the window frame where you like. Mine is not quite center but almost.

Now let’s dress the tag up with elements from the kit. I will list the elements I used. Feel free to use other elements to make your tag unique. Placement of the elements is completely up to you. If you want your tag to look just like mine, then use my tag for reference.

Elements I used:

2

4

6

9

19

22

Add your name. Add your copyright and licensing information.

Crop and resize if you wish.

Now lets get ready to animate.

Open animation shop and then open the animation you are going to use.

Resize if you need to.

Select all frames. Take note of the amount of frames in the animation.

Now back to psp delete the white layer.

Merge together all of the layers EXCEPT the mask layer and the paper layer that fills the window frame.

Now you should have 3 layers.

Hide the layer that you just created merging all of the elements and tube together.

Edit copy merged.

Open animation shop and right click and paste as a new animation.

This should be your mask layer and the paper layer.

Duplicate the frames to match the amount of frames in your animation.

Select all frames in your tag.

Grab frame #1 from the animation and drag it onto frame #1 of the tag. Do not let go until you get it into place where you want it. If you accidentally misplace it you can undo and do the same steps over again until you get it right where you want it.

Once that is all in place go back to psp and copy the layer with your tube and all of the elements on it.

Back to animation shop. Right click and paste as a new animation. Duplicate to match the amount of frames in your animated tag. Select all frames.

Again drag frame #1 onto frame #1 of the animated tag.

Once that is all in place then view your animation to make sure you are happy with everything.

Optimize your tag and save.

Thanks for trying my tutorial.

♥♥♥


Saturday, June 18, 2016

Wings Of Enchantment


Wings Of Enchantment
Written 6/18/2016
This tutorial is meant purely as a guide. Feel free to use your own choice of tube or scrap kit to make your tag unique. If you want your tag to look just like mine them use the same supplies I have used. This tutorial assumes you have a knowledge of paint shop pro. Any resemblance to any other tag or tutorial is completely coincidental.
Supplies Used:
Tube of your choice. I am using a tube by Anna Marine. You can purchase this tube at http://cdoestore.com
The beautiful scrap kit is by Amy Marie’s Kits. It is called Fairy Garden. You can purchase it at http://amymarieskits.com/store/
Cloud brushes of your choice. You can find some awesome brushes at http://www.deviantart.com/browse/all/?section=&global=1&q=cloud+brushes
Mask of your choice. I am using mask #81 by moonbeams and spiderwebs. You can get this mask at http://moonbeamsandspiderwebs.blogspot.com/search/label/Masks
Font of your choice I am using Nafeeza Script. This is a PTU font.
Plugins:
Animation Shop
Drop shadow used throughout:
0 0 70 15.00  Dark Grey
**NOTE: This is an animated tag and choosing to animate or not is completely up to you. There are many ways to animate tags and accomplish different animations. I simply show the way that I do it however if you know of a different way to accomplish the same thing then feel free to do it your way. **

Let's Begin:
Open paper  12 and shift+D to duplicate. Close the original. Promote the background layer to a raster layer. Re-size if you wish. Make your canvas large enough to give you room to work with. Apply the mask of your choice. Delete the mask layer and merge the group.
Open our tube and copy and paste as a new layer. Position within the center of the mask area. We are going to build the tag out around the tube. Re-size if needed. Add a drop shadow.
Open element 67 and copy and paste as a new layer. Drag under your tube. Move to the bottom so your tube is standing on it. Add a drop shadow.
Open element 107 and re-size by 85%. Copy and paste as a new layer and drag under the leaves layer. Move to the bottom behind the tube and the leaves. DO NOT ADD A DROP SHADOW to this layer.
Open element 148 and copy and paste as a new layer. Move to the far right of the tag behind your tube. Add a drop shadow.
Open element 116 and re-size by 65%. Copy and paste as a new layer. Move to the bottom left of the tag in front of your tube. Add a drop shadow.
Open element 91 and copy and paste as a new layer and drag under the water element. Place behind it but so you can see it. Add a drop shadow.
Open element 60 and copy and paste as a new layer. Move so it appears to be hanging from the right side of the archway. NO DROP SHADOW ON THIS ELEMENT.
Open element 50 and re-size by 75% 2x. Copy and paste as a new layer and place behind the water element but in front of the grass and to the right closer to your tube. Add a drop shadow.
Open element 41 and re-size by 60% and then again by 75% 2x. Copy and paste as a new layer and place in nearly the same place as the last element but so it is showing out the left of the water element. Add a drop shadow.
Open element 11 and re-size by 50% 3x and copy and paste as a new layer and move to the bottom in front of the right side of the archway. Add a drop shadow.
Open element 96 and re-size by 50%. Copy and paste as a new layer and place at the bottom on the right side of the water element. Add a drop shadow.
Layers new raster layer. Apply the cloud brush or brushes of your choice. Drag down to under the archway and of course position at the top of the tag.
Open element 138 and re-size. Copy and paste as a new layer and place so it appears to be sitting on the water element feature to the left. This is the part we are going to animate. DO NOT ADD A DROP SHADOW.
Add your name.
Add your copyright and licensing information.
Now let’s get ready to animate:
Crop your tag.
Hide the butterfly layer.
Merge visible all other layers.
Layers new raster layer and drag to the bottom and flood fill with white.
Unhide your butterfly layer and copy it and open animation shop and paste as a new animation. Go to Effects Insert Image Effect and select compress. Use the settings below:

Select all frames in the butterfly animation.
Back to psp and hide the butterfly layer and edit copy merged the other 2 layers. Open animation shop and edit paste as a new animation. Take note of the amount of frames in your butterfly animation. Should be 8. Duplicate your tag frames to have the same amount. Select all frames. Go to Animation and frame properties and change the value to 20. Now grab the first frame of the butterfly animation and drag it onto the first frame of the tag. Once you have it where you think you want it let go of your mouse button. View your animated tag. If you are happy then optimize and save. If you are not happy you can undo and redo until you are happy.
Once you are done re-size your tag if needed/wanted.

You’re all done!!

Tuesday, June 7, 2016

Keepin It Cool


Keepin It Cool
Written 6/5/2016
This tutorial is meant purely as a guide. Feel free to use your own choice of tube or scrap kit to  make your tag unique. If you want your tag to look just like mine them use the same supplies I have used. This tutorial assumes you have a knowledge of paint shop pro. Any resemblance to any other tag or tutorial is completely coincidental.
Supplies Used:
Tube of your choice. I am using a tube by Aleksky Stark. I purchased this tube at MPT which is no longer in business and am not sure where to purchase this tube any longer so use whatever tube works for your.
Scrap kit is a fun cool lil kit by Amy Marie called Summer Ice. You can purchase this kit at http://amymarieskits.com/store/
Font of your choice. I am using Run Tron 1983. You can download it at http://www.dafont.com/run-tron1983.font
Plugins:
DSB Flux Bright Noise
Drop shadow used throughout:
0 0 50 6.50 black
Let's Begin:
Open element 10 and shift+D to duplicate. Close the original. Re-size as needed. This will be the base for your tag. Make your canvas large enough to give you room to work with. You can crop and save when you are done.
Using your magic wand tool select the inside of the frame and selections modify and expand by 6. Layers new raster layer and drag under the frame. Open paper 15 and copy and paste into selection. Selections select none. Add a drop shadow to the frame.
Open element 47 and copy and paste as a new layer at the top and move to the far left of the frame. Duplicate 2x for a total of 3. Hide the top 2 layers. Apply the DSB Flux Bright noise filter using 42% and mix. Unhide the next one and apply the filter again but click mix 2x. Unhide the last one and apply the filter again hitting mix 3x.
At this point open your tube and copy and paste as a new layer and place so she is in the front of the bottom right of the wave. This will allow some space on her right to add one of the cute penguin elements from the kit. Add a drop shadow.
Open one of the cute penguins from this kit. I used #3 but you can use whatever one you want. Copy and paste as a new layer. Re-size if you need/want to. Move to the right of your tube and add a drop shadow.
Now lets use some of the great elements in this cute to dress up this adorable tag. I will simply list the elements I used. You may use other elements of your choice. This will make your tag unique. Placement of the elements is completely up to you however if you want your tag to look just like mine then use my tag for reference.
Elements I used:
17
24 ( I used my pick tool and rotated and erased bits to make it look like she was holding in her hand but this is up to you)
30
32
59
Layers new raster layer and flood fill with white. Drag to the bottom.
Add your name.
Add your copyright and licensing information.
Crop and lets get ready to animate.
Hide the top 2 layers of the wave you added noise to.
Copy merged all of the layers that are showing.
Open animation shop and right click and paste as a new animation.
Back to psp and hide the bottom wave layer and unhide the middle one. Copy merged again and back to animation shop edit and paste after current frame.
Repeat the above steps with the top wave layer.
View your animated tag if you are happy save.


Saturday, February 27, 2016

Mermaids Have More Fun


Mermaids Have More Fun
written 2/27/2016

This tutorial is meant purely as a guide. Feel free to make your tag unique by using your own choice of tube and scrap kit. If you want your tag to look just like mine then use the same supplies that I have used. Any resemblance to any other tag or tutorial is purely coincidental.

Supplies Used:

Matching Scrap Kit by Blissful Designs. You can purchase it at http://scrapsncompany.com/index.php?main_page=product_info&products_id=17379

Tag Template by Dangerously Delicious Designz. You can download it at http://dangerouslydeliciousdesignz.blogspot.ca/2015/06/template167mermaid.html

Animation By Love Shack. You can download it at http://loveysshack.blogspot.com.ar/2011/07/animations-for-today_19.html

Font of your choice. I am using Violet Bee. You can purchase it at https://thehungryjpeg.com/product/381-violet-bee-font/

Plugins:
NONE

Let's Begin:
Open the tag template and shift+D to duplicate.
Close the original.
Remove the following layers from the template:
Raster1, font info, mermaid blue, mermaid white, mermaid d/s, be your own kind of white, be your own kind d/s and bg.
Make your canvas large enough to work with.
Starting at the bottom and working up fill each of the layers with papers from the kit.
On the bottom oval layer add another layer underneath it and make it a little large and fill with white and apply noise.
On the waves layer add the same noise as you did to the white layer.
On the inner blue circle and outer blue circle apply the same noise.
Once done add a drop shadow to all layers.
Open your tube and copy and paste as a new layer at the top and re-size if necessary.
Position in the center of the tag template.
Add a drop shadow.
Open element 71 and re-size by 80%.
Copy and paste as a new layer and drag under your tube.
Move to the bottom and set so your mermaid is sitting in the clamshell.
Add a drop shadow.
Open element 67 and copy and paste as a new layer.
Drag under the clamshell.
Move to the far left so it is peeking out from behind the bottom of the clamshell.
Add a drop shadow.
Duplicate and image flip horizontal.
Move this one to the top right of the clamshell.
Open element 59 and re-size by 50% and then again by 60%.
Copy and paste as a new layer drag under the clamshell.
Move to the right side and make it peek out from the side of the shell.
Open element 48 and copy and paste as a new layer.
Re-size as you wish.
I duplicated mine a few times and re-sized each of them and placed them randomly around the tag.
Open element 24 and copy and paste as a new layer.
Drag down to just above the squarish layer.
Move to the far left side so it is peeking out behind the wheel layers.
Add a drop shadow.
Duplicate and image flip horizontal.
Move to the far right.
Add your name.
Add your copyright and licensing information.
Crop.
Now lets get ready to add the animation.
Merge together all layers from the top down to your tube (include your tube in this first set of merged layers.
Hide this new layer.
Merge together the rest of the layers.
Layers new raster layer and drag to the bottom.
Flood fill with white.
Copy merged the white layer and the layer with the clamshell on it.
Open animation shop and right click and paste as a new animation.
Open the animation you are going to use.
I am using the bubble fountain.
Take note of the amount of frames in the animation. For me its 18.
Duplicate your tag layer to match the frames.
Select all frames in both your animation and your tag.
Grab frame 1 of the animation and drag it onto frame 1 of your tag.
Place where you want.
Now back to psp and copy the layer that has your tube on it.
Back to animation shop and paste this as a new animation.
Repeat the same steps as above.
Duplicate and drag onto the tag.
View your animated tag.
Optimize and save.


Monday, February 22, 2016

Irish In A Few Beers


Irish In A Few Beers
written 2/22/2016

This tutorial is meant purely as a guide. Feel free to make your tag unique by using your own choice of Tube and Scrap Kit. If you want your tag to look exactly like mine then use the same supplies that I have used. Any resemblance to any other tutorial or tag is purely coincidental.

Supplies Used:

Tube by Amber Kelso. I got this tag when the artist was at CILM. I am not sure where to get her tubes now sorry.

Scrap kit is by Purple Dreams Scraps. It is called Irish and you can purchase it at http://picsfordesign.com/en/catalogue/id_116578_irish.pix

Animation by Love Shack Animations and PSP Tutorials. You can get it at http://loveysshack.blogspot.com.ar/2012/01/st-pattys-day-animations.html

Font of your choice. I am using Sistah Ysse you can get it at http://www.fontspace.com/vvb-designs/sistah-ysse

Plugins:
NONE

Let's Begin:
Open element 18 and shift+D to duplicate.
Close the original.
Image free rotate and rotate in either direction 90 degrees.
Make your canvas large enough to work with.
Using your magic wand select the inside of the frame.
Selections modify and expand by 3.
Open paper 5 and copy and paste as a new layer.
Drag under the frame.
Selections invert and hit delete.
Selections select none.
Add a drop shadow of
4
-2
85
5.00
black
to the frame.
Open your tube and copy and paste as a new layer at the top.
Position at the bottom center of the frame.
Add the same drop shadow to the tube.
Now lets dress it up with some of the fun elements from this awesome kit.
Open element 4.
Image rotate to the right.
Copy and paste as a new layer and drag to just above your frame.
Move to the far right side and make it peeking out from behind your tube.
Duplicate and image flip horizontal.
Move this duplicate to the far left side.
Merge these 2 layers together and add a drop shadow.
Open element 21 and copy and paste as a new layer.
Drag behind your tube.
Move to the far left side bottom.
Re-size as needed.
Add a drop shadow.
Open element 5 and copy and paste as a new layer.
Drag behind your tube.
Re-size as needed.
Place to the far left bottom in front of the cauldron.
Add a drop shadow.
Duplicate and image rotate to the right 90 degrees.
Move this layer above your tube and place in front of the first bottle and your tube.
Duplicate the standing bottle and move to the far right of your tube.
Add some wordart text if you choose.
Add your name.
Add your licensing and copyright information.
Crop.
Merge all layers visible.
Add a new raster layer and drag to the bottom.
Flood Fill with white.
Copy Copy Merged
Open animation shop and right click and paste as a new animation.
Open your animation.
Take note of the number of frames in your animation and duplicate your tag to have the same amount of frames.
Be sure to remove the first frame of the animation that is black.
Re-size the animation if you need to to fit over the top of the pot of gold in your tag.
Select all frames in both the animation and in the tag.
Grab frame 1 of the animation and drag it onto frame 1 of the tag .. Position where you want and drop.
View your animated tag.
If you are happy save. If not undo and repeat until you get it just right.
Save your tag once you are happy.


Wednesday, December 2, 2015

Snow Pink


Snow Pink
written 12/2/2015

This tutorial is meant purely as a guide. Feel free to make your tag unique by using your own choice of tube and scrap kit. If you want your tag to look just like mine then use the same supplies I have used.

Supplies Used:

Tube is an exclusive commission by Chris Pastel for Scraps n Company store. You can purchase this tube at http://scrapsncompany.com/index.php?main_page=product_info&cPath=305&products_id=15802

Matching scrap kit is by FWTags. You can purchase it at http://scrapsncompany.com/index.php?main_page=product_info&products_id=15718

Animation is by Scrappy Bit of Fun. You can get it at http://scrappybitoffun.blogspot.ca/2011/11/animations-2-3.html

Font of your choice. I am using Bellanche. This is a PTU font so use whatever font you would like.

Plugins:
None

Let's Begin:
Open frame 2 from the kit.
Shift+D to duplicate. Close the original.
Re-size.
Make your canvas large enough to give you plenty of room to work with.
Using your magic wand select the inside of the frame.
Selections modify and expand by 4.
Open paper 1.
Copy and paste as a new layer.
Drag under the frame.
Selections invert and hit delete.
Selections select none.
Open element 27.
Copy and paste as a new layer and drag to the bottom.
Move to the bottom of the frame so it is peeking out of the bottom and the sides.
Duplicate.
Image flip vertical.
Move this copy to the top.
Merge these 2 layers together.
Open your tube and copy and paste as a new layer at the top.
Re-size as needed.
Place where you want on your tag.
Open element 60.
Copy and paste as a new layer and drag under your tube.
Re-size as needed.
Image flip horizontal.
Place behind your tube so it appears she is sitting on the end of the sleigh.
Open element 6.
Copy and paste as a new layer and drag under your tube but on top of the sleigh.
Re-size if you wish.
Move to the bottom of the tag so it looks like the sleigh is behind it in the snow and your tube is standing in it.
Duplicate and move the duplicate under the sleigh.
Move it up and over to the left a bit.
Open element 47 and copy and paste as a new layer.
Drag under your sleigh.
Re-size as needed.
Move to the far left of the frame.
Open element 73 and copy and paste as a new layer.
Re-size as needed.
Place in the sleigh. I erased bits to make it appear to be sitting inside of the sleigh.
Open element 63 copy and paste as a new layer.
Re-size as needed and place in the sleigh with the gift.
Open element 59 and repeat the above steps.
Open element 51 copy and paste as a new layer.
Place in the snow next to your tube.
Re-size as needed.
Open element 44 and repeat the above steps.
Open element 43 and copy and paste as a new layer.
Place so it is hanging from the tree.
Re-size as needed.
Open element 28 and repeat above steps.
Open element 25 and repeat above steps.
Open element 24 and copy and paste as a new layer.
Re-size as needed and place at the top of the tree.
Open element 30 and copy and paste as a new layer.
Move to the bottom of the tag.
Open element 42 and copy and paste as a new layer and drag down under your frame.
Place in the top area of the framed area where its kind of a blank space in your paper layer.
Re-size as needed.
I duplicated and re-sized this layer several times and placed them randomly to fill in the empty space.
Add your name.
Add your copyright and licensing information.
Crop.
Layers new raster layer and fill with white.
Move to the very bottom.
Lets take this into animation shop and add the cute lil animation.
Copy your tag and open animation shop and right click and paste as a new animation.
Open your animation and select all of the frames.
Take note of the number of frames in the animation.
Duplicate the frames of your tag to match the frames in your animation.
Select all of the frames in your tag.
Grab frame 1 of the animation and drag it onto frame 1 of your tag.
Place where you want.
This might take some undoing to get it right.
Once you are happy view your animated tag.
Re-size if needed/wanted.
Save.


Sunday, July 19, 2015

High Maintenance


High Maintenance
written 7/8/2015

Supplies Needed:

Tube of your choice. I am using a tube by Jose Cano that I got at MPT but you can now purchase his tubes at http://canotubes.com/ You will want to use a tube with a close up preferably.

Scrapkit is a freebie by TK Dezigns. It's called High Maintenance. Grab the kit and the add-on you will need both. You can get them at http://tkdezigns.blogspot.com/2014/05/3-free-kits.html

Font of your choice I am using hl comic. Which you can get at http://www.hunglan.com/?page_id=494 it is #4 on this page.

Animation by Divine Intentionz. You can get it at http://divineintentionz.blogspot.com/2011/05/new-animations.html

Plugins:
Xero Soft Mood.

Let's Begin:
Open the framestars element from the kit and shift+D to duplicate.
Close the original.
Make your canvas large enough to work with.
Using your magic wand select the inside of the frame and go to selections modify and expand by 5.
Open the paper called blinged-pink and copy and paste as a new layer.
Drag under the frame and go to selections invert and hit delete.
Selections invert again.
Open the close up of your tube and copy and paste as a new layer.
Drag under the frame and position within the frame area and selections invert and hit delete to clear the excess hanging out of the frame.
Selections select none.
Go to adjust hue and saturation – colorize and set both properties to 0.
Apply Xero Soft Mood with both properties set to 50.
Add a drop shadow to the tube.
Open the full size of your tube and copy and paste as a new layer and position over the stars on the frame.
Lower the opacity of this tube layer so you can see the stars through the tube.
Using your eraser tool very carefully erase the bits of your tube that is over the stars. The object is to make it look like she is behind the stars and coming out of the frame.
When happy raise the opacity of this layer back up to 100 and add a drop shadow.
Add a drop shadow to the frame.
Open crown1 and re-size by 50% 2x.
Copy and paste as a new layer and place near the bottom overlapping the stars.
Add a drop shadow.
Open moneypink and re-size by 50% and copy and paste as a new layer and move to the bottom of the stars.
Add a drop shadow.
Open diamond rec frame.
Re-size by 75%.
Copy and paste as a new layer.
Drag under the crown and the money.
Move to the bottom and place so the crown and the money are overlapping the left side.
Using your magic wand select the inside of the frame.
Selections modify and expand by 3.
Open paper rkpinkdamask which can be found in the add-on kit.
Copy and paste as a new layer.
Drag under the frame.
Selections invert and hit delete.
Selections select none.
Add a drop shadow to the frame.
Add your name to the inside of the frame.
Use the pink white and black diamonds and re-size them and copy and paste randomly over the top of your name.
Add your copyright and licensing information.
Lets get ready to animate:
Crop your tag.
Layers new raster layer and move this layer to the bottom.
Flood fill with white.
Merge your layers together and edit copy.
Open animation shop and right click and paste as a new animation.
Look at the animation you are going to use and see how many frames are in it.
Duplicate your tag animation to the same amount of frames.
Edit select all frames on both the animation and your tag.
Grab the first frame of your animation and drag it onto the first frame of your tag.
Don't let go until you have it where you want it.
View your animated tag. If you are happy then optimize and save.
You might have to undo it a couple of times to get the placement how you want.
Re-size if you wish.


Tuesday, March 10, 2015

Rock Your World


Rock Your World
written 3/10/2015

Supplies Needed:


Mask of your choice. I am using mask #200 by Insatiable Dreams. You can get her great masks at http://insatiabledreams.net

Font of your choice. I am using I am using Pipeburn. This is a PTU font.


Plugins:
None.

Let's Begin:
Open a new blank canvas large enough to work with.
Open paper 11 and copy and paste as a new layer.
Apply your mask.
Delete the mask layer and merge the group.
At this point open your tube and copy and paste as a new layer.
Re-size as needed so she is just slightly bigger than the mask area.
Move to the far left side.
Add a nice drop shadow.
Now we will begin to build the tag out around her.
Open element 60 and re-size by 75% and then again by 85%.
Copy and paste as a new layer and drag under your tube.
Move to the top left behind her head.
Open element 82 and copy and paste as a new layer.
Drag down to just above your mask layer.
Center within the mask area.
Open element 95.
Re-size by 75% and then again by 85%.
Copy and paste as a new layer and place along the bottom.
Hide your tubes cut off legs behind the rear wheel and seat of the bike.
Add a drop shadow.
Open element 137.
Copy and paste as a new layer.
Drag down to just above the white center of the frame mask area.
Re-size until it will fit nicely tucked behind your tube and across the mask layer to the right.
Use my tag for reference if needed.
Open element 19.
Copy and paste as a new layer.
Re-size so it will fit nicely in the front of the bike above the front wheel.
Add a drop shadow.
Open element 44.
Copy and paste as a new layer.
Drag to just below the wings.
Re-size by 85%.
Image flip horizontal.
Place in front of the bike and behind the wings.
Add a drop shadow.
Open element 140.
Go to adjust hue and saturation then colorize.
Set both values to 0.
Copy and paste as a new layer.
Re-size by 75% 2x/
Move over to the far left above the rear wheel of the bike and across the tube a bit.
Add a drop shadow.
Open element 133.
Copy and paste as a new layer.
Re-size by 50% and then again by 65%.
Drag down to below your tube.
Place anywhere within your tag and then duplicate many times and move them around just randomly on your tag.
Add a drop shadow to each one.
Open element 77 and copy and paste as a new layer at the top.
Move to the bottom of the tag.
Using the font of your choice add the words “ your world” by the “ROCK” wordart.
Add your name.
Add your copyright and licensing information.
If you are not going to animate then crop and save.
If you are going to animate lets put this together.
Layers new raster layer and drag to the bottom.
Flood fill with white.
Hide all of your layers.
Now unhide your white background, the mask layer and the white center layer.
Merge these 3 layers together.
Now hide that layer.
Unhide the rest of the layers and merge them together.
This leaves you with 2 layers.
Unhide the bottom layer and copy it.
Open animation shop and paste as a new animation.
Open your animation.
Take note of the amount of frames in your animation.
If you are using the one I am then it has 20 frames.
Delete the first frame that is black and then select all the rest of the frames.
Back to your tag duplicate those frames to match 20 frames.
Select all of those frames.
Drag the first frame of your animation onto the first frame of your tag.
Once you have it where you want it release it.
Place in the center of the white area.
Back to psp and copy the layer that has the remainder of your tag on it.
In animation right click and paste as a new animation.
Again duplicate the frames to 20.
Select all frames and drag the first frame to the first frame of your tag.
Once you are happy with placement release it.
View your animated tag and if you are happy re-size and save.