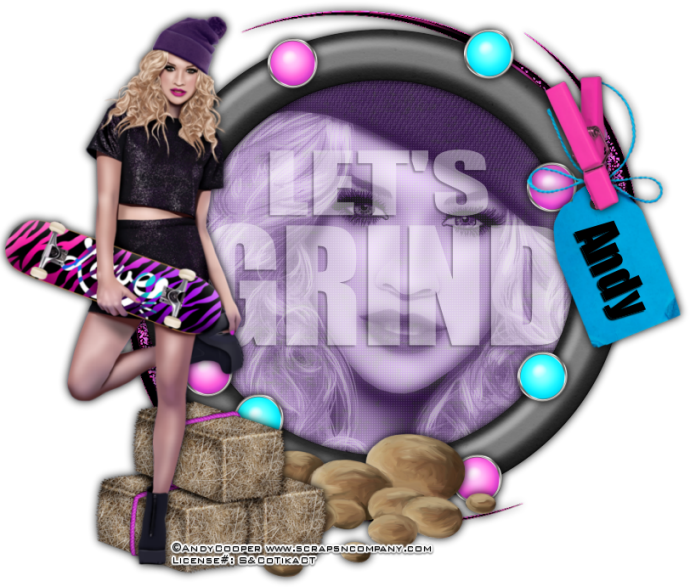
Let's
Grind
written
4/4/2016
This
tutorial is meant purely as a guide. Feel free to make your tag
unique by using your own choice of tube and scrap kit. If you want
your tag to look just like mine then use the same supplies I have
used. This tutorial assumes you have a knowledge of paint shop pro.
Any resemblance to any other tag or tutorial is purely coincidental.
Supplies
Used:
Tag by
Andy Cooper. She is called Zebra Skate. You can purchase her at
http://scrapsncompany.com/index.php?main_page=product_info&cPath=113_304&products_id=18261
Matching
scrap kit by Designs By Claudia. You can purchase it at
http://scrapsncompany.com/index.php?main_page=product_info&cPath=112_465_283&products_id=18224
Font of
your choice. I am using Impact.
Plugins:
Penta
Color Dot
Drop
shadow used throughout:
0 0 100
15.00 black
Let's
Begin:
Open
element 8 and shift+D to duplicate.
Close the
original.
Make your
canvas large enough to work with.
Using your
magic wand select the inside of the frame.
Selections
modify and expand by 3.
Open paper
2 and copy and paste as a new layer.
Drag under
the frame.
Selections
invert and hit delete.
Selections
invert again.
Open the
close up of your tube and copy and paste as a new layer.
Position
within the framed area.
Selections
invert and hit delete.
Selections
select none.
Change the
properties of this layer to luminance legacy.
Duplicate
the tube layer.
On the
bottom layer apply penta color dot and change the value to 60.
On the top
layer adjust blur gaussian blur at 8.00
Lower the
opacity of this layer to 60.
Using the
font of your choice add the text “Let's Grind” in the framed area
using white.
Lower the
opacity of this layer to 40.
Add a drop
shadow to the frame.
Merge
these layers together.
Open
element 17 and copy and paste as a new layer.
Drag under
the framed image.
Image
re-size by 110%
Add a drop
shadow.
Open your
full sized tube and copy and paste as a new layer.
Re-size as
needed until she is just bigger than the framed image.
Add a drop
shadow.
Open
element 20 and copy and paste as a new layer.
Re-size.
Duplicate
several times and place all around the frame.
Repeat
with element 21.
Add a drop
shadow to all of these.
Now lets
add some elements from the kit.
I will
list the elements I used and the placement is completely up to you.
If you
want your tag to look like mine then use my tag for reference on the
placement.
Feel free
to use other elements that I did not use. This will make your tag
unique.
Elements I
used:
3
38
59
60
Add your
name.
Add your
copyright and licensing information.
Crop and
save.