Showing posts with label Fairies. Show all posts

Saturday, August 19, 2017

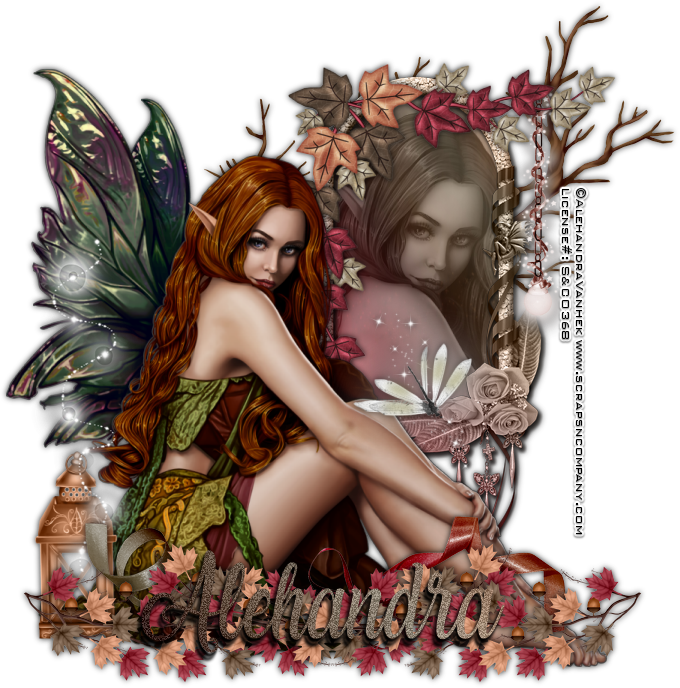
Fall Fantasy


Fall Fantasy

Written 8/19/2017

This tutorial is meant purely as a guide. Feel free to use your own choice of tube or scrap kit to make your tag unique.If you want your tag to look just like mine then use the same supplies I have used. This tutorial assumes you have a knowledge of paint shop pro. Any resemblance to any other tag or tutorial is completely coincidental.

Supplies Used:
Tube of your choice. I am using the work of Alehandra Vanhek. This tube is called Fairy Mae and you can purchase her at http://scrapsncompany.com/index.php?main_page=product_info&cPath=113_499&products_id=30799

Scrap Kit of your choice. I am using a kit called Autumn Fairies by Jens Sweet Temptations. You can purchase this kit at http://scrapsncompany.com/index.php?main_page=product_info&cPath=112_655&products_id=24016

Font of your choice. I am using Laughing and Smiling.

Plugins: (plugins are most generally optional)
Xero Porcelain

Let's Begin:
Open element 12 and shift+D to duplicate. Close the original. Make your canvas large enough to work with. Using your magic wand select the inside of the window. Selections modify and expand by 15. Layers new raster layer and drag under the window. Open paper 1 and copy and paste into selection.
Open your tube and copy and paste as a new layer. Re-size as needed. Position so her face is within the selected part of the window. Selections invert and hit delete. Selections select none. Apply the Xero Porcelain plugin using the default settings. Change the properties to Luminance Legacy. Lower the opacity to 55. Add a drop shadow to both the tube and the window. Merge these layers together.
Copy and paste your tube again as a new layer. Re-size as needed. Place to the left of the window and down just a bit. Add a drop shadow.
Open element 31 and re-size by 75%. Copy and paste as a new layer. Drag to just on top of the window. Place it in the top left corner. Add a drop shadow.
Open element 35 and copy and paste as a new layer. Drag to the bottom. Place so you can see the branches above the tubes head and out the right side of the window. Use my tag for reference if needed. Add a drop shadow.
Open element 46 and copy and paste as a new layer. Move to the bottom in front of your tube. Image flip vertical. Place to the far left. Duplicate and image flip horizontal. Move this duplicate to the right. Merge together. Add a drop shadow.
Open element 37. Re-size as needed. Copy and paste as a new layer. Move to the far left of your tube and move under the leaves. Add a  drop shadow.
Open element 60 and re-size by 50%. Copy and paste as a new layer and place so it is hanging from the leaves that go along the top of the window to the far right in front of the tree branch.
Open element 55 and copy and paste as a new layer. Place so it looks to be coming out of the lantern.
Open element 20 and re-size as needed. Copy and paste as a new layer. Move to the bottom center of the window area. Add a drop shadow.
Open element 4 and copy and paste as a new layer and move down under the leaves that run along the bottom so that the ribbon is peeking out from the top of the leaves. Add a drop shadow.
Add your name.
Add your copyright and licensing information.
Crop and save.


Monday, September 26, 2016

Autumn Days Are Here


Autumn Days Are Here
Written 9/23/2016
This tutorial is meant purely as a guide. Feel free to use your own choice of tube or scrap kit to make your tag unique. If you want your tag to look just like mine them use the same supplies I have used. This tutorial assumes you have a knowledge of paint shop pro. Any resemblance to any other tag or tutorial is completely coincidental.
Supplies Used:
Tube of your choice. I am using the artwork of Queen Uriel. You can purchase this tube and all of her work at http://www.queenuriel.com/loja/index.asp
Scrap kit is called Touch of Autumn and is by Amy Marie’s Kits. You can purchase it at http://amymarieskits.com/store/
Font of your choice. I am using Housegrind. You can download it at http://www.dafont.com/housegrind.font
Plugins:
DSB Flux Linear Transmission
Drop shadow used throughout:
0 0 100 9.50 Dark Brown from the paper

Let's Begin:
Open element 68 and shift+D to duplicate. Close the original. Make your canvas large enough to work with.
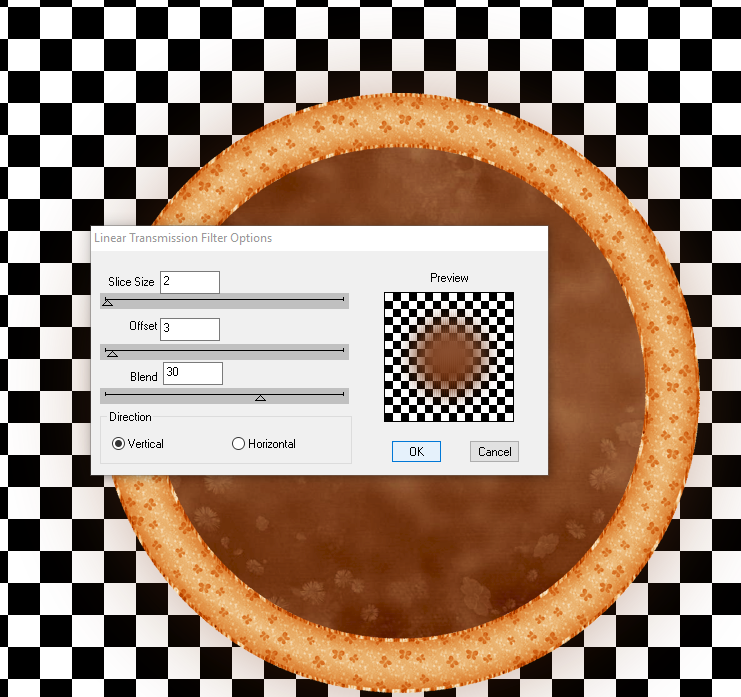
Using your magic wand select the inside of the frame and go to selections modify and expand by 5. Layers new raster layer and drag under the frame. Open paper 4 and paste into selection. Selections select none. Duplicate this paper layer. On the bottom layer adjust blur Gaussian blur at 75. Apply the Dsb Flux Linear Transmission filter using the following settings:

Open element 61 and copy and paste as a new layer. Re-size by 110% 2x. Drag under the top paper layer. Place so its evenly around the frame. Add a drop shadow.
Open your tube and copy and paste as a new layer. Place in the bottom center of the frame. Add a drop shadow.
Now let’s dress the tag up with elements from the kit. I will list the elements I used. Feel free to use other elements to make your tag unique. Placement of the elements is completely up to you. If you want your tag to look just like mine then use my tag for reference.
Elements I used:
37
41
66
70
83
94
104
110
Add your name.
Add your copyright and licensing information.
Crop and save.


Friday, August 5, 2016

Just Believe


Just Believe
Written 8/5/2016
This tutorial is meant purely as a guide. Feel free to use your own choice of tube or scrap kit to make your tag unique. If you want your tag to look just like mine them use the same supplies I have used. This tutorial assumes you have a knowledge of paint shop pro. Any resemblance to any other tag or tutorial is completely coincidental.
Supplies Used:
Tube of your choice. I am using the work of Kathleen Lowe. I purchased this tube when she was with CILM which is no longer around. I am not sure where you can get her work now.
The scrap kit is called Magical Mini by Amy Marie’s Kits. You can purchase this kit at http://amymarieskits.com/store/
Mask of your choice. I am using mask #362 by Vix. You can get her masks at http://www.freewebs.com/vixpsp/
Font of your choice. I am using Midnight Legend. You can download it at http://www.dafont.com/de/midnight-legend.font
Plugins:
Eye Candy 4000 Glass
Drop shadow used throughout:
0 0 70 8.50 black

Let's Begin:
Open the tube of your choice and shift+D to duplicate. Close the original.
Since my tube is a half tube/cut off on one side I needed to draw my frame around the tube. However if your tube is not and you do not want to draw the frame around it then just draw a frame out that you are happy with that will be the base of your tag. I chose a color from my tube and used my preset rectangle shape. Once you are done convert your frame to a raster layer. Apply a glass effect using your Eye Candy 4000 Glass.
Using your magic wand select the inside of the frame. Selections modify and expand by 1. Layers new raster layer and drag to the bottom. Open paper 8 and copy and paste into selection. Selections select none.
Add a drop shadow to your tube.
Open the paper of your choice from the kit and copy and paste as a new layer. Drag to the bottom. Apply the mask of your choice. Delete the mask layer and merge the group.
Now let’s dress the tag up with elements from the kit. I will list the elements I used. Feel free to use other elements to make your tag unique. Placement of the elements is completely up to you. If you want your tag to look just like mine then use my tag for reference.
Elements I used:
10
15
23
24
30
37
44
48
Add a drop shadow to each of the elements.
Add your name.
Add your copyright and licensing information.
Crop and save.

Saturday, May 14, 2016

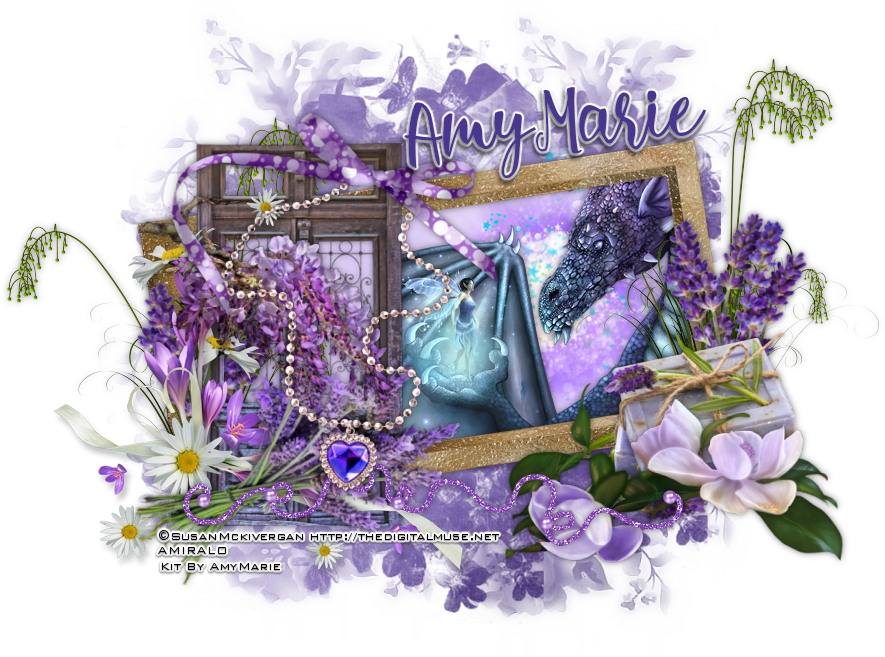
Magical Garden


Magical Garden
Written 5/14/2016
This tutorial is meant purely as a guide. Feel free to make your tag unique by using your own choice of tube and scrap kit. If you want your tag to look like mine then use the same supplies I have used. This tutorial assumes you have knowledge of paint shop pro. Any resemblance to any other tag or tutorial is purely coincidental.
Supplies Used:
Tube by Susan McKivergan. I purchased this tube when she was at AMI. AMI is no longer in business and I am not sure where to purchase or if you can even still purchase her work in psp tube format.
Scrap kit is by Amy Marie. It is called Lavender Garden. You can purchase Amy’s amazing kits at http://amymarieskits.com/store/
Mask of your choice. I am using mask #3 from set 115 by Rachel’s Designs. You can download the mask from https://racheldesignsblog.wordpress.com/2016/05/07/mask-set-115/
Font of your choice. I am using lovelight. This is a PTU font.
Plugins:
NONE
Drop shadow used throughout:
0 0 50 10.00 black

Let’s Begin:
Open element 34 from the kit and shift+D to duplicate. Close the original. Make your canvas large enough to work with.
Open paper 11 and copy and paste as a new layer. Drag under the frame. Apply the mask of your choice. Delete the mask layer and merge the group.
Make the frame layer active and using your magic wand select the inside of the frame. Selections modify and expand by 3. Open paper 2 and copy and paste as a new layer. Drag under the frame. Selections invert hit delete to clear the excess paper. Selections invert again.
Open your tube and copy and paste as a new layer. Drag under the frame and position within the frame. Selections invert and hit delete to clear the excess tube. Selections select none. Add a drop shadow to the tube and the frame layers.
Lets dress this tag up with some of the awesome elements from the kit. I will list the elements I used and you can choose to use the same or use others. Placement of the elements is also up to you and will probably depend largely on the tube you use. If you want your tag to look just like mine then use my tag for reference.
Elements Used:
16
24
25
41
57
74
79
92
93
101 (I used this to help cover the fact my tube was cut off and did not fill the frame)
117
118
Add your name.
Add your copyright and licensing information.
Crop and save. 

Saturday, May 7, 2016

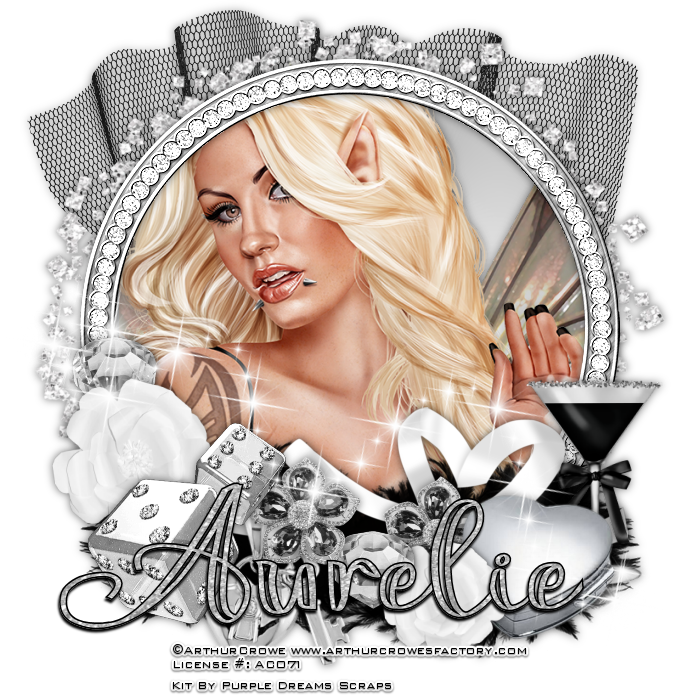
Fairy Beautiful


Fairy Beautiful
Written 5/5/2016
This tutorial is meant purely as a guide. Feel free to make your tag unique by using your own choice of tube and scrap kit. If you want your tag to look just like mine then use the same supplies I have used. This tutorial assumes you have knowledge of paint shop pro. Any resemblance to any other tag or tutorial is purely coincidental.
Supplies Used:
Tube is called Blonde Fairy by Arthur Crowe. You can purchase her at http://arthurcrowesfactory.com/store/index.php?route=common/home
Scrap kit is by Purple Dreams Scraps. It is called Black and White and can be purchased at http://picsfordesign.com
Font of your choice. I am using Aysheea. This is a PTU font.
Plugins:
NONE
Drop shadow used throughout:
0 0 55 13.00 black

Let’s Begin:
Open element 49 and shift+D to duplicate. Close the original. Make your canvas large enough to work with.
Using your magic wand select the inside of the frame. Selections modify and expand by 5.
Open paper 11 and copy and paste as a new layer. Drag under the frame. Selections invert and hit delete.
LEAVE SELECTED!!
Selections invert again. Open your tube and copy and paste as a new layer. Position within the selected frame area. Selections invert and hit delete. Selections select none.
Add a drop shadow to both the tube and the frame layers.
Open element 45 and re-size by 90%. Copy and paste as a new layer. Drag to the bottom. Position around the frame. Add a drop shadow.
Open element 34 and copy and paste as a new layer. Drag to the bottom. Position at the top of the frame. Add a drop shadow.
Open element 3 and copy and paste as a new layer. Move to the bottom of your tag along the bottom of the frame. Add a drop shadow.
Open element 9 and re-size by 50% and then again by 75%. Copy and paste as a new layer. Place at the bottom of your tag and to the left of the feathers. Add a drop shadow. Duplicate. Re-size this copy by 75%. Move to the bottom and to the right.
Open element 12 and re-size by 75% 2x. Copy and paste as a new layer. Drag under the smaller of the 2 flowers. Move to the right of that flower. Add a drop shadow.
Open element 15 and re-size by 50%. Copy and paste as a new layer and drag under the larger of the 2 flowers. Place on the far left above the flower. Duplicate. Move this copy down and to the right in front of the smaller of the 2 flowers. Add a drop shadow to both.
Open element 16 and re-size by 50%. Copy and paste as a new layer. Place to the left. Add a drop shadow.
Open element 23 and image flip horizontal. Copy and paste as a new layer. Drag down to just above the feathers. Add a drop shadow.
Open element 26 and re-size by 75%. Copy and paste as a new layer and place to the far right. Add a drop shadow.
Open element 31 and re-size by 50% and then again by 75%. Copy and paste as a new layer and place near the bottom and to the left. Add a drop shadow.
Open element 69 and re-size by 50%. Copy and paste as a new layer. Duplicate and place this one where you wish. Add a drop shadow to both.
Add your  name.
Open element 1 and copy and paste as a new layer.
Add your copyright and licensing information.
Crop and save.

Wednesday, November 11, 2015

Some Type Of Fantasy


Some Type of Fantasy
written 11/11/2015

This tutorial is simply a guide. Feel free to make your tag unique by using your own choice of tube and scrap kit. If you want your tag to look just like mine then use the same supplies that I have used.

Supplies Used:

Tube by Andy Cooper called Fairy Purple. You can get it at http://scrapsncompany.com/index.php?main_page=product_info&cPath=113_304&products_id=15304

Matching scrap kit by Kizzed by Kelz also called Fairy Purple. You can get it at http://scrapsncompany.com/index.php?main_page=product_info&products_id=15413

Tag template #773 by Millies PSP Madness. You can get it at http://milliespspmadness.blogspot.com/2015/06/template-773-and-tag-featuring-verymany.html

Font of your choice. I am using Plates Napery. You can get it at http://www.fontspace.com/m%C3%A5ns-greb%C3%A4ck/plates-napery-personal-use

Plugins:
NONE

Let's Begin:
Open your template and shift+D to duplicate.
Close the original.
Remove the following layers:
temp by millie
13
12
background
Make your canvas large enough to work with.
Fill each of the layers of the template using the different papers from the kit.
Alternate purple and black between the layers.
Select each layer by going to selections select all float and defloat.
Once you are done add a drop shadow to each layer.
Open your tube and copy and paste as a new layer.
Center within the template and make it so she is sitting on the bottom of the circle.
I will list the elements I used.
Placement is completely up to you.
If you want your tag to look just like mine then use my tag for reference.
Elements used:
4
6
7
79
112
Add a drop shadow to all layers.
Add your name.
Add your copyright and licensing information.
Crop and save.

Sunday, August 2, 2015

Sweet Surprise


Sweet Surprise
written 8/1/2015

This tutorial is meant to simply be a guide. Make your tag your very own by using whatever tubes and scrap kits you want. If you want your tag to look just like mine then use the same supplies that I use and use my tag as a reference.

Supplies Used:


Font of your choice. I am using Simply Glamorous. You can get it at http://www.dafont.com/simply-glamorous.font

Plugins:
NONE

Let's Begin:
Open element 97 and shift+D to duplicate.
Close the original.
Re-size if you wish.
Make your canvas large enough to work with.
Using your magic wand select the inside of the frame and then go to selections modify and expand by 20.
Open paper 7 and copy and paste as a new layer and drag under the frame.
Selections invert and hit delete.
Selections invert again.
Open the close up of your tube and copy and paste as a new layer.
Position her face within the framed area.
Selections invert and hit delete.
Selections select none.
Change the properties of the tube layer to luminance legacy.
Merge down to the paper layer.
Now use your smudge tool and run along the edges to smooth them out and blend them so they don't look so choppy behind the frame.
Add a slight drop shadow to the frame using the pink color.
Open your full size tube and copy and paste as a new layer.
Re-size and then move to the far right side of the frame.
Open element 10 and copy and paste as a new layer.
Re-size so it is within proportion of your tube.
I placed mine so it looked like the tube was standing inside of the cupcake wrapper.
You can do this by erasing bits of the tube.
Add a drop shadow to both the tube and the cupcake wrapper.
Now lets dress the tag up with some of the great elements included in this great kit.
I will simply list the elements I used. Placement is entirely up to you.
Elements used:
element09
element011
element013
element027
element033
element036
element042
element059
Add your name.
Add your copyright and licensing information.
Crop and re-size if needed.
Save.


Wednesday, January 14, 2015

Fairy Whimsy


Fairy Whimsy
written 1/14/2015

Supplies Needed:


Font of your choice. I am using Angelface. You can get it at http://www.dafont.com/angelface.font

Plugins:
None

Lets Begin:
Open element 73 and shift + D to duplicate.
Close the original.
Re-size by 75%.
Make your canvas large enough to work with.
Apply a slight drop shadow.
Set your foreground and background colors to a darker and lighter color from your tube.
Change the background to a foreground/background gradient.
Using your elipse preset shape tool create a circle in the center of the element.
Convert to a raster layer.
Selections select all float and defloat.
Open the close up of your tube and copy and paste as a new layer over the circle.
Move to the far right of the circle.
Open element 67 and re-size by 60%.
Copy and paste as a new layer and position at the top of the circle.
Selections invert and hit delete on both the star layer and the closeup tube layer.
Selections select none.
Adjust add/remove noise at 55% uniform and monochrome checked.
Add a drop shadow to the circle and the stars.
Open your tube and re-size if necessary.
Copy and paste as a new layer.
Move to the far left side of the circle.
Add a drop shadow.
Open element 6 and re-size by 75% and then again by 85%.
Copy and paste as a new layer.
Erase the bits around the fairy's foot so it is in front of the grass.
Add a drop shadow.
Open element 7 and re-size by 50% and then again by 75%.
Copy and paste as a new layer and place in the grass to the far right.
Erase the bits so her leg is again in front of them.
Add a drop shadow.
Open element 37 and re-size by 50% 2x.
Copy and paste as a new layer and place in the grass to the far left.
Add a drop shadow.
Open element 53 and re-size by 50% 2x.
Copy and paste as a new layer and move to the grass in front of the pot.
Add a drop shadow.
Open element 74 and re-size by 75% and copy and paste as a new layer and place along the bottom of the tag.
Add a drop shadow.
Add your name.
Add your copyright and licensing information.
Crop and save.