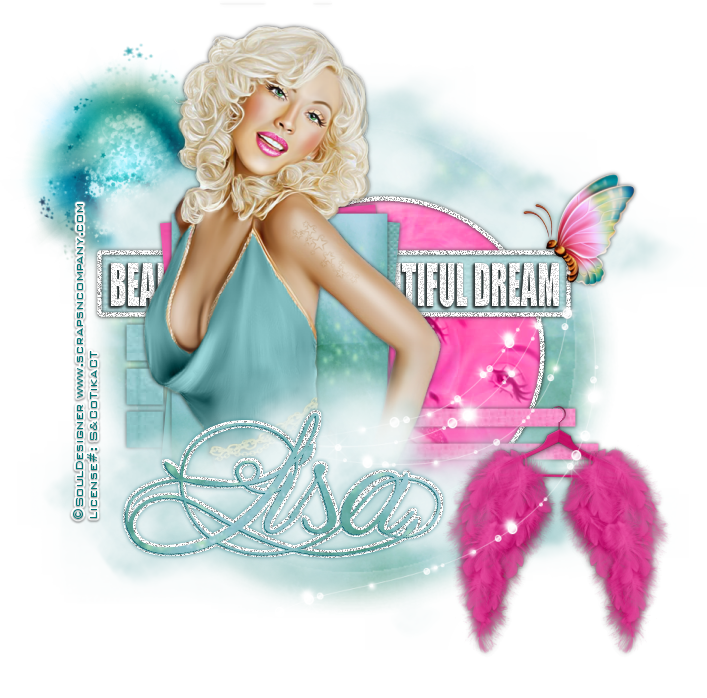
Beautiful
Dream
written
7/14/2015
This
tutorial is simply meant as a guide. Feel free to use any kits, tubes
etc that you want. If you want your tag to look just like mine then
use the same items and use my tag as a reference.
Supplies
Needed:
Tube by
Soul Designer. The tube is called Lisi. You can get it at
http://scrapsncompany.com/index.php?main_page=product_info&cPath=113_434&products_id=11951
Scrap kit
by Bibi's Collection. You can get it at
http://scrapsncompany.com/index.php?main_page=product_info&products_id=11956
Cloud tube
is by Rainbow Coffi. You can get her tubes at
http://www.psp-playground.com/
Tag
Template by A Creative Space Between. I am using template # 17. You
can get it at
http://acreativespacebetween.blogspot.ca/2014/12/ssam-tag-templates-14-45.html
Mask of
your choice. I am using mask #200 by Insatiable Dreams. You can get
it at http://insatiabledreams.net
Font of
your choice. I am using Impact(which is a standard windows font) and
also
Mademoiselle
Camille. You can get it at
http://www.fontspace.com/maellekeita/mademoiselle-camille
Plugins:
NONE
Let's
Begin:
Open your
tag template.
Shift+D to
duplicate.
Close the
original so you may use it again if you choose.
Delete the
following layers:
Raster 8
Raster 1
Raster 2
Make your
canvas large enough to work with.
Start at
the bottom with Raster 3.
Make this
layer active and selections select all float and defloat.
Open paper
10 and copy and paste as a new layer.
Selections
invert and hit delete.
Selections
invert again.
Open the
close up of your tube and copy and paste as a new layer.
Position
her face within the selected area and make so you can see her eyes.
Selections
invert and hit delete.
Selections
select none.
Change the
properties of this layer to luminance legacy.
Lower the
opacity to 50.
Delete the
original Raster 3.
Merge
together your paper and your tube.
Make copy
of vector 5 layer active and go to adjust add/remove noise.
Add noise
at 100% with uniform and monochrome checked.
Make
Raster 4 active and selections select all float and defloat.
Open paper
2 and copy and paste as a new layer.
Selections
invert and hit delete.
Selections
select none.
Delete
Raster 4.
Make
Raster 5 layer active and selections select all float and defloat.
Open paper
6 and copy and paste as a new layer.
Selections
invert and hit delete.
Selections
select none.
Delete
Raster 5.
Make
Raster 6 active and selections select all float and defloat.
Open paper
11 and copy and paste as a new layer.
Selections
invert and hit delete.
Selections
select none.
Delete
Raster 6.
Using your
Impact font write out the words “Beautiful Dream” in the box
area.
I used
white and added the same noise to it that I did to the frame.
Make copy
of vector 2 active and add the same noise.
Make copy
of vector 1 active and selections select all float and defloat.
Open paper
5 and copy and paste as a new layer.
Selections
invert and hit delete.
Selections
select none.
Delete
copy of vector layer 1.
Make Copy
of Raster 7 active and selections select all float and defloat.
Open paper
9 and copy and paste as a new layer and selections invert and hit
delete.
Selections
select none.
Delete
copy of raster 7 layer.
Make
Raster 7 layer active and selections select all float and defloat.
Layers new
raster layer.
Open paper
8 and copy and paste into selection.
LEAVE
SELECTED
Delete
Raster 7 layer.
Open your
full tube.
Re-size as
necessary.
Copy and
paste as a new layer and position within the selected area.
Erase any
bits hanging out that you do not want.
Selections
select none.
Now add a
drop shadow to each layer.
Open paper
8 and copy and paste as a new layer.
Drag to
the bottom.
Apply the
mask of your choice.
Delete the
mask layer and merge the group.
Open your
cloud tube.
I
colorized mine to match my tag but that is up to you.
Copy and
paste as a new layer and drag to the bottom.
Duplicate
and move this copy to the top behind your tubes head and drag down to
just above your mask layer.
Now lets
dress this tag up with some of the great elements from the kit.
I will
tell you what elements I used.
Placement
is completely up to you.
Elements
used:
2
19
26(i
erased bits of the hanger so it looked like it was hanging on the
strip)
31
Add your
name.
If you
want to add some noise around it like I did mine then go ahead.
Add your
copyright and licensing information.
Crop and
save.


No comments:
Post a Comment