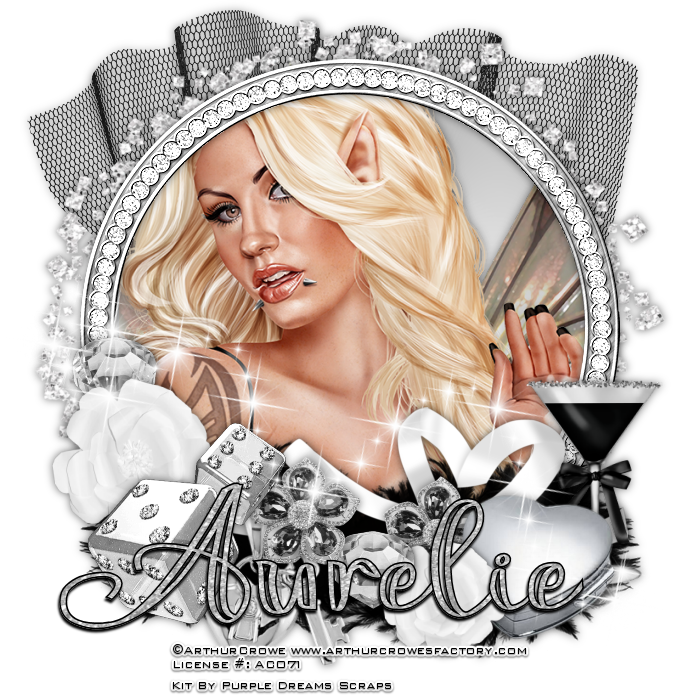
Fairy Beautiful
Written 5/5/2016
This tutorial is meant purely as a guide. Feel free to
make your tag unique by using your own choice of tube and scrap kit. If you
want your tag to look just like mine then use the same supplies I have used.
This tutorial assumes you have knowledge of paint shop pro. Any resemblance to
any other tag or tutorial is purely coincidental.
Supplies Used:
Tube is called Blonde Fairy by Arthur Crowe. You can
purchase her at http://arthurcrowesfactory.com/store/index.php?route=common/home
Scrap kit is by Purple Dreams Scraps. It is called
Black and White and can be purchased at http://picsfordesign.com
Font of your choice. I am using Aysheea. This is a PTU
font.
Plugins:
NONE
Drop shadow used throughout:
0 0 55 13.00 black
Let’s Begin:
Open element 49 and shift+D to duplicate. Close the
original. Make your canvas large enough to work with.
Using your magic wand select the inside of the frame.
Selections modify and expand by 5.
Open paper 11 and copy and paste as a new layer. Drag
under the frame. Selections invert and hit delete.
LEAVE SELECTED!!
Selections invert again. Open your tube and copy and
paste as a new layer. Position within the selected frame area. Selections
invert and hit delete. Selections select none.
Add a drop shadow to both the tube and the frame
layers.
Open element 45 and re-size by 90%. Copy and paste as
a new layer. Drag to the bottom. Position around the frame. Add a drop shadow.
Open element 34 and copy and paste as a new layer. Drag
to the bottom. Position at the top of the frame. Add a drop shadow.
Open element 3 and copy and paste as a new layer. Move
to the bottom of your tag along the bottom of the frame. Add a drop shadow.
Open element 9 and re-size by 50% and then again by
75%. Copy and paste as a new layer. Place at the bottom of your tag and to the
left of the feathers. Add a drop shadow. Duplicate. Re-size this copy by 75%.
Move to the bottom and to the right.
Open element 12 and re-size by 75% 2x. Copy and paste
as a new layer. Drag under the smaller of the 2 flowers. Move to the right of
that flower. Add a drop shadow.
Open element 15 and re-size by 50%. Copy and paste as
a new layer and drag under the larger of the 2 flowers. Place on the far left
above the flower. Duplicate. Move this copy down and to the right in front of
the smaller of the 2 flowers. Add a drop shadow to both.
Open element 16 and re-size by 50%. Copy and paste as
a new layer. Place to the left. Add a drop shadow.
Open element 23 and image flip horizontal. Copy and
paste as a new layer. Drag down to just above the feathers. Add a drop shadow.
Open element 26 and re-size by 75%. Copy and paste as
a new layer and place to the far right. Add a drop shadow.
Open element 31 and re-size by 50% and then again by
75%. Copy and paste as a new layer and place near the bottom and to the left.
Add a drop shadow.
Open element 69 and re-size by 50%. Copy and paste as
a new layer. Duplicate and place this one where you wish. Add a drop shadow to
both.
Add your name.
Open element 1 and copy and paste as a new layer.
Add your copyright and licensing information.
Crop and save.


No comments:
Post a Comment