Showing posts with label AmyMarie. Show all posts

Friday, October 7, 2016

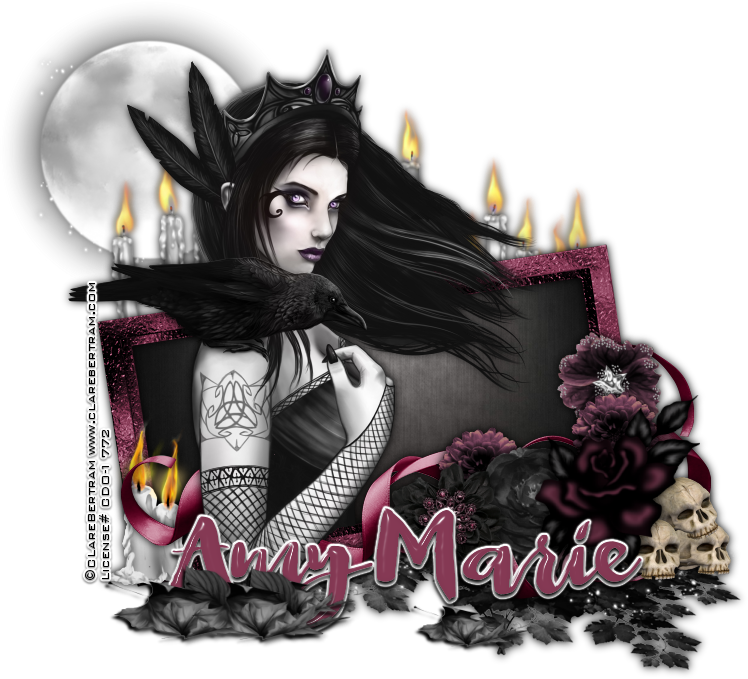
Dark Side Of Me


Dark Side Of Me
Written 10/4/2016
This tutorial is meant purely as a guide. Feel free to use your own choice of tube or scrap kit to make your tag unique. If you want your tag to look just like mine them use the same supplies I have used. This tutorial assumes you have a knowledge of paint shop pro. Any resemblance to any other tag or tutorial is completely coincidental.
Supplies Used:
I am using the work of Clare Bertram.  You can purchase this tube at http://cdoestore.com
Scrap kit is called Dark Lil by Amy Marie’s Kits. You can purchase this kit at http://amymarieskits.com/store/
Font of your choice. I am using Queen. This is a PTU font.
Plugins:
NONE
Drop shadow used throughout:
0 0 100 13.00 black

Let's Begin:
Open element 35 and shift+D To duplicate. Close the original. Make you canvas large enough to give you room to work with.
Using your magic wand select the inside of the frame. Selections modify and expand by 4. Layers new raster layer and drag under the frame. Open paper 16 and edit and copy and paste into selection. Selections select none.
Select the inside of the frame again and this time selections modify and expand by 2. Open your tube and copy and paste as a new layer. Erase any bits hanging out of the frame that you do not want. Selections select none. Add a drop shadow to both the frame and the tube.
Open element 4 and copy and paste as a new layer. Drag to the bottom. Move to the top of the frame so you can see the candles and flame around your tube and above the top edge of the frame. Add a drop shadow.
Open element 107 and copy and paste as a new layer. Drag to the bottom. Move to the top left behind the head of your tube and the candles. Add a drop shadow.
Open element 10 and copy and paste as a new layer and drag to the bottom. Move to the bottom right of the frame. Add a drop shadow.
Open element 6 and re-size as needed. Copy and paste as a new layer and place in the bottom right hand corner of the frame. Add a drop shadow. Now build up around the side and bottom of the frame with other flowers of your choice from the kit. There are so many to choose from. Add a drop shadow to each one.
Open element 24 and re-size. Copy and paste as a new layer and place in the lower left corner of the frame. Add a drop shadow.
Open element 40 and copy and paste as a new layer. Place along the bottom amongst the flowers. Erase any bits to make it look like its wrapped around the flowers and in and around your tube. Add a drop shadow.
Open element 114 and re-size. Copy and paste as a new layer and place in the bottom right corner. Tuck it behind some of the flowers. Add a drop shadow.
Add your name.
Add your copyright and licensing information.
Crop and save.


Thursday, September 29, 2016

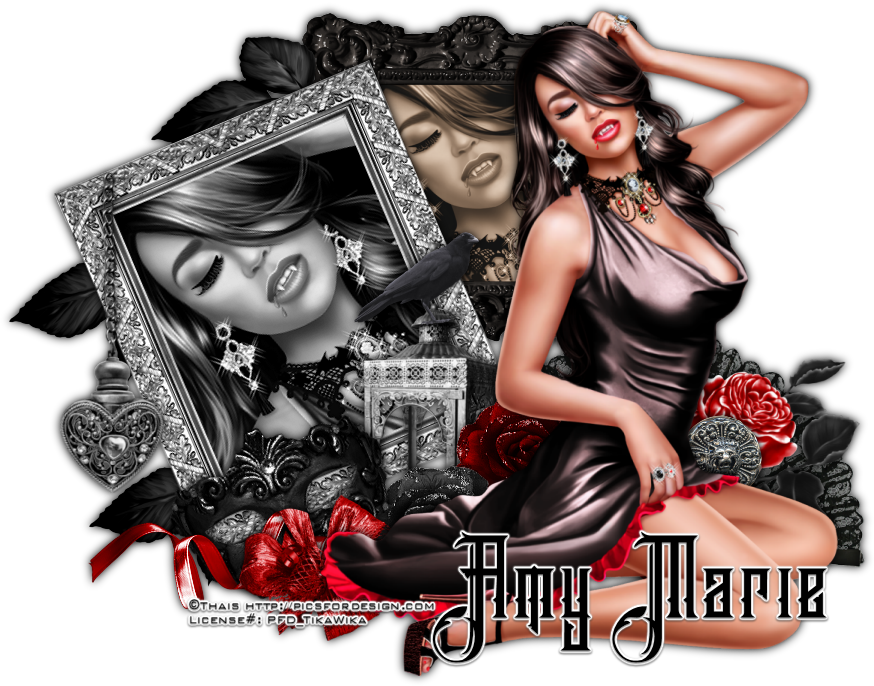
Vampire Love


Vampire Love
Written 9/29/2016
This tutorial is meant purely as a guide. Feel free to use your own choice of tube or scrap kit to make your tag unique. If you want your tag to look just like mine them use the same supplies I have used. This tutorial assumes you have a knowledge of paint shop pro. Any resemblance to any other tag or tutorial is completely coincidental.
Supplies Used:
Tube of your choice. I am using the artwork of Thais. You can purchase this tube at http://picsfordesign.com
The scrap kit is called Simone and is by Amy Marie’s Kits. You can purchase this kit at http://amymarieskits.com/store/
Font of your choice. I am using Brandley. This is a PTU font.
Plugins:
NONE
Drop shadow used throughout:
0 0 100 13.50 black

Let's Begin:
Open a blank canvas that is going to give you plenty of room to work with.
Open element 40 and shift+D to duplicate. Close the original. Using your magic wand select the inside of the frame and go to selections modify and expand by 5. Layers new raster layer and drag under the frame. Flood fill with black. Open your tube and copy and paste as a new layer and drag under the frame. Position so her face is within the frame. Adjust hue and saturation, colorize and set both values to 0. Selections invert and hit delete. Selections select none. Merge all of these layers together. Crop this canvas around the frame. Copy and paste as a new layer on the blank canvas. Re-size. Image free rotate to the left 23 degrees. Adjust sharpen. Move to the left of the canvas. Add a drop shadow.
Open element 66 and we are going to basically repeat the same steps as above but do not colorize. Once you get your tube positioned in the frame go to effects. Photo Effects. Sepia Toning and set the amount to age to 60. Merge the layers together. Crop the canvas. Copy and paste as a new layer onto your tag canvas. Re-size. Move to the top and to the right of your first image and drag under so it comes out from behind that frame. Use my tag for reference if needed. Add a drop shadow.
Open your tube and copy and paste as a new layer. Re-size as needed. Move her to the far right and up so her head is right next to the small black framed image. Use my tag for reference if needed. Add a drop shadow.
Now let’s dress the tag up with elements from the kit. I will list the elements I used. Feel free to use other elements to make your tag unique. Placement of the elements is completely up to you. If you want your tag to look just like mine then use my tag for reference.
Elements I used:
9
10
11
24
27
35
53
54
56
62
65
99
Add your name.
Add your copyright and licensing information.
Crop and save.

Monday, September 26, 2016

Autumn Days Are Here


Autumn Days Are Here
Written 9/23/2016
This tutorial is meant purely as a guide. Feel free to use your own choice of tube or scrap kit to make your tag unique. If you want your tag to look just like mine them use the same supplies I have used. This tutorial assumes you have a knowledge of paint shop pro. Any resemblance to any other tag or tutorial is completely coincidental.
Supplies Used:
Tube of your choice. I am using the artwork of Queen Uriel. You can purchase this tube and all of her work at http://www.queenuriel.com/loja/index.asp
Scrap kit is called Touch of Autumn and is by Amy Marie’s Kits. You can purchase it at http://amymarieskits.com/store/
Font of your choice. I am using Housegrind. You can download it at http://www.dafont.com/housegrind.font
Plugins:
DSB Flux Linear Transmission
Drop shadow used throughout:
0 0 100 9.50 Dark Brown from the paper

Let's Begin:
Open element 68 and shift+D to duplicate. Close the original. Make your canvas large enough to work with.
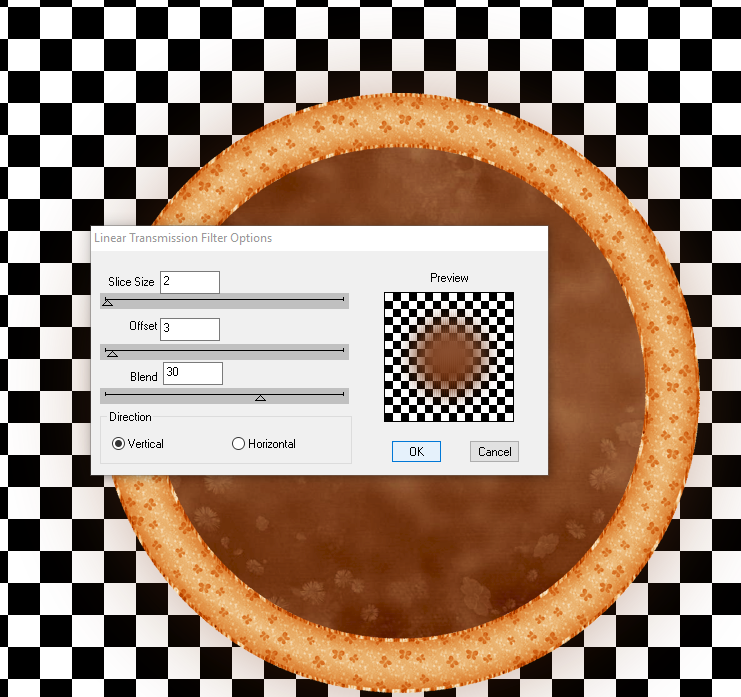
Using your magic wand select the inside of the frame and go to selections modify and expand by 5. Layers new raster layer and drag under the frame. Open paper 4 and paste into selection. Selections select none. Duplicate this paper layer. On the bottom layer adjust blur Gaussian blur at 75. Apply the Dsb Flux Linear Transmission filter using the following settings:

Open element 61 and copy and paste as a new layer. Re-size by 110% 2x. Drag under the top paper layer. Place so its evenly around the frame. Add a drop shadow.
Open your tube and copy and paste as a new layer. Place in the bottom center of the frame. Add a drop shadow.
Now let’s dress the tag up with elements from the kit. I will list the elements I used. Feel free to use other elements to make your tag unique. Placement of the elements is completely up to you. If you want your tag to look just like mine then use my tag for reference.
Elements I used:
37
41
66
70
83
94
104
110
Add your name.
Add your copyright and licensing information.
Crop and save.


Thursday, September 22, 2016

Fright Night


Fright Night
Written 9/21/2016
This tutorial is meant purely as a guide. Feel free to use your own choice of tube or scrap kit to make your tag unique. If you want your tag to look just like mine them use the same supplies I have used. This tutorial assumes you have a knowledge of paint shop pro. Any resemblance to any other tag or tutorial is completely coincidental.
Supplies Used:
Tube of your choice. I am using the work of Pinup Toons. You can purchase this tube at http://cdoestore.com I purchased this tube when PUT was with CILM.
Scrap kit is a great lil Halloween mini kit by Amy Marie’s Kits. It is called Lexi’s Halloween Collection. You can purchase it at http://amymarieskits.com/store/
Mask of your choice. I am using mask #281 by Vix. You can get her masks at http://www.freewebs.com/vixpsp/
Font of your choice. I am using Humblle Rought. You can download it at http://www.dafont.com/humblle-rought.font
Plugins:
NONE
Drop shadow used throughout:
0 0 100 12.50 black
Let's Begin:
Open F1 from the kit and shift+D to duplicate. Close the original. Make your canvas large enough to work with. Using your magic wand select the inside of the frame. Selections modify and expand by 3. Layers new raster layer and drag under the frame. Open paper 5 and copy and paste into selection. Selections select none.
Copy and paste the same paper again and drag to the bottom. Apply the mask of your choice. Delete the mask layer and merge the group.
Add a drop shadow to the frame.
Open element 8 and copy and paste as a new layer and move to the far right side of the frame. Add a drop shadow.
Open element 9 and copy and paste as a new layer and place center bottom of the frame. Add a drop shadow.
Open your tube and copy and paste as a new layer. Re-size as needed. Place so she is sitting in the bottom of the frame. Add a drop shadow.
Open element 24 and re-size as needed. Copy and paste as a new layer. Drag down under the grass. Move to the far left. Add a drop shadow.
Open element 50 copy and paste as a new layer and place at the top of the framed area mostly over the image inside of the frame.
Open element 3 and re-size. Copy and paste as a new layer and place at the top over the tree. Add a drop shadow.
Open element 18 and copy and paste as a new layer and re-size as needed. Move to the far left near the headstone. Add a drop shadow.
Add your name.
Add your copyright and licensing information.
Crop and save.


Thursday, September 15, 2016

Falling In Love


Falling In Love
Written 9/13/2016
This tutorial is meant purely as a guide. Feel free to use your own choice of tube or scrap kit to make your tag unique. If you want your tag to look just like mine them use the same supplies I have used. This tutorial assumes you have a knowledge of paint shop pro. Any resemblance to any other tag or tutorial is completely coincidental.
Supplies Used:
Tube of your choice. I am using the work of Enys Guerrero. You can purchase this tube at http://cdoestore.com
Scrap Kit is called Falling In Love by Amy Marie’s Kits. You can purchase this kit at http://amymarieskits.com/store/
Mask of your choice. I am using mask #31 by Millies PSP Madness. You can get her masks at http://milliespspmadness.blogspot.com/
Font of your choice. I am using Wisdom Script. You can download it at http://www.losttype.com/font/?name=wisdom%20script
Plugins:
NONE
Drop shadow used throughout:
0 0 85 3.50 black

Let's Begin:
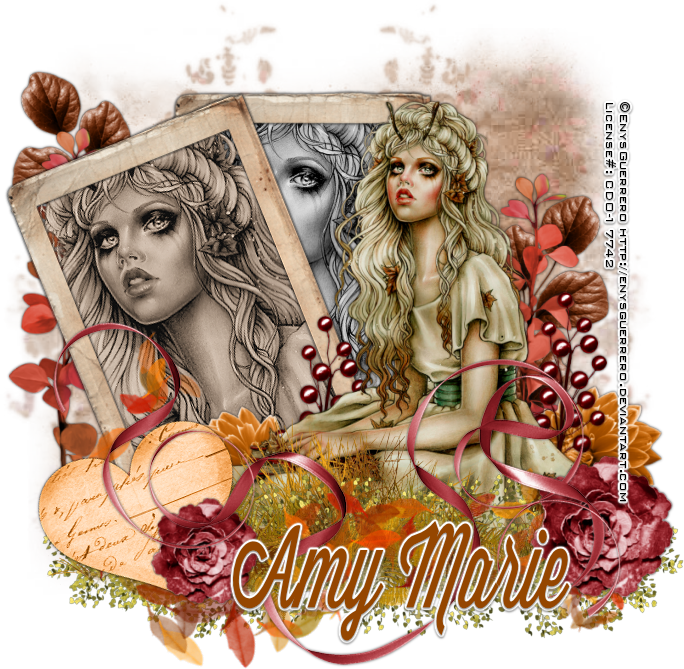
Open element 8 and shift+D to duplicate. Close the original. Duplicate again. We are going to prep these frames to go on your main canvas for the actual tag. Working with  just one of the frames re-size to a size you are happy with. You don’t want it too large but you don’t want it small either. Using your magic wand select the inside of the frame and go to selections modify and expand by 6. Open your tube and copy and paste as a new layer. Drag under the frame. Selections invert and hit delete. Selections select none. Effects photo effects Sepia Toning and set the toning to 45. Add a drop shadow to the frame and the tube. Merge these 2 layers together. Repeat with the second frame however change the coloring of this tube to greyscale.
Open a blank new canvas large enough to give you room to work with.
Copy and paste both of the framed images you prepped onto this new canvas. Image free rotate the sepia toned one to the left 22 degrees. Adjust sharpen. Place the sepia toned image at the top and the greyscale image at the bottom. Place the greyscale image so only part of it can be seen out of the right side of the sepia toned image.
Open your tube again and copy and paste as a new layer and place to the right side of the 2 framed images but also in front of them. Use my tag for reference. Re-size if you need to. Add a drop shadow to the tube.
Open paper 1 and copy and paste as a new layer and drag to the bottom. Re-size if you need to. Apply the mask of your choice. Delete the mask layer and merge the group.
Now let’s dress the tag up with elements from the kit. I will list the elements I used. Feel free to use other elements to make your tag unique. Placement of the elements is completely up to you. If you want your tag to look just like mine then use my tag for reference.
Elements I used:
5
6
22
24
28
41
46
68
79
Add your name.
Add your copyright and licensing information.
Crop and save.


Sunday, September 4, 2016

Apple Picking Season


Apple Picking Season
Written 9/4/2016
This tutorial is meant purely as a guide. Feel free to use your own choice of tube or scrap kit to make your tag unique. If you want your tag to look just like mine them use the same supplies I have used. This tutorial assumes you have a knowledge of paint shop pro. Any resemblance to any other tag or tutorial is completely coincidental.

Supplies Used:
Tube of your choice. There are some fun ones in the kit or use whatever you choose. I am using the work of TooshToosh. You can purchase this tube at http://www.tooshtoosh.com/index.php
Scrap Kit is by Amy Marie’s Kits and is called Autumn Fairy Mini. You can purchase this kit at http://amymarieskits.com/store/
Mask of your choice. I am using mask # 1 from Set 121 by Rachel Designs. You can get her masks at https://racheldesignsblog.wordpress.com/
Font of your choice. I am using Orion MD.
Plugins:
None
Drop shadow used throughout:
0 0 85 9.50 black

Let's Begin:
Open paper 3 from the kit and shift+D to duplicate. Close the original. Promote the background layer to a raster layer. Make your canvas large enough to work with. Re-size the paper if you wish. Apply the mask of your choice. Delete the mask layer and merge the group.
Open element 2 from the kit and copy and paste as a new layer. Place at the bottom center of your mask. Add a drop shadow.
Open your tube and copy and paste as a new layer. Re-size as needed and place so it appears to be sitting on the bench. Add a drop shadow.
Open element 8 and copy and paste as a new layer. Drag to the bottom in front of the bench. Carefully use your eraser tool and erase any bits you want. I didn’t want it to cover the bench but more like it was just growing up around it.
Open element 15 and copy and paste as a new layer. Re-size as needed. Place to the far left of the bench. Add a drop shadow.
Open element 16 and copy and paste as a new layer and re-size smaller than the first barrel. Move to the bottom right of the first barrel. Add a drop shadow.
Open element 31 and copy and paste as a new layer. Drag down to just above the mask layer. Move to the far right and tuck it behind the bench. Add a drop shadow.
Open element 30 and copy and paste as a new layer. Re-size and place in the bottom right in front of the bench and light pole. Add a drop shadow. Duplicate and re-size this one by 50%. Move to the left side on the bench next to your tube.
Open element 43 and copy and paste a new layer. Re-size by 60%. Drag down to just on top of the bench. Use your eraser tool and erase any bits to make it look like its kind of entertwined with the bench. Add a drop shadow.
Open element 38 and copy and paste as a new layer. Place on the far left behind the apple barrel. Re-size as needed. Add a drop shadow. Duplicate and re-size by 70% and move to the far right near the first set of flowers.
Add your name.
Add your copyright and licensing information.
Crop and save.

Saturday, August 27, 2016

"Fall" 'ing Apples - Forum Set


“Fall”ing Apples – Forum Set
Written 8/25/2016
This tutorial is meant purely as a guide. Feel free to use your own choice of tube or scrap kit to make your tag unique. If you want your tag to look just like mine them use the same supplies I have used. This tutorial assumes you have a knowledge of paint shop pro. Any resemblance to any other tag or tutorial is completely coincidental.
Supplies Used:
No tubes used in this tutorial however if you wish to use one that is up to you. I have used the bears from the scrapkit.
Adorable scrap kit by Amy Marie’s Kits. It is called Apple Of My Eye. You can purchase it at http://amymarieskits.com/store/
Font of your choice. I am using Kids Play. You can download it at http://www.fontspace.com/jonathan-s-harris/kids-play
Plugins:
NONE
Drop shadow used throughout:
0 0 85 5.00 Black

Let's Begin:
We are going to start off with the tag itself.
Open a new blank canvas that will give you plenty of room to work with. Make sure it is a transparent canvas.
Using your rectangle preset tool turn off the background color and set the foreground color to whatever color you choose. Set the width to 4.50. Draw out a rectangle to the size you want for the base of your tag.
Using your magic wand to select the inside of the rectangle. Selections modify and expand by 1. Open a paper of your choice from the kit and copy and paste as a new layer and drag under the frame. Selections invert and hit delete. Selections select none. Add a drop shadow to the frame.
Open element 8 and copy and paste as a new layer. Place to the left side of your canvas. Add a drop shadow.
Open element 6 and re-size by 50% and then again by 85%. Copy and paste as a new layer and place to the right of the tree. Add a drop shadow.
Open element 12 and re-size by 50% and then again by 75% and copy and paste as a new layer and place to the left of the tree. Add a drop shadow.
Open element 9 and re-size by 50%. Copy and paste as a new layer and place at the top of the frame to the right of the tree. Add a drop shadow.
Open element 19 and re-size by 75%. Copy and paste as a new layer and drag to the bottom. Move to the far right side of the frame. Make it appear to be coming out of the word “Fall”. Add a drop shadow.
Open element 33 and re-size by 50%. Copy and paste as a new layer and move to the far bottom right of the frame. Add a drop shadow.
Add your name in the center.
Add your copyright and licensing information.
Crop and save.
Now lets make our avatar to match.
Open a blank canvas the size you want it to be. Usually a good avatar size is 150x150.
Open the paper of your choice from the kit and copy and paste as a new layer.
Open the tube from the kit or the tube you are using and copy and paste as a new layer and re-size. Place in the bottom right corner of the avatar. Add a drop shadow.
Add any another elements you want.
Add a 2 pixel width border in the color that you wish.
Add your name or initial.
Add your copyright and licensing information.
Crop and save. 

Monday, August 22, 2016

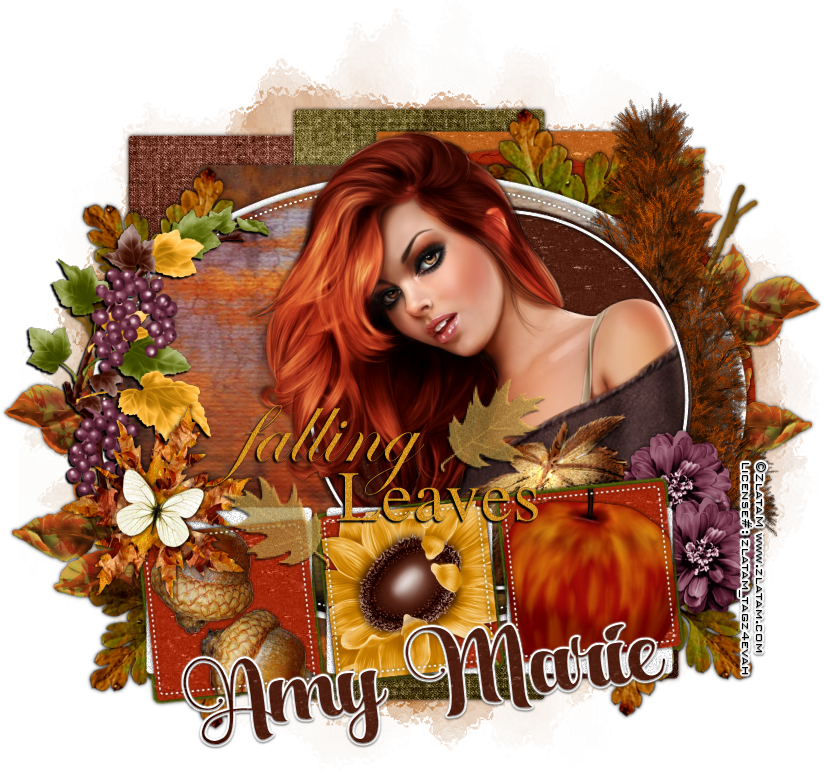
Falling Leaves


Falling Leaves
Written 8/22/2016
This tutorial is meant purely as a guide. Feel free to use your own choice of tube or scrap kit to make your tag unique. If you want your tag to look just like mine them use the same supplies I have used. This tutorial assumes you have a knowledge of paint shop pro. Any resemblance to any other tag or tutorial is completely coincidental.
Supplies Used:
Tube of your choice. I am using the work of Zlata M and this tube is called Autumn Blues. You can purchase this tube at http://zlatam.com/
Scrap Kit is by Amy Marie’s Kits and is called Autumn Days. You can purchase this kit at http://amymarieskits.com/store/
Tag template is by Dangerously Delicious Designz. You can get it at http://dangerouslydeliciousdesignz.blogspot.de/2016/07/template-176-summertime-with-3-word-art.html
Mask of your choice. I am using vix big mask 001. You can get this mask at http://vixpsp.blogspot.com/
Font of your choice. I am using Aqualita. This is a PTU font.
Plugins:
NONE
Drop shadow used throughout:
0 0 85 6.50 black

Let's Begin:
Open the tag template and shift+D to duplicate. Close the original. Delete the following layers : info and bg. Make your canvas large enough to work with. Now lets clean up this layer palette a bit and merge some of the layers together. Merge together: bottom right yellow square and top left lt blue square, merge together top and bottom orange squares, merge together left blue square and right blue square.
Now fill each of the layers with either papers from the kit or colors and gradients of your choice. Once you get them all filled then add a drop shadow to each layer.
Open your tube and copy and paste as a new layer. I placed mine in the smaller of the 2 circles at the top. Add a drop shadow.
Using some of the elements from the kit add them to the 3 fames of the template.
Open the paper of your choice and copy and paste as a new layer and drag to the bottom. Apply the mask of your choice. Delete the mask layer and merge the group.
Now let’s dress the tag up with elements from the kit. I will list the elements I used. Feel free to use other elements to make your tag unique. Placement of the elements is completely up to you. If you want your tag to look just like mine then use my tag for reference.
Elements I used:
1
3
9
31
38
40
41
49
79
83
Add your name.
Add your copyright and licensing information.

Crop and save.
Saturday, August 20, 2016

Wine A Little


Wine A Little
Written 8/20/2016
This tutorial is meant purely as a guide. Feel free to use your own choice of tube or scrap kit to make your tag unique. If you want your tag to look just like mine them use the same supplies I have used. This tutorial assumes you have a knowledge of paint shop pro. Any resemblance to any other tag or tutorial is completely coincidental.
Supplies Used:
Tube of your choice. I am using a tube called Patty by Misticheskaya. You can purchase this tube at http://picsfordesign.com
The awesome scrap kit is by Amy Marie;s Kits and it is called Vintage Grapes. You can purchase this kit at http://amymarieskits.com/store/
Mask of your choice. I am using mask #109 by Vix. You can get her masks at http://www.freewebs.com/vixpsp/
Font of your choice. I am using Carioca. You can download it at http://www.1001fonts.com/carioca-font.html
Plugins:
Penta.com Color Dot
Drop shadow used throughout:
0 0 80 12.00 black

Let's Begin:
Open element 13 and shift+D to duplicate. Close the original. Re-size by 75%. Make your canvas large enough to work with. Using your magic wand select the inside of the frame. Selections modify and expand by 5. Open paper 12 and copy and paste as a new layer. Drag under the frame. Selections invert and hit delete. Selections invert again. Open your tube and copy and paste as a new layer. Position her face within the frame so it fills the whole frame. Selections invert and hit delete again. Selections select none. Change the properties of this layer to luminance legacy. Apply the penta.com color dot filter and change the top value to 30. Add a drop shadow to the frame. Merge these 3 layers together. Image free rotate to the left 24 degrees. Adjust sharpen. Move this to the top and left.
Open your tube again and copy and paste as a new layer. Re-size as needed and move to the right side of the frame. Add a drop shadow to the tube.
Open the paper of your choice and copy and paste as a new layer and drag to the bottom. Apply the mask of your choice. Delete the mask layer and merge the group.
Now let’s dress the tag up with elements from the kit. I will list the elements I used. Feel free to use other elements to make your tag unique. Placement of the elements is completely up to you. If you want your tag to look just like mine then use my tag for reference.
Elements I used:
17
20
31
35
41
50
84
85
86
91
Add some text if you would like to.
Add your name.
Add your copyright and licensing information.

Crop and save.