Showing posts with label Pink. Show all posts

Wednesday, June 22, 2022

Cream And Coffee


Cream and Coffee

Written on 6/22/2022

This tutorial is meant purely as a guide. Feel free to use your own choice of tube or scrap kit to make your tag unique.

If you want your tag to look just like mine, then use the same supplies I have used. This tutorial assumes you have a knowledge

of paint shop pro. Any resemblance to any other tag or tutorial is completely coincidental.


Supplies Used:

Tube of your choice; preferably one with a close up. I am using a tube called Cup of tea 8 by VeryMany. You can purchase this tube at www.verymanytubes.com

Scrap kit is called Cream and Coffee by Jenns Designs. You can purchase this kit at www.jennsxdesigns.com

Mask of your choice. I am using Mask #27 by Rachey. You can get her masks at http://scrapsofenchantment.blogspot.com

Font of your choice. I am using Beauty Boutique.


Plugins: (plugins are most generally optional)

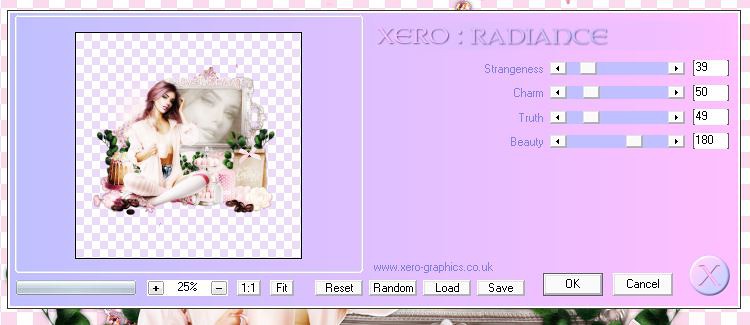
Xero Radiance


Let's Begin:

Open paper 3. Shift+D to duplicate. Close the original. Promote the background layer to a raster layer. Make your canvas large enough to give you plenty of room to work with. Apply the mask of your choice. Delete the mask layer and merge the group.

Open element 50. Copy and paste as a new layer. Resize by 80%. Adjust sharpen. Move to the top right of your tag. Using your magic wand select the inside of the frame and selections modify and expand by 5. Layers new raster layer. Drag under the frame. Open paper 6 and copy and paste into selection.

LEAVE SELECTED.

Open the close up of your tube and copy and paste as a new layer. Resize as needed and move to where the face is inside of the frame. Selections invert delete then selections select none. Change the properties of this layer to luminance legacy and lower the opacity to 40. Merge the tube down to the paper. Add a drop shadow to the frame and merge the frame down to the tube/paper layer.

Open your main tube. Copy and paste as a new layer. Resize as needed. Place to the left of the framed image. Add a drop shadow.


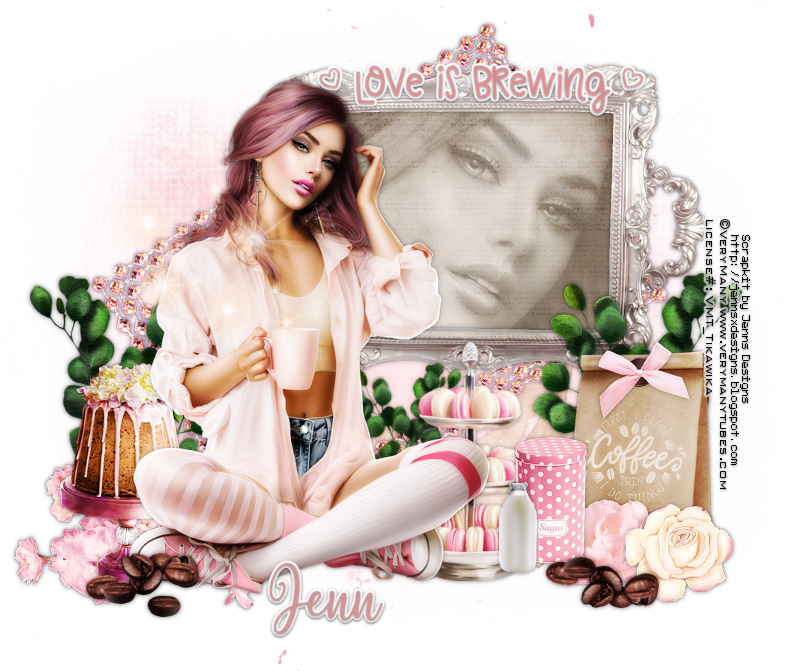
Now let’s dress the tag up with elements from the kit. I will list the elements I used. Feel free to use other elements to make your tag unique. Placement of the elements is completely up to you. If you want your tag to look just like mine, then use my tag for reference.

Elements I used:

1

6

8

31

38

41

42

60

74

84

85

103

118

122

Merge visible.

Apply the Xero Radiance filter using the following settings::


Add your name.

Add your copyright and licensing information.

You can make a 3 piece set like I have by simply using elements from your tag and creating an avatar.

Thank you for trying my tutorial.

XoXoXo


Friday, October 7, 2016

Pink For Hope


Pink For Hope
Written 10/4/2016
This tutorial is meant purely as a guide. Feel free to use your own choice of tube or scrap kit to make your tag unique. If you want your tag to look just like mine them use the same supplies I have used. This tutorial assumes you have a knowledge of paint shop pro. Any resemblance to any other tag or tutorial is completely coincidental.
Supplies Used:
I am using a tube by Alex Prihodoko. You can purchase this tube at http://picsfordesign.com
Scrap Kit is by Tiny Turtle Designs. It is called Wishes and you can purchase it at http://tinyturtledesigns.com/store/
Mask of your choice. I am using a big mask by me. You can download it at http://tagsbytika.blogspot.com/2014/06/1st-big-mask.html
Font of your choice. I am using Aysheea. This is a PTU font
Plugins:
NONE
Drop shadow used throughout:
0 0 100 9.50  grey color

Let's Begin:
Open element 29 and shift+D  to duplicate. Close the original. Make your canvas large enough to work with.
Using your magic wand select the inside of the frame. Selections modify and expand by 3. Layers new raster layer and drag under the frame. Open paper 32 and copy and paste into selection.
Leaving the frame selected open your tube and copy and paste as a new layer. Re-size as needed. Position to the right side of the frame. Selections invert and erase any bits you do not want hanging outside of the frame. Selections select none. Add a drop shadow to both the tube and the frame.
Open paper 29 and copy and paste as a new layer. Drag to the bottom. Apply the mask of your choice. Delete the mask layer and merge the group.

Now let’s dress the tag up with elements from the kit. I will list the elements I used. Feel free to use other elements to make your tag unique. Placement of the elements is completely up to you. If you want your tag to look just like mine then use my tag for reference.
Elements I used:
34
37
59
61
74
76
85
87
93
95
100
123
133
135
Add your name.
Add your copyright and licensing information.
Crop and save.


Friday, June 24, 2016

High Society


High Society
Written 6/24/2016
This tutorial is meant purely as a guide. Feel free to use your own choice of tube or scrap kit to make your tag unique. If you want your tag to look just like mine them use the same supplies I have used. This tutorial assumes you have a knowledge of paint shop pro. Any resemblance to any other tag or tutorial is completely coincidental.

Supplies Used:
Tube of your choice. I am using the work of Daniel Esparza. I bought this tube at CILM when it was in business. I know he also used to sell at CDO but don’t believe you can purchase his work as tubes any longer. If you can I am not sure where.
Scrap kit is by Amy Marie’s Kits. It is called Pinky and you can get it at http://amymarieskits.com/store/
Font of your choice. I am using Twister Script. This is a PTU font.
Plugins:
NONE
Drop shadow used throughout:
0 0 100 12.00 black

Let's Begin:
Open element 63 and shift+D to duplicate. Close the original. Make your canvas large enough to work with. Using your magic wand select the inside of the frame and go to selections modify and expand by 3. Open paper 7 and copy and paste as a new layer. Drag under the frame and selections invert and hit delete. Open element 100 and copy and paste as a new layer. Move to the left side of the frame and then using your eraser tool erase any bits that you do not want hanging outside of the frame. Selections select none. Add a drop shadow to both the frame and the buildings.
Open your tube and re-size if needed. Copy and paste as a new layer and move to the far left side in front of the frame and buildings. Add a drop shadow.
Open element 103 and copy and paste as a new layer. Drag under your tube. Move to the bottom of the frame. Add a drop shadow.
Open element 86 and re-size. Copy and paste as a new layer and move to the far right side of the tag. Add a drop shadow.
Open element 32 and copy and paste as a new layer. Move to the top and drag to the bottom of the layer palette so you can see it around the buildings at the top.
Open element 98 and re-size. Copy and paste as a new layer and move to the bottom left in front of your tube. Add a drop shadow.
Open element 96 and re-size. Copy and paste as a new layer and drag under the necklace element and place to the far left. Add a drop shadow.
Open element 74 and re-size. Copy and paste as a new layer and I placed so it appeared to be hanging from one of the buildings. You can accomplish this effect by using your eraser tool. Add a drop shadow.
Open element 65 and re-size so it is very small. Copy and paste as a new layer and place wherever you want on the tag. Duplicate a few times and rotate them different directions and scatter them all over your tag. Add a drop shadow to each of them when you are done.
Open element 26 and re-size. Copy and paste as a new layer. Place over on top of part of the car. Duplicate and image flip horizontal and move this one on top of the buildings near your tube.
Add your name.
Add your copyright and licensing information.
Crop and save.


Sunday, August 2, 2015

Sweet Surprise


Sweet Surprise
written 8/1/2015

This tutorial is meant to simply be a guide. Make your tag your very own by using whatever tubes and scrap kits you want. If you want your tag to look just like mine then use the same supplies that I use and use my tag as a reference.

Supplies Used:


Font of your choice. I am using Simply Glamorous. You can get it at http://www.dafont.com/simply-glamorous.font

Plugins:
NONE

Let's Begin:
Open element 97 and shift+D to duplicate.
Close the original.
Re-size if you wish.
Make your canvas large enough to work with.
Using your magic wand select the inside of the frame and then go to selections modify and expand by 20.
Open paper 7 and copy and paste as a new layer and drag under the frame.
Selections invert and hit delete.
Selections invert again.
Open the close up of your tube and copy and paste as a new layer.
Position her face within the framed area.
Selections invert and hit delete.
Selections select none.
Change the properties of the tube layer to luminance legacy.
Merge down to the paper layer.
Now use your smudge tool and run along the edges to smooth them out and blend them so they don't look so choppy behind the frame.
Add a slight drop shadow to the frame using the pink color.
Open your full size tube and copy and paste as a new layer.
Re-size and then move to the far right side of the frame.
Open element 10 and copy and paste as a new layer.
Re-size so it is within proportion of your tube.
I placed mine so it looked like the tube was standing inside of the cupcake wrapper.
You can do this by erasing bits of the tube.
Add a drop shadow to both the tube and the cupcake wrapper.
Now lets dress the tag up with some of the great elements included in this great kit.
I will simply list the elements I used. Placement is entirely up to you.
Elements used:
element09
element011
element013
element027
element033
element036
element042
element059
Add your name.
Add your copyright and licensing information.
Crop and re-size if needed.
Save.