Showing posts with label Summer. Show all posts

Saturday, September 3, 2022

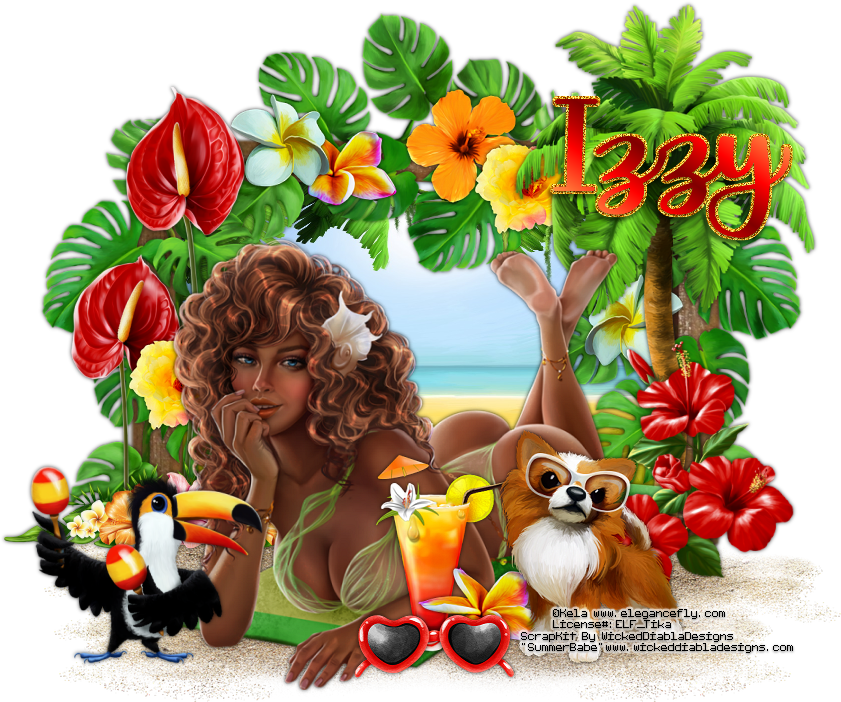
Last Beach Day


Last Beach Day

Written 9/3/2022

This tutorial is meant purely as a guide. Feel free to use your own choice of tube or scrap kit to make your tag unique.

If you want your tag to look just like mine, then use the same supplies I have used. This tutorial assumes you have a knowledge

of paint shop pro. Any resemblance to any other tag or tutorial is completely coincidental.


Supplies Used:

Tube is by Kela “Xenya”- you can purchase it at www.elegancefly.com

Scrap Kit is by Wicked Diabla Designs “Summer Babe” – you can purchase it at www.wickeddiabladesigns.com

Font of your choice. I am using – Cailyn Bloom


Plugins: (plugins are most generally optional)

NONE


Let's Begin:

Open element 51 from the kit. Shift +D to duplicate. Close the original. Make your canvas large enough to give you plenty of room to work with. I usually make my canvases 900x900 then crop and resize when I am done.

Resize the frame by 85%.

Using your magic wand select the inside of the frame. Selections modify and expand by 5.

Layers new raster layer and drag under your frame.

Open paper 3 from the kit. Copy and paste the paper into the selection on your new raster layer.

Selections select none.

Add a drop shadow of your choice to the frame.

Open your tube. Copy and paste as a new layer. Resize as you wish.

Place in front of the frame. Add a drop shadow to your tube.

Now let’s dress the tag up with elements from the kit. I will list the elements I used. Feel free to use other elements to make your tag unique. Placement of the elements is completely up to you. If you want your tag to look just like mine, then use my tag for reference.

Elements I used:

6

7

9

15

21

30

33

34

43

48

56

58

64

68

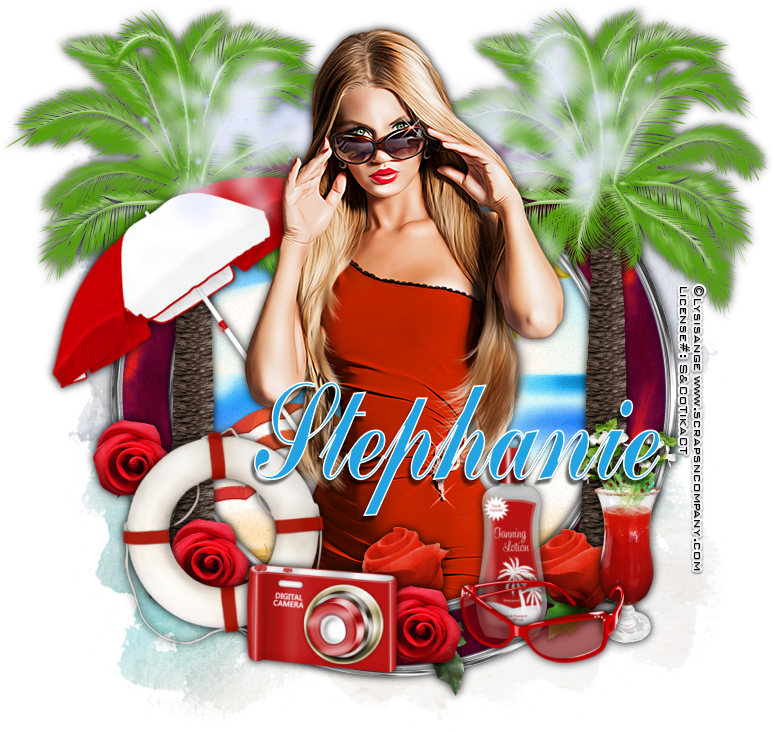
Add your name.

Add your copyright and licensing information.

Crop and save.

Thanks for trying my tutorial.

♥♥♥


Sunday, May 23, 2021

Dog Day Beach


Dog Day Beach

Written May 22, 2021

This tutorial is meant purely as a guide. Feel free to use your own choice of tube or scrap kit to make your tag unique.

If you want your tag to look just like mine, then use the same supplies I have used. This tutorial assumes you have a knowledge of paint shop pro. Any resemblance to any other tag or tutorial is completely coincidental.

Supplies Used:

Tube is by Maryline Cazenave and can be purchased at http://cdoestore.com You must have a license to use this image in your tag creations.

Scrapkit is by Kizzed By Kelz and can also be purchased at CDO.

Mask of your choice.

Font of your choice.

Plugins: (plugins are most generally optional)

Xero-Moodlight

Xero - Radiance

Let's Begin:

Open frame 1 from the kit and shift+D to duplicate. Close the original so you can use it again if you choose in other creations.

Make your canvas large enough for you to work with by going to Image Canvas Size and setting the size you want. I usually do 900x900 just to give me loads of room to work with while creating. You will be cropping and resizing at the end if you wish.

Resize the frame by 80%. Go to Adjust Sharpen more and sharpen it 2x to clean it up some.

Using your magic wand select the inside of the frame. Selections modify and expand by 5. Layers new raster layer and drag this new layer under the frame.

Open paper 5. There is a small white border around this paper so I like to crop that out just because of me wanting to use the paper as a fill for my frame I do not want the white border but you can leave it if you choose. After cropping. Copy and paste into selection which should be on your new layer. Selections select none. Duplicate the paper layer 2x. On both copies change the blend mode of the layer to multiply.

Open paper 2 and copy and paste as a new layer. Drag to the bottom. Apply the mask of your choice. Delete the mask layer and merge the group.

Open your tube and copy and paste as a new layer at the top. Resize as needed and position where you would like. Apply the Xero Moodlight plugin using the following settings:


Drop shadow both the frame and your tube.

Now let’s dress the tag up with elements from the kit. I will list the elements I used. Feel free to use other elements to make your tag unique. Placement of the elements is completely up to you. If you want your tag to look just like mine, then use my tag for reference.

Elements I used:

4

6

8

17

21

26

30

31

Once you have everything in place add your artist copyright information and any other details you need to add. Make sure your license # is on there.

I then chose to apply the Xero Radiance plugin using the following settings:

This is completely up to you.

Crop your tag.

Add your name.

Save.

Thanks for trying my tutorial.


Saturday, August 19, 2017

Beary Best Friend


Beary Best Friends

Written 8/19/2017

This tutorial is meant purely as a guide. Feel free to use your own choice of tube or scrap kit to make your tag unique. If you want your tag to look just like mine then use the same supplies I have used. This tutorial assumes you have a knowledge of paint shop pro. Any resemblance to any other tag or tutorial is completely coincidental.

Supplies Used:
Tube of your choice. I am using a tube by Ken Morton. You can find his work at http://cdoestore.com You must have a license to use his work.

Scrap kit of your choice. I am using a kit by Foxys Designz which you can find at http://www.cdoestore.com/index.php?p=product&id=41819&parent=498

Mask of your choice. I am using mask #226 by Insatiable Dreams. You can get her masks at http://insatiabledreams.net

Font of your choice. I am using 2 Peas Sunflowers

Plugins: (plugins are most generally optional)
NONE

Let's Begin:
Open Frame 2 and shift+D to duplicate. Close the original. Resize by 75% and then again by 85%. Make your canvas large enough to work with.
Using your magic wand select the inside of the frame and go to selections modify and expand by 5. Layers new raster layer and drag under the frame. Open paper 3 and copy and paste into selection. Selections select none. Add a drop shadow to the frame.
Open your tube and copy and paste as a new layer. Re-size as needed. Place on the far right side of the frame and add a drop shadow.
Open paper 2 and copy and paste as a new layer. Drag to the bottom. Apply the mask of your choice. Delete the mask layer and merge the group.
Open element 7. Copy and paste as a new layer. Place around your frame. Re-size as you need and rotate or flip. Add a drop shadow and once you get them all on merge them together.
Open element 8 and copy and paste as a new layer and re-size as needed. Duplicate many times and place all around the frame. Add a drop shadow to each and if you want merge them together.
Open element 4 and copy and paste as a new layer. Re-size by 50%. Image rotate to the left by 25 degrees. Move to the bottom left corner of the frame. Add a drop shadow.
Open element 5 and copy and paste as a new layer. Image flip vertical and then again image flip horizontal. Place behind the bear and to the left side. Add a drop shadow.
Open element 1 and re-size by 50% 2x. Copy and paste as a new layer and place in the bottom left corner at the end of the ribbon. Add a drop shadow.
Open element 16 and re-size by 50%. Copy and paste as a new layer and position so they are all within the framed area. Add a drop shadow.
Open element 19 and re-size by 60%. Copy and paste as a new layer. Move to the bottom left corner behind the jar and just to the right of the jar. Add a drop shadow.
Open element 15 and re-size by 50%. Copy and paste as a new layer. Image flip horizontal. Place so that the twine is behind one of your flowers. Add a drop shadow.
Add some text and your name to the tag.
Add your copyright and licensing information.
Crop and save.

Beaute Florale


Beaute Florale
(Floral Beauty)

Written 8/19/2017

This tutorial is meant purely as a guide. Feel free to use your own choice of tube or scrap kit to make your tag unique. If you want your tag to look just like mine then use the same supplies I have used. This tutorial assumes you have a knowledge of paint shop pro. Any resemblance to any other tag or tutorial is completely coincidental.

Supplies Used:
Tube of your choice. I am using an exclusive tube that was created by Arthur Crowe. This tube is exclusive to The Taggers Lounge psp forum. You can get this tube simply by participating at the forum. You can find the forum at http://thetaggerslounge.forumotion.com/ You must have a TTL license to use this image. You can find Arthur’s awesome tubes at https://arthurcrowesfactory.com/store/

Scrap kit is another exclusive made for The Taggers Lounge forum. This kit was made by Jens Sweet Temptations. You can also get this kit by participating at the forum. You can find other goodies by Jen at http://jenssweettemptations.blogspot.ca/

Font of your choice. I am using Amastery(I also used some of the extra swashes)

Plugins: (plugins are most generally optional)
NONE

Let's Begin:
Open element 29 and shift+D to duplicate. Close the original. Make your canvas large enough to work with. Resize the frame by 120%.
Using your freehand selection tool set on point to point carefully go around the outside edge of the frame and select it. Be really careful that you do not go outside of the frame.
Layers new raster layer. Drag under the frame.
Open paper 5 and copy and paste into selection.
LEAVE SELECTED
Open your tube and copy and paste as a new layer. Position so that her top half is within the framed area but also some poking out around if you wish. Erase any bits you do not want. Selections select none.
Add a drop shadow to both your tube and the frame.
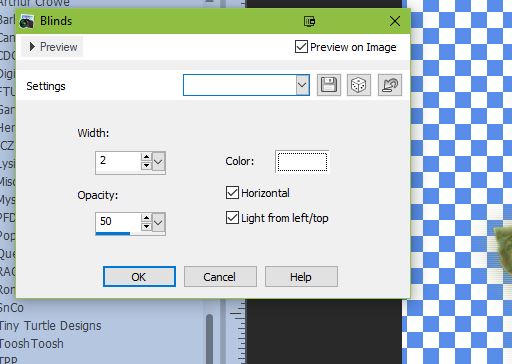
Open element 44. Copy and paste as a new layer and drag to the very bottom. Place at the top right side near your tubes head. Now here is where it is going to take some work from you but it’s so worth it in the end. You are going to duplicate this leaf element several times and rotate it so that you can place it around the frame from the top right to the bottom right. I rotated mine by 15 and 30 degrees. Make sure you sharpen every time you rotate. Once you get them built up the way you want then merge them all together and duplicate that merged layer and image flip horizontal and move to the left side. You should have a complete ring of leaves all the way around the frame. Once you are happy then merge both layers together. Duplicate. On the bottom copy Adjust Blur Guassian Blur at 15. On this blurred layer go to effects texture effects Blinds with the following settings: 

Add a drop shadow to the top copy of the leaves layer.
Now here is where some freedom of expression can come in. Let’s begin building up the flowers all around the frame. You can use any flowers of your choice from the kit. Use as little or as much as you want. I placed some under the frame and peeking out. I placed some on top. Re-size them as you need to. Add a drop shadow to each one.
Once you get all of your flowers on let’s add some other elements.
Open element GElement. And copy and paste as a new layer. Re-size by 75%. Move to the bottom left corner of the frame. Add a drop shadow.
Open element 33. Copy and paste as a new layer. Re-size by 50% 2x. Move to the bottom left in front of the water buckets element. Add a drop shadow.
Open element 9 and copy and paste as a new layer. Re-size by 50% and then again by 70%. Drag under the frog layer. Place at the bottom on the right side of the frog. Add a drop shadow.
Open element 6 and copy and paste as a new layer. Re-size by 50% 2x and image flip horizontal. Place on top of the water buckets element. Add a drop shadow.
You can of course at this time add any other elements if you wish and make the tag uniquely yours. I chose to stop here.
Add your name.
Add your copyright and licensing information.
Crop and save. 


Tuesday, August 16, 2016

Summers Last Fling


Summers Last Fling
Written 8/16/2016
This tutorial is meant purely as a guide. Feel free to use your own choice of tube or scrap kit to make your tag unique. If you want your tag to look just like mine them use the same supplies I have used. This tutorial assumes you have a knowledge of paint shop pro. Any resemblance to any other tag or tutorial is completely coincidental.

Supplies Used:
Tube of your choice. Preferably one with a close up.  I am using the work of Zlata M. The tube is called Barely and can be purchased at http://picsfordesign.com
The scrap kit is called Sea Breeze by Purple Dreams Scraps and can also be purchased at http://picsfordesign.com
Mask of your choice. I am using mask#451 by Vix. You can download her masks at http://www.freewebs.com/vixpsp/
Font of your choice. I am using Vallerie. This is a PTU font.
Plugins:
NONE
Drop shadow used throughout:
0 0 85 6.50 Black

Let's Begin:
Open paper 5 and shift+D to duplicate. Close the original. Promote the background layer to a raster layer. Make your canvas large enough to work with. Re-size the paper if you wish. Apply the mask of your choice. Delete the mask layer and merge the group. Selections select all float and defloat. Open the close up of your tube and copy and paste as a new layer. Position over the mask how you want within the selected area. Selections invert and hit delete. I hit delete a couple of times to bring mine in a little bit from the edges but this is completely up to you and the mask you may be using. Once you are happy selections select none. Change the properties of the tube layer to luminance legacy. Lower the opacity to 60. Merge these 2 layers together if you like to keep  your layer palette organized like I do.
Open element 26 from the kit and copy and paste as a new layer. Move to the far left side. Drag under the mask layer. Duplicate and move this duplicate over to the right side. Merge these 2 layers together.
Open element 49 and copy and paste as a new layer on top of the layer palette. Place in the bottom left of the mask area. Duplicate and move this one down and to the right a bit.
Open your tube and copy and paste as a new layer. Re-size as needed. Place on the bottom right so she is sitting in the sand. Add a drop shadow.
Now let’s dress the tag up with elements from the kit. I will list the elements I used. Feel free to use other elements to make your tag unique. Placement of the elements is completely up to you. If you want your tag to look just like mine then use my tag for reference.
Elements I used:
1
4
9
10
12
16
23
28
35
36
40
46
Add your name.
Add your copyright and licensing information.
Crop and save.


Friday, August 5, 2016

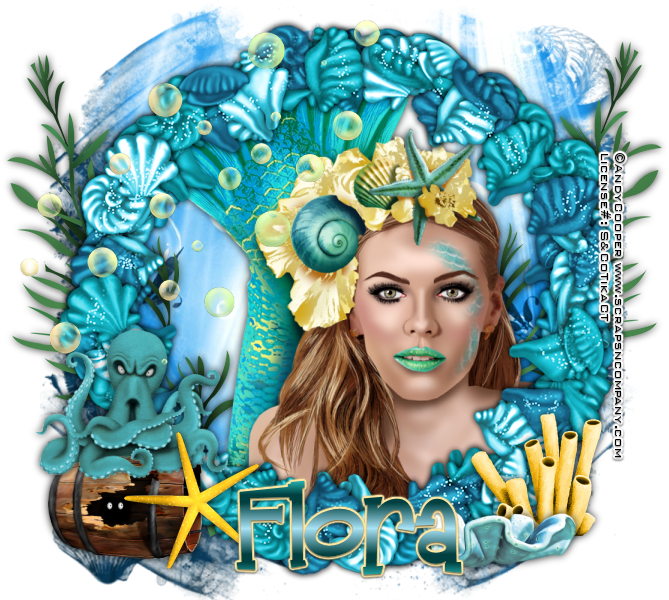
Beauty Of The Deep


Beauty Of The Deep
Written 8/04/2016
This tutorial is meant purely as a guide. Feel free to use your own choice of tube or scrap kit to make your tag unique. If you want your tag to look just like mine them use the same supplies I have used. This tutorial assumes you have a knowledge of paint shop pro. Any resemblance to any other tag or tutorial is completely coincidental.
Supplies Used:
Tube of your choice. I am using the work of Andy Cooper and this tube is called Sea Mermaid. You can purchase this tube at http://scrapsncompany.com/index.php?main_page=product_info&cPath=113_652_304&products_id=21033
The scrap kit is called Sea Mermaid and it is by Mysterfeerie Creation. You can purchase this kit at http://scrapsncompany.com/index.php?main_page=product_info&products_id=21236
Mask of your choice. I am using one by Scrappy Bit of Fun. You can get them at http://scrappybitoffun.blogspot.ca/2016/07/six-new-masks.html
Font of your choice. I am using Mandingo. You can get it at http://www.dafont.com/mandingo.font
Plugins:
NONE
Drop shadow used throughout:
0 0 85 11.00 black

Let's Begin:
Open element 5 from the frames folder of the kit. Shift+D to duplicate. Close the original. Make your canvas large enough to work with. Open paper 5 from the papers folder of the kit. Copy and paste as a new layer and drag under the frame. Apply the mask of your choice. Delete the mask layer and merge the group. Using your magic wand select the inside of the frame and selections modify and expand by 15. Copy and paste the paper again and move to the very bottom. Selections invert and hit delete. Selections select none.
Open your tube and re-size as needed. Copy and paste as a new layer and position within the frame. Erase any bits you don’t want hanging out of the frame. Add a drop shadow to the tube.
Now let’s dress the tag up with elements from the kit. I will list the elements I used. Feel free to use other elements to make your tag unique. Placement of the elements is completely up to you. If you want your tag to look just like mine then use my tag for reference.
Elements I used:
36
41
43
44
47
55
60
Add your name.
Add your copyright and licensing information.
Crop and save.


Wednesday, July 6, 2016

Sea Maiden


Sea Maiden
Written 7/6/2016
This tutorial is meant purely as a guide. Feel free to use your own choice of tube or scrap kit to make your tag unique. If you want your tag to look just like mine them use the same supplies I have used. This tutorial assumes you have a knowledge of paint shop pro. Any resemblance to any other tag or tutorial is completely coincidental.
Supplies Used:
Tube of your choice. I am using the work of Toriya. It is called My Sweet Mermaid. You can purchase it at http://scrapsncompany.com/index.php?main_page=product_info&cPath=113_320&products_id=20724
The matching scrap kit is called Sea Maiden and is by Disturbed Scraps. You can purchase it at http://scrapsncompany.com/index.php?main_page=product_info&products_id=20761
Mask of your choice. I am using mask #2 from set # 111 by Rachel Designs https://racheldesignsblog.wordpress.com/
Font of your choice. I am using Qaskin.  You can download it at http://www.fontspace.com/m%C3%A5ns-greb%C3%A4ck/qaskin-black-personal-use
Plugins:
NONE
Drop shadow used throughout:
0 0 85 15.00 color from your tag

Let's Begin:
Open paper 10 and shift+D to duplicate. Close the original. Promote the background layer to a raster layer. Make your canvas large enough to work with. Re-size as needed. This will be the base of your tag. Apply the mask of your choice. Delete the mask layer and merge the group.
Open your tube and re-size as needed. Copy and paste as a new layer and position on the masked area. Add a drop shadow.
Now let’s dress the tag up with elements from the kit. I will list the elements I used. Feel free to use other elements to make your tag unique. Placement of the elements is completely up to you. If you want your tag to look just like mine then use my tag for reference.
Elements I used:
10
11
20
24
45
52
53
65
73
Add your name.
Add your copyright and licensing information.
Crop and save.


Monday, June 20, 2016

Summer Paradise


Summer Paradise
Written 6/19/2016
This tutorial is meant purely as a guide. Feel free to use your own choice of tube or scrap kit to make your tag unique. If you want your tag to look just like mine them use the same supplies I have used. This tutorial assumes you have a knowledge of paint shop pro. Any resemblance to any other tag or tutorial is completely coincidental.
Supplies Used:
Tube of your choice. I am using one called Hot Summer by Very Many. You can purchase this tube at http://verymanytubes.com/
Scrap Kit is called Summer Rose by Amy Marie’s Kits. You can purchase this kit at http://amymarieskits.com/store/
Tag Template is by Millie’s PSP Madness. You can get the template at http://milliespspmadness.blogspot.com.au/2015/08/template-779-and-tag-with-laguna-and.html
Font of your choice. I am using Fullsize Sans. You can get it at http://www.1001freefonts.com/fullsize_sans.font
Plugins:
Xero Porcelain
Penta.com Dot and Cross
Drop shadow used throughout:
0 0 85 6.00 black

Let's Begin:
Open the tag template and shift+D to duplicate. Close the original. Remove the following layers : temp by millie and background. Make your canvas large enough to work with.
Create a gradient from either elements in the kit or your tube. Using a darker and lighter color. This is what we will fill our template with.
Make Layer 1 active and selections select all float and defloat. Layers new raster layer and flood fill with your gradient. Selections select none. Delete the original layer. Adjust Add/Remove noise and add noise with the following settings. Uniform and Monochrome and 65%.
Make Layer 2 active and selections select all float and defloat. Layers new raster layer and flood fill with the darker color. Leave selected. Open your tube and copy and paste as a new layer and position within the selected area. Selections invert and hit delete. Selections select none. Delete the original layer. Change the properties of the tube to luminance legacy. Apply the Xero Porcelain filter using the default settings. Apply the penta.com Dot and Cross filter and change the top value to 40.
Make Layer 3 active and selections select all float and defloat. Layers new raster layer and flood fill with the darker color. Selections select none and delete the original layer.
Make layer 4 active and selections select all float and defloat. Layers new raster layer and fold fill with the lighter color. Selections select none and delete the original layer.
Make layer 5 active and selections select all float and defloat. Layers new raster layer and flood fill with your gradient again. Leave selected. Open your tube and copy and paste as a new layer. Re-size if needed. Position however you want in the selected area. Erase any bits hanging out that you do not want. Selections select none. Delete the original raster 5 layer. Make the gradient filled layer active and apply the Penta.com Dot and Cross filter again using the same settings as before.
Make layer 6 active and apply noise same as before.
Make layer 7 active and selections select all float and defloat. Layers new raster layer. Flood fill with white. Selections select none. Delete the original layer. Add noise same as before.
Now add a drop shadow to each layer.
Now let’s dress the tag up with elements from the kit. I will list the elements I used. Feel free to use other elements to make your tag unique. Placement of the elements is completely up to you. If you want your tag to look just like mine then use my tag for reference.
Elements I used:
24
31
32
35
39
43
49
54
74
Add your name.
Add your copyright and licensing information.
Crop and save.


Sunday, June 19, 2016

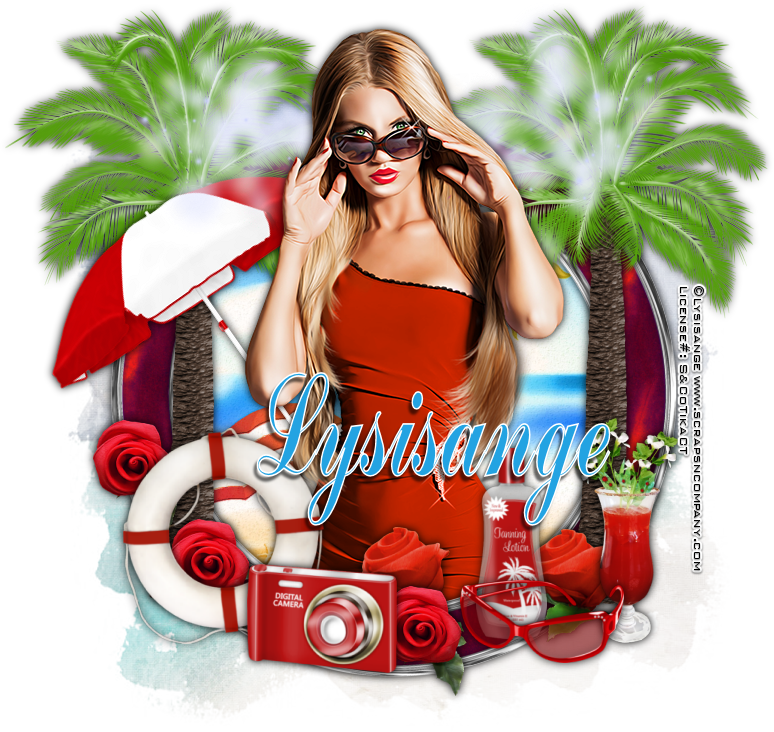
Beach Beauty


Beach Beauty
Written 6/19/2016
This tutorial is meant purely as a guide. Feel free to use your own choice of tube or scrap kit to make your tag unique. If you want your tag to look just like mine them use the same supplies I have used. This tutorial assumes you have a knowledge of paint shop pro. Any resemblance to any other tag or tutorial is completely coincidental.
Supplies Used:
Tube of your choice. I am using one called Beach Party by Lysisange. You can purchase this tube at http://scrapsncompany.com/index.php?main_page=product_info&cPath=113_562&products_id=20020
Matching scrap kit by Lil Mz Brainstorms. It is also called Beach Party.  You can purchase it at http://scrapsncompany.com/index.php?main_page=product_info&products_id=20179
Font of your choice. I am using Commercial Script.
Plugins:
NONE
Drop shadow used throughout:
0 0 100 14.00 black

Let's Begin:
Open element 90 and shift+D to duplicate. Close the original. Make your canvas large enough to work with. Using your magic wand select the inside of the frame. Selections modify and expand by 3. Layers new raster layer and drag under the frame. Open paper 4 and copy and paste into selection. Leave selected. Open your tube and copy and paste as a new layer and position within the frame area that is selected. Erase any bits that are hanging out of the frame that you do not want. Selections select none. Add a drop shadow to both the frame and the tube.
Open element 104 and re-size by 85%. Copy and paste as a new layer and drag to the bottom. Position behind your tag.
Now let’s dress the tag up with elements from the kit. I will list the elements I used. Feel free to use other elements to make your tag unique. Placement of the elements is completely up to you. If you want your tag to look just like mine then use my tag for reference.
Elements I used:
13
14
28
29
32
42
57
65
80
81
Add your name.
Add your copyright and licensing information.

Crop and save.


Saturday, June 18, 2016

Cozumel


Cozumel
Written 6/18/2016
This tutorial is meant purely as a guide. Feel free to use your own choice of tube or scrap kit to make your tag unique. If you want your tag to look just like mine them use the same supplies I have used. This tutorial assumes you have a knowledge of paint shop pro. Any resemblance to any other tag or tutorial is completely coincidental.
Supplies Used:
Tube of your choice. I am using a tube by Michael Calandra. You can purchase this tube at http://cdoestore.com
Fun scrap kit by Amy Marie’s Kits. It is called Hello Sunshine. You can purchase this kit at http://amymarieskits.com/store/
Mask of your choice. I am using mask #97 by Vix. You can download her masks at http://www.freewebs.com/vixpsp/
Font of your choice. I am using Twister Script. This is a PTU font
Plugins:
NONE
Drop shadow used throughout:
0 0 100 12.00  I used the pink color in my tag but the color is up to you

Let's Begin:
Open element 32 and shift+D to duplicate. Close the original. Using your magic wand select the inside of the frame and go to selections modify and expand by 5. Open paper 12 and copy and paste as a new layer. Drag under the frame and selections invert and hit delete. Open paper 6 and copy and paste as a new layer and drag under the frame but on top of the first paper. Delete. Selections select none. On the top paper apply the mask. Delete the mask layer and merge the group.
Using your magic wand select the inside of the frame again and go to selections modify and expand by 2. Open your tube and copy and paste as a new layer and position within the frame. Erase any bits hanging out of the frame that you do not want. Add a drop shadow to the tube and the frame.
Now let’s dress the tag up with some of the fun elements from this wonderful kit. I will list the elements I used. Feel free to use other elements to make your tag unique. Placement of the elements is completely up to you. If you want your tag to look just like mine then use my tag for reference.
Elements I used:
1
24
34
35
42
52
70
73
99
101
Add your name
Add your copyright and licensing information
Crop and save


Tuesday, June 14, 2016

Sunset Beauty


Sunset Beauty
Written 6/14/2016
This tutorial is meant purely as a guide. Feel free to use your own choice of tube or scrap kit to  make your tag unique. If you want your tag to look just like mine them use the same supplies I have used. This tutorial assumes you have a knowledge of paint shop pro. Any resemblance to any other tag or tutorial is completely coincidental.
Supplies Used:
Tube is called Sunny Day by Very Many Tubes. You can purchase her at http://verymanytubes.com
Scrap Kit is called Summer Sunset by Amy Marie’s Kits. You can purchase it at http://amymarieskits.com/store/
Tag Template is template #1 by Cakes Creations. You can download it at http://cakescreations.blogspot.ca/2016/05/tag-template-1.html?zx=d3c95450d1a51630
Font of choice. I am using Beach Type which you can download at http://www.dafont.com/beach-type.font

Plugins:
NONE
Drop shadow used throughout:
0 0 85 15.00 black

Let's Begin:
Open the tag template and Shift+D to duplicate. Close the original. Remove the following layers from the template: Cakes Creations and background. Make your canvas large enough to work with.
Grab outer circle 5 and drag it down to above outer circle 5. Merge these 2 layers together. Merge circle 5 and circle 6 together. Merge rectangle 1 and rectangle 2 together. Merge circle 3 and circle 4 together. Merge Diamonds 1 and Diamonds 2 together. Fill all layers with papers from the kit or colors of your choice EXCEPT the rectangles and diamonds. In the 2 smaller circles copy and paste your tube and position her face within the circles. Change the properties to whatever you like. I chose to use overlay in the bottom one and then luminance legacy in the top one.
Lower the opacity of the rectangles to 55. Add a drop shadow.
Add noise to the diamonds. Add a drop shadow.
Open your tube and copy and paste as a new layer. Re-size as needed. Place in the center of the tag template. Add a drop shadow.
Open element 69 and copy and paste as a new layer and re-size by 110%. Drag under your tube and center over the top smaller circle. Add a drop shadow.
Open element 12 and re-size by 75%. Copy and paste as a new layer and drag under your tube and place in the top left corner. Add a drop shadow.
Open element 16 and copy and paste as a new layer and drag down to the bottom of your tag. Add a drop shadow.
Now lets add some of the awesome elements from this kit. I will list the elements I have used. Feel free to use other elements to make your tag unique. Placement of the elements is completely up to you. If you want your tag to look just like mine then use my tag for reference.
Elements I used:
2
13
36
39
40
41
64
Add your name.
Add your copyright and licensing information.
Crop and save.


Tuesday, June 7, 2016

Keepin It Cool


Keepin It Cool
Written 6/5/2016
This tutorial is meant purely as a guide. Feel free to use your own choice of tube or scrap kit to  make your tag unique. If you want your tag to look just like mine them use the same supplies I have used. This tutorial assumes you have a knowledge of paint shop pro. Any resemblance to any other tag or tutorial is completely coincidental.
Supplies Used:
Tube of your choice. I am using a tube by Aleksky Stark. I purchased this tube at MPT which is no longer in business and am not sure where to purchase this tube any longer so use whatever tube works for your.
Scrap kit is a fun cool lil kit by Amy Marie called Summer Ice. You can purchase this kit at http://amymarieskits.com/store/
Font of your choice. I am using Run Tron 1983. You can download it at http://www.dafont.com/run-tron1983.font
Plugins:
DSB Flux Bright Noise
Drop shadow used throughout:
0 0 50 6.50 black
Let's Begin:
Open element 10 and shift+D to duplicate. Close the original. Re-size as needed. This will be the base for your tag. Make your canvas large enough to give you room to work with. You can crop and save when you are done.
Using your magic wand tool select the inside of the frame and selections modify and expand by 6. Layers new raster layer and drag under the frame. Open paper 15 and copy and paste into selection. Selections select none. Add a drop shadow to the frame.
Open element 47 and copy and paste as a new layer at the top and move to the far left of the frame. Duplicate 2x for a total of 3. Hide the top 2 layers. Apply the DSB Flux Bright noise filter using 42% and mix. Unhide the next one and apply the filter again but click mix 2x. Unhide the last one and apply the filter again hitting mix 3x.
At this point open your tube and copy and paste as a new layer and place so she is in the front of the bottom right of the wave. This will allow some space on her right to add one of the cute penguin elements from the kit. Add a drop shadow.
Open one of the cute penguins from this kit. I used #3 but you can use whatever one you want. Copy and paste as a new layer. Re-size if you need/want to. Move to the right of your tube and add a drop shadow.
Now lets use some of the great elements in this cute to dress up this adorable tag. I will simply list the elements I used. You may use other elements of your choice. This will make your tag unique. Placement of the elements is completely up to you however if you want your tag to look just like mine then use my tag for reference.
Elements I used:
17
24 ( I used my pick tool and rotated and erased bits to make it look like she was holding in her hand but this is up to you)
30
32
59
Layers new raster layer and flood fill with white. Drag to the bottom.
Add your name.
Add your copyright and licensing information.
Crop and lets get ready to animate.
Hide the top 2 layers of the wave you added noise to.
Copy merged all of the layers that are showing.
Open animation shop and right click and paste as a new animation.
Back to psp and hide the bottom wave layer and unhide the middle one. Copy merged again and back to animation shop edit and paste after current frame.
Repeat the above steps with the top wave layer.
View your animated tag if you are happy save.