Showing posts with label Di_Halim. Show all posts

Wednesday, February 15, 2017

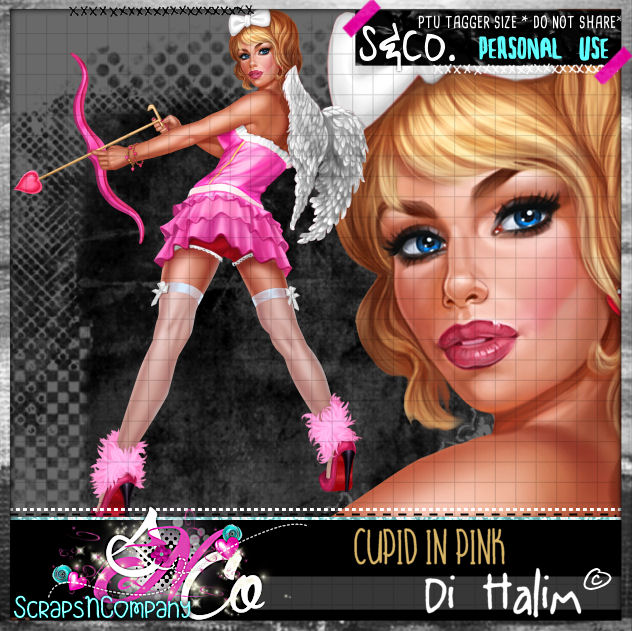
Shot Through The Heart


Shot Through The Heart
Written 2/14/2017
This tutorial is meant purely as a guide. Feel free to use your own choice of tube or scrap kit to make your tag unique.
If you want your tag to look just like mine, then use the same supplies I have used. This tutorial assumes you have a knowledge
of paint shop pro. Any resemblance to any other tag or tutorial is completely coincidental.

Supplies Used:

Tube of your choice. I am using the work of Di Halim. This tube is called Cupid in Pink and you can purchase her at http://scrapsncompany.com/index.php?main_page=product_info&cPath=113_133_166&products_id=25991
Scrap Kit is by Bibi’s Collection. It is called Cupid In Pink. You can purchase it at http://scrapsncompany.com/index.php?main_page=product_info&products_id=26002

Mask of your choice. I am using one by a member at my forum. This mask was made by Bev. You can find our forum at http://thetaggerslounge.forumotion.com/ Come join us and check out all the goodies and fun!!

Font of your choice. I am using Guarddilla Typeface. This is a PTU font.
Animation is by Divine Intentionz. You can get it at http://divineintentionz.blogspot.com/

Plugins:
NONE

Let's Begin:
Open paper 8 from the kit. Shift+D to duplicate. Close the original. Re-size as needed/wanted. Promote the background layer to a raster layer. Apply the mask of your choice. Delete the mask layer and merge the group. I added a slight drop shadow to the mask layer to help it stand out just a bit more but this is completely up to you.

Open your tube and copy and paste as a new layer. Re-size until she is just slightly larger than the mask layer. Add a drop shadow.

Now let’s dress the tag up with elements from the kit. I will list the elements I used. Feel free to use other elements to make your tag unique. Placement of the elements is completely up to you. If you want your tag to look just like mine, then use my tag for reference.

Elements I used:
8
29
37
39
42
76
121
Add your Name.

Add your copyright and licensing information.

Let’s Get ready to add the animation:

Crop your tag.

Merge all the layers together except the mask layer.

Layers new raster layer and move to the bottom.
Flood fill with white.

Copy the white background and the mask layer to animation shop.
Duplicate the number of frames to match the number of frames in  your animation. In my case its 20.

Drag the first frame of your animation onto the first frame of your tag. Once happy with the placement go back to psp and copy the rest of your tag. Bring into animation shop. Duplicate and drag to the animated tag. Once you are done view your completed animated tag. If you are happy optimize and save.
♥♥♥

Wednesday, November 2, 2016

The Story


The Story
Written 11/2/2016
This tutorial is meant purely as a guide. Feel free to use your own choice of tube or scrap kit to make your tag unique. If you want your tag to look just like mine them use the same supplies I have used. This tutorial assumes you have a knowledge of paint shop pro. Any resemblance to any other tag or tutorial is completely coincidental.
Supplies Used:
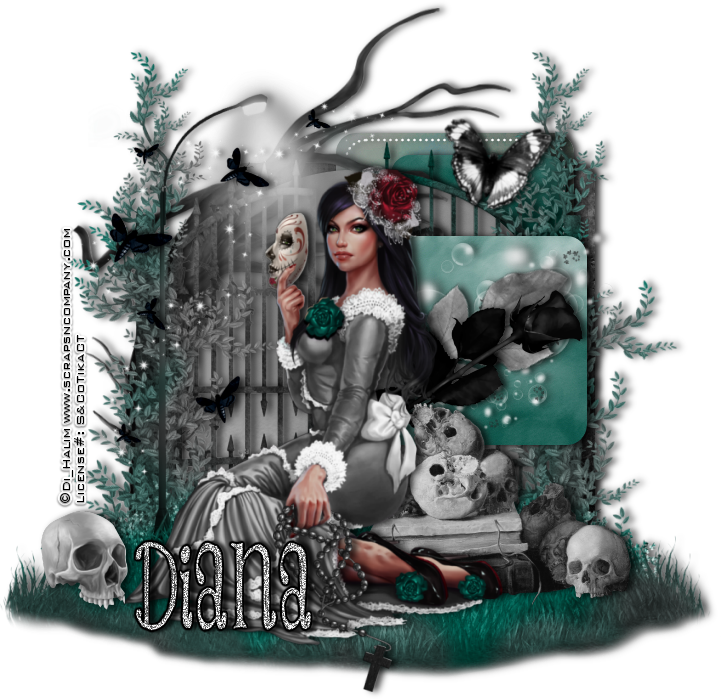
Tube of your choice. I am using the work of Di Halim and this tube is a store exclusive for Scraps N Company. She is called Morti 1. You can purchase her at http://scrapsncompany.com/index.php?main_page=product_info&cPath=305&products_id=23697
The matching scrap kit is by Disturbed Scraps and is called Bella Morte. You can purchase it at http://scrapsncompany.com/index.php?main_page=product_info&products_id=23690
Mask of your choice. I am using mask #31 by Millies PSP Madness. You can get her masks at http://milliespspmadness.blogspot.com/?zx=cf16f4d1876dde2f
Font of your choice. I am using Brandley. This is a PTU font.
Plugins:
NONE
Drop shadow used throughout:
0 0 100 13.50 black

Let's Begin:
Open element 73 and shift+D to duplicate. Close the original. Make the canvas large enough to work with.
Open paper 11 and copy and paste as a new layer and drag under the frame. Apply the mask of your choice. Delete the mask layer and merge the group.
Add a drop shadow to the frame.
Open element 41 and re-size by 75% and then again by 85%. Copy and paste as a new layer and place on the far left of the tag. Add a drop shadow.
Open element 43 and re-size by 60%. Copy and paste as a new layer and position in the center of the frame from the top and in front of the bookshelf. Add a drop shadow.
At this time open your tube and re-size as needed. You want her still larger than the frame but not by much. Copy and paste as a new layer and place her on the far right side. Add a drop shadow.
Open element 45 and copy and paste as a new layer. Drag under the frame and place at the bottom under the bookshelf and add a drop shadow.
Now let’s dress the tag up with elements from the kit. I will list the elements I used. Feel free to use other elements to make your tag unique. Placement of the elements is completely up to you. If you want your tag to look just like mine then use my tag for reference.
Elements I used:
13
14
24
25
27
34
35
54
77
Add your name.
Add your copyright and licensing information.
Crop and save.


Thursday, June 9, 2016

Carnivale


Carnivale
Written 6/8/2016
This tutorial is meant purely as a guide. Feel free to use your own choice of tube or scrap kit to  make your tag unique. If you want your tag to look just like mine them use the same supplies I have used. This tutorial assumes you have a knowledge of paint shop pro. Any resemblance to any other tag or tutorial is completely coincidental.
Supplies Used:
Tube of your choice. I am using a tube called Dolls 2 by Di Halim. You can purchase this tube at http://scrapsncompany.com/index.php?main_page=product_info&cPath=113_133_166&products_id=20080
The amazing scrap kit is called Chasing The Night by Disturbed Scraps. You can purchase it at http://scrapsncompany.com/index.php?main_page=product_info&products_id=20004
Mask of your choice. I am using mask #70 by Insatiable Dreams. You can get her masks at http://insatiabledreams.net under resources.
Font of your choice. I am using Banana Yeti. You can download it at http://www.dafont.com/banana-yeti.font
Plugins:
DSB Flux Linear Transmission
Drop shadow used throughout:
0 0 100 14.00 black

Let's Begin:
Open element 70. Shift+D to duplicate. Close the original. Re-size if you wish. Make your canvas large enough to work with. You can crop and re-size at the end. Using your magic wand select the inside of the frame. There are some open outside edges but you want to leave those open so just do the very very center. Selections modify and expand by 2. Open paper 10 and copy and paste as a new layer. Drag under the frame. Selections invert and hit delete. Selections select none.
Open paper 14 and copy and paste as a new layer and drag to the bottom. Apply the mask of your choice. Delete the mask layer and merge the group.
Add a drop shadow to the frame.
Open your tube and re-size as needed. Copy and paste as a new layer and place in the center of the frame. Duplicate the tube layer. On the bottom tube adjust blur Gaussian blur at 12.00. Apply the DSB Flux Linear Transmission plugin using the following settings:
Slice size 2
Offset 2
Blend 100
Horizontal checked
Add noise at 100% to the linear transmission layer.
Add a drop shadow to this linear transmission layer of 1 -1 100 2.00 black.
Add a drop shadow to the top tube layer.
Now lets dress this tag up with some of the awesome whimsical elements from this kit. I will list the elements I used. Feel free to use any of the other elements that I didn’t use to make your tag unique. Placement of the elements is up to you. If you want your tag to look just like mine then use my tag for reference.
Elements I used:
16
20
21
23
46
50
56
64
 Add your name.
Add your copyright and licensing information.
Crop and save. 


Wednesday, April 20, 2016

Play Like A Pirate


Play Like A Pirate
written 4/19/2016

This tutorial is meant purely as a guide. Feel free to make your tag unique by using your own choice of tube and scrap kit. If you want your tag to look just like mine then use the same supplies I have used. This tutorial assumes you have knowledge of paint shop pro. Any resemblance to any other tutorial or tag is purely coincidental.

Supplies Used:


Awesome matching scrap kit by Bibi's Collection. You can purchase it at http://scrapsncompany.com/index.php?main_page=product_info&products_id=19180

Tag template # 153 by Toxic Desirez. You can get it at http://toxicdesirez.blogspot.com

Font of your choice. I am using Black Sam's Gold. You can download it at http://www.fontspace.com/redruths-basement-software/black-sams-gold

Plugins:
4 4 40 10.00 black

Drop shadow used throughout:


Let's Begin:
Open the tag template and shift+D to duplicate.
Close the original.
Delete the following layers from the template:
credits, stars, words, dotted lines2, and background.
Make your canvas large enough to work with.
Merge the 2 glitter rectangle layers together.
Merge the 2 rectangle layers together.
Make the rectangle layer active.
Selections select all float and defloat.
Layers new raster layer.
Open paper 9 and copy and paste into selection.
Selections select none.
Delete the original rectangle layer.
Merge the 2 thin rectangle layers together.
Selections select all float and defloat
Open paper 7 and copy and paste as a new layer.
Selection invert and hit delete.
Selections select none.
Delete the original layer.
Make the oval layer active.
Selections select all float and defloat.
Layers new raster layer.
Open paper 4 and copy and paste into selection.
Selections select none.
Delete the original oval layer.
Make the rectangle layer active.
Selections select all float and defloat.
Layers new raster layer.
Open paper 6 and copy and paste into selection.
Selections select none.
Delete the original rectangle layer.
At this time go ahead and add a drop shadow to all of the layers.
Open element 19 and copy and paste as a new layer.
Re-size so it fits nicely within your tag.
Add a drop shadow.
Open your tube.
Copy and paste as a new layer.
Re-size.
Place so it is standing in the sand.
Add a drop shadow.
Open element 43 and copy and paste as a new layer and drag under your tube.
Re-size.
Move to the far right side so your tube is kind of standing in front of it.
Add a drop shadow.
Open element 46 and copy and paste as a new layer.
Re-size.
Drag down under the sand.
Move to the far left side.
Add a drop shadow.
Open element 18 and copy and paste as a new layer.
Re-size and move to the far right side in front of the bottom of the tree.
Add a drop shadow.
Open element 20 and copy and paste as a new layer.
Re-size.
Move to the top left so it looks to be behind the boat.
Add a drop shadow.
Open element 22 and copy and paste as a new layer.
Re-size.
Move to the bottom right in front of the chest.
Add a drop shadow.
Open element 76 and copy and paste as a new layer.
Using your pick tool rotate it so it is on the same angle as the left side of the sand.
Move to that side and position so it is laying in the sand.
Add a drop shadow.
Open element 83 and copy and paste as a new layer.
Re-size.
Move to the far left down in front of the bottle.
Add a drop shadow.
Add your name.
Add your copyright and licensing information.
Crop and save.


Wednesday, April 6, 2016

And She Bakes


And She Bakes
written 4/5/2016

This tutorial is meant purely as a guide. Feel free to make your tag unique by using your own choice of tube and scrap kit. If you want your tag to look just like mine then use the same supplies I have used. This tutorial assumes you have a knowledge of paint shop pro. Any resemblance to any other tag or tutorial is purely coincidental.

Supplies Used:

Tube by Di Halim. She is called Delicious Old Style 2. You can purchase it at http://scrapsncompany.com/index.php?main_page=product_info&cPath=113_133_166&products_id=18783

Matching scrap kit by Chili Designz. It is called Delicious Glamour. You can purchase it at http://scrapsncompany.com/index.php?main_page=product_info&products_id=18846

Mask of your choice. I am using a mask by Rachel Designs. I am using mask #2 from this set at https://racheldesignsblog.wordpress.com/2016/04/04/mask-set-111/

Font of your choice. I am using Nouradilla. You can download it at https://www.littlebigcrafter.com/product/freebie-nouradilla-script-beautiful-handwritten-font/

Plugins:
NONE

Drop shadow used throughout:
0 0 75 11.00 black

Let's Begin:
Open paper 6 and shift + D to duplicate.
Close the original.
Promote the background layer to a raster layer.
Re-size the paper by 85%.
Apply your mask.
Delete the mask layer and merge the group.
Open chair2 from the kit and copy and paste as a new layer.
Place at the bottom of the mask area and place so the far left leg is about center bottom of your mask.
Add a drop shadow.
Open your tube and copy and paste as a new layer.
Re-size as needed until she is in proportion with the chair.
Place so she is sitting on the chair.
Add a drop shadow.
Now we are going to dress this up with some of the beautiful elements from the kit.
I will list the elements I used.
Placement of the elements is completely up to you.
If you want your tag to look just like mine then use my tag for reference.
Feel free to use some of the other elements that I did not use and that will help make your tag unique.
Elements I used:
tulle
leaf2
leaf4
greenery
flower10
flower9
flower8
flower6
flower2
deco
button4
pearls2
sparkles4
Add your name.
Add your copyright and licensing information.
Crop and save.

Friday, November 6, 2015

To Die For


To Die For
written 11/6/2015

This tutorial is meant purely as a guide. Feel free to make your tag unique by using your own tube and scrap kit. If you want to have your tag look exactly like mine then use the same supplies that I have.

Supplies Used:

Tube by Di Halim. It is called Death Lover 2. You can get it at http://scrapsncompany.com/index.php?main_page=product_info&cPath=113_133_166&products_id=15272

Matching Scrap Kit by Designs By Joan. It is called Death Lover. You can get it at http://scrapsncompany.com/index.php?main_page=product_info&products_id=15298

Tag template by Millies PSP Madness. It is template # 788. You can get it at http://milliespspmadness.blogspot.com/2015/09/template-788-and-tag-featuring-beauty.html

Font of your choice. I am using Things We Said. You can get it at http://www.dafont.com/things-we-said.font

Plugins:
NONE

Let's Begin:
Open your tag template and shift+D to duplicate.
Close the original.
Delete the following layers from the template:
cr
8
7
background
Make your canvas large enough to give you plenty of room to work with.
Layer 1 selections select all float and defloat.
Open paper 2 and copy and paste as a new layer.
Selections invert and hit delete.
Selections select none.
Delete the original layer.
Repeat the above steps for layer 2 but use paper 1.
Repeat above steps for layer 3 but use paper 4.
Use the same paper for layer 6.
For layer 5 use paper 3.
Add a drop shadow to all layers using the following setting:
Vertical – 0
Horizontal – 5
Opacity – 75
Blur – 10
Color – Black
Open your tube and re-size.
Copy and paste as a new layer and position in the center of the tag template.
Add the same drop shadow.
Open element 2 and re-size by 85%.
Copy and paste as a new layer and drag down under the top little square.
Center on the template.
Add the same drop shadow.
Open element 11 and re-size by 85% 2x.
Copy and paste as a new layer and drag under the gate element.
Move to the left side so you can see the tree branches over the top of the tubes head.
Add a drop shadow.
Open element 12 and re-size.
Copy and paste as a new layer at the top and move to the right side.
Add a drop shadow.
Open element 14 and re-size by 50% 2x.
Copy and paste as a new layer.
Move to the bottom of your tag and place over the hand of the tube.
Using your eraser erase bits of the element so it appears the tube is holding it.
Add a drop shadow.
Open element 15 and re-size by 50% 2x.
Copy and paste as a new layer and move to the bottom left in the grass.
Add a drop shadow.
Open element 77 and re-size by 50%.
Copy and paste as a new layer.
Drag behind your tube and move to the far right side resting in the grass.
Add a drop shadow.
Open element 79 and re-size by 50%.
Copy and paste as a new layer just above the top little square.
Add a drop shadow.
Open element 80 and re-size by 50% and then again by 60%.
Copy and paste as a new layer.
Image free rotate to the right 17 degrees 2x.
Adjust sharpen.
Drag behind the black rose.
Add a drop shadow.
Open element 68 and re-size by 50% 2x.
Copy and paste as a new layer and drag down to just above the top little square.
Add a drop shadow.
Open element 54 and re-size by 50% 2x.
Copy and paste as a new layer at the top and move to the far right over the gate.
Add a drop shadow.
Add your name along the bottom.
I added noise to my name to help it stand out a bit.
Add your copyright and licensing information.
Crop and save.


Thursday, March 12, 2015

Pot O' Gold


Pot O' Gold
written 3/12/2015

Supplies Needed:


Scrap Kit by Ginnibug Designz. You can get it at http://scrapsncompany.com/index.php?main_page=product_info&products_id=8416

Mask of your choice. I am using mask #250 by Vix. You can get it at http://www.freewebs.com/vixpsp/

Font of your choice. I am using Foglihten No07 and you can get it at http://fontspace.com/gluk/foglihtenno07

Drop shadow used:
0 0 50 6.00 black

Plugins:


Let's Begin:
Open a new blank canvas that gives you plenty of room to work with.
Open paper 5 and copy and paste as a new layer.
Apply your mask.
Delete the mask layer and merge the group.
Open your tube and re-size if needed.
Copy and paste as a new layer and place in the center bottom of your mask area.
Add a drop shadow.
Open element 94 and re-size so it will fit nicely along the bottom of the tag.
Copy and paste as a new layer and move into position on the bottom.
I erased bits so her foot was in front of it. This is completely up to you.
Add a drop shadow.
Open element 63 and re-size so it will fit nicely along side of your masked area.
Copy and paste as a new layer and move to the far left side.
Add a drop shadow.
Duplicate and move this copy to the far right side.
Duplicate again and go to image rotate and rotate to the right 90 degrees.
Move this copy to the top and drag under the first 2.
If you have any bits of stem poking out erase it.
Open element 46 and copy and paste as a new layer.
Move to the right side behind your tube.
Add a drop shadow.
Open element 10 and re-size by 50% and then again by 60%.
Copy and paste as a new layer at the top.
Move to the bottom right corner of your tag.
Add a drop shadow.
Open element 6 and re-size by 50%.
Copy and paste as a new layer.
Drag under the hat and move to the bottom right behind the hat.
Add a drop shadow.
Open element 36 and re-size by 50%.
Copy and paste as a new layer.
Drag under your tube.
Place to the far left of the tag.
Add a drop shadow.
Open element 65 and re-size so it will fit nicely across your tag.
Copy and paste as a new layer and move to the bottom.
Add your name.
Add your copyright and licensing information.
Crop and re-size if you wish.
Save.


Monday, January 19, 2015

Cupid Shuffle


Cupid Shuffle
written 1/19/2015

Supplies Needed:


Mask of your choice. I am using mask #145 by WeeScotLass Creations. You can get her masks at http://weescotslasscreations.blogspot.com/2009/04/masks.html

Cloud tube is by Rainbow Coffi. There are cloud elements in the kit but I did not like the way they were cut off so I opted to use Rainbow Coffi's. Her's are free to use but you must be a member of PSP Playground and they are not accepting new members. If you are you can get the clouds I used at http://www.psp-playground.com/

Font of your choice. I am using Sweethearts Love Letters. You can get it at http://www.dafont.com/sweethearts-love-letters.font

Plugins:
None

Lets Begin:
Open element 77.
Shift +D to duplicate.
Close the original.
Re-size by 85%.
Make your canvas large enough to work with.
Using your freehand selection tool set to point to point draw around the frame edge.
Layers new raster layer and drag under the frame.
Open paper 2 and edit copy and paste into selection.
Selections select none.
Open paper 8 and copy and paste as a new layer.
Drag to the bottom.
Apply your mask.
Delete the mask layer and merge the group.
I re-sized mine by 90% to make it fit better behind the frame but this is up to you based on the mask that you use.
Open your tube and re-size so he will fit nicely along side of the base of the tag you just created.
Copy and paste as a new layer and move to the far right side.
Add a drop shadow.
Open your cloud tube or cloud element whichever you are using and copy and paste as a new layer and place along the bottom of the tag to the far left.
Duplicate and image flip horizontal.
Re-size this duplicate by 75%.
Move this duplicate to the far right behind your tube.
Open element 45 and re-size by 60%.
Copy and paste as a new layer and place in the top left corner.
Duplicate and image flip horizontal.
Move to the lower right side just to the left of your tube.
Open element 89.
Re-size by 50%.
Copy and paste as a new layer and place so he is standing on top of the largest heart in the group near the top left.
Open element 78.
Re-size by 75%.
Copy and paste as a new layer and position along the bottom in the clouds.
Open element 51 and re-size by 50%.
Copy and paste as a new layer and place along the top in the center.
Add a drop shadow.
Add your name.
Add your copyright and licensing information.
Crop and save.


Saturday, October 18, 2014

Blood Thirsty


Blood Thirsty
written 10/18/2014

Supplies Needed:


Font of your choice. I am using Feathergraphy. You can get it at http://www.fontspace.com/m%C3%A5ns-greb%C3%A4ck/feathergraphy-decoration

Lets Begin:
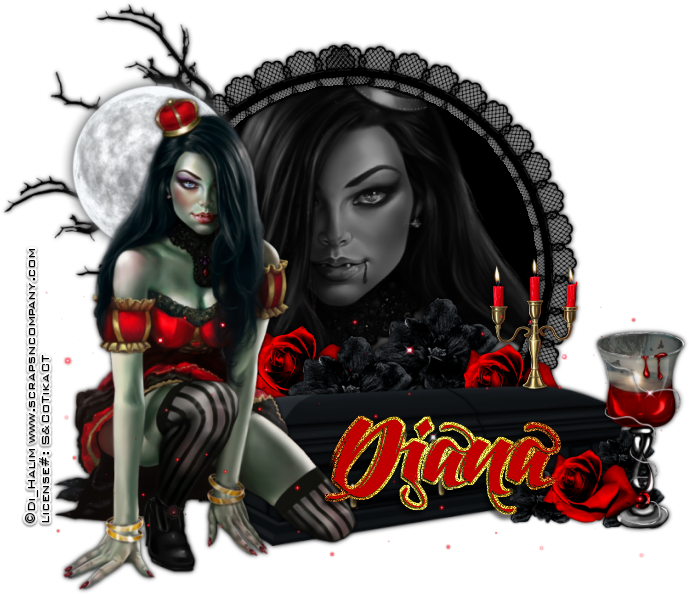
Open element 14 and shift+D to duplicate.
Close the original.
Re-size by 85%.
Make your canvas large enough to work with.
Using your magic wand select the inside of the frame and go to selections modify and expand by 3.
Layers new raster layer and drag under the frame.
Flood fill this new layer with black.
Open the close up of the tube and copy and paste as a new layer and position within the frame.
Selections invert and hit delete to clear the excess.
Selections select none.
Adjust hue and saturation colorize and set both properties to 0.
Lower the opacity on this layer to 60.
Add a drop shadow to the frame.
Open your full tube and copy and paste as a new layer.
Re-size to fit nicely along the side of your frame.
Place on either side.
Add a drop shadow.
Open element 9 and re-size so it will fit nicely behind your tube and frame and able to peek out.
I also flipped mine horizontal as my tube is on the left and I wanted the branches facing the correct direction.
Add a drop shadow.
Open element 92 and re-size by 50% and then again by 85%.
Copy and paste as a new layer and drag under your tube.
Place behind her head and to the left.
Add a drop shadow.
Open element 67 and re-size by 85% 2 times.
Copy and paste as a new layer and drag behind your tube.
Move to the bottom along the bottom of the frame.
Add a drop shadow.
Open element 59 and re-size by 50% 2 times.
Copy and paste as a new layer and drag behind the coffin.
Place along the top and peeking out.
Add a drop shadow.
Duplicate a couple of times and place them randomly.
I moved one in front and at the bottom.
Repeat these steps with element 29.
Open element 8 and re-size by 50% 2 times.
Copy and paste as a new layer and place on the top of the coffin opposite end than your tube is on.
Open element 73 and re-size by 50% and then again by 85%.
Copy and paste as a new layer and place along side of the coffin at the end where the flowers are in front.
Add a drop shadow.
Open element 25 and re-size by 75%.
Copy and paste as a new layer and place at the bottom.
Add your name.
Add your copyright and licensing information.
Crop and save.


Friday, October 10, 2014

Hag Hangout


Hag Hangout
Written 10/10/2014

Supplies Needed:


Scrap Kit is by Bibi's Collection. You can get it at http://scrapsncompany.com/index.php?main_page=product_info&products_id=5995

Font of your choice. I am using Blackboard. You can get it at http://www.dafont.com/blackboard.font

Lets Begin:
Open element 47 and shift +D to duplicate.
Close the original.
Make your canvas large enough to work with.
Add a drop shadow to the web using the orange from the web itself.
Open element 48.
Copy and paste as a new layer.
Re-size by 85%.
Place in the center of your web.
Using your magic wand select the inside of the frame.
Selections modify and expand by 6.
Layers new raster layer and drag under the frame.
Open paper 2 and edit copy and paste into selection.
Selections select none.
Add a drop shadow to the frame.
Open element 29 and copy and paste as a new layer.
Place just above your paper layer.
Re-size until the moon is just bigger than the moon that is on the paper and position to where it covers the moon on the paper.
Open element 28 and copy and paste as a new layer.
Re-size by 50%.
Position on top of the moon.
Add a drop shadow.
Open your tube.
Copy and paste as a new layer.
Re-size so she fits nicely along the left hand side of the frame.
Add a drop shadow.
Open element 31.
Copy and paste as a new layer.
Re-size so its just slightly larger than your tube.
Position behind your tube.
Use my tag for reference if needed.
Open element 22 and re-size.
Copy and paste as a new layer and place to the bottom right of your tubes feet.
Drag behind your tube.
Duplicate a couple of times and re-size.
Open element 40 and copy and paste as a new layer.
Drag down to just above the tree.
Place in the center bottom of the tag.
Open element 90 and copy and paste as a new layer.
Re-size so it will fit to appear to be hanging from one of the top branches of the tree.
Add a drop shadow.
Using a font of your choice and the color white write some text on the sign.
Lower the opacity of the text layer to make look worn in.
Open element 25 and copy and paste as a new layer.
Move to the far right side of the book.
Add a drop shadow.
Add your name.
Add your copyright and licensing information.
Crop and save.