Showing posts with label Disturbed Scraps. Show all posts

Saturday, February 4, 2017

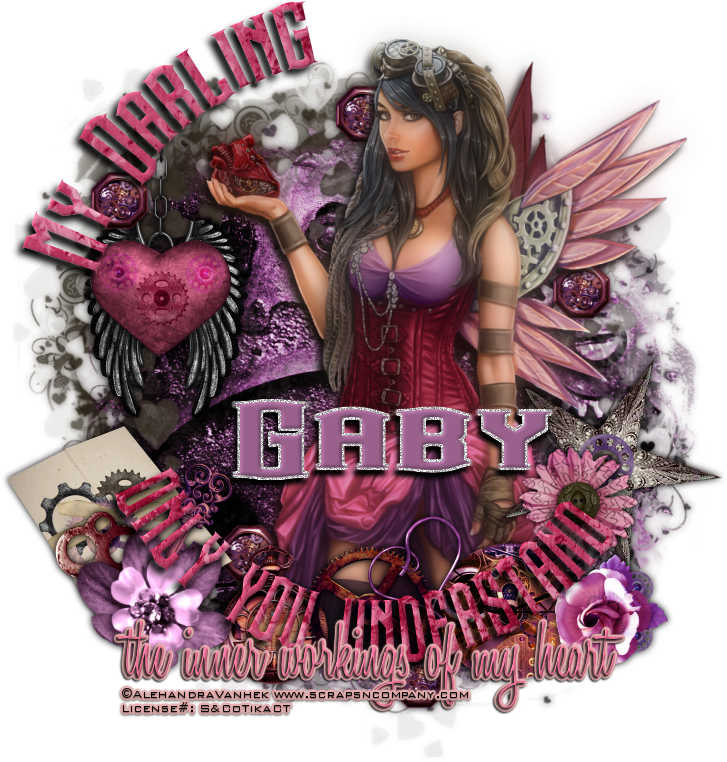
Inner Workings of my Heart


Inner Workings of my Heart
Written 2/4/2017
This tutorial is meant purely as a guide. Feel free to use your own choice of tube or scrap kit to make your tag unique. If you want your tag to look just like mine them use the same supplies I have used. This tutorial assumes you have a knowledge of paint shop pro. Any resemblance to any other tag or tutorial is completely coincidental.

Supplies Used:
Tube is by Alehandra Vanhek. She is called Mechanical Heart. You can purchase her at http://scrapsncompany.com/index.php?main_page=product_info&cPath=113_499&products_id=25672
The scrap kit is by Disturbed Scraps. It is called Mechanical Hearts. You can purchase it at http://scrapsncompany.com/index.php?main_page=product_info&products_id=25761
Mask of your choice. I am using one by Kisses and Dreams. You can get it at http://kissesndreams.blogspot.ca/2015/01/freebie-heart-mask.html
Font of your choice. I am using Steamwreck which you can download at http://www.fontspace.com/pixel-sagas/steamwreck
Plugins:
NONE
Let's Begin:
Open paper 3 and shift+D to duplicate. Close the original. Promote the background layer to a raster layer. Apply the mask. Delete the mask layer and merge the group. Add a drop shadow of 0 0 100 11.50 and the dark color from the paper. Open paper 14 and repeat but when adding your drop shadow use a purple from the paper. Move this mask down and to the right a bit.

Open your tube and copy and paste as a new layer. Re-size as needed so she is just larger than the mask layers. Move to the right side more so than the left. Duplicate the tube layer. On the top copy go to adjust blur Gaussian blur and apply a blur of 11. Lower the opacity of this layer to 45. Add a drop shadow to the bottom tube layer of 6 -5 100 10.50 black.

Now we are going to put some text on a path. Using your elipse preset shape. Set your foreground color to whatever color you like. It doesn’t matter as we will delete this layer anyhow. Turn off the background color. Set the width of the elipse shape to 1.00. Draw out a circle around the outside edges of the mask layer. 

Now select the font you want to use and the color or I used paper 7 for mine. Place your text tool up on the elipse shape until you get the A with the line under it and then begin typing whatever it is you want. I placed part of my text around the top left side and then I wanted some along the bottom so I flipped my elipse shape vertical. This will turn the text right side up. And placed the rest of my text along the bottom. Promote your text layers to a raster layer. Add a drop shadow. Delete the elipse shape layer when you are done.

Now let’s dress the tag up with elements from the kit. I will list the elements I used. Feel free to use other elements to make your tag unique. Placement of the elements is completely up to you. If you want your tag to look just like mine then use my tag for reference.
Elements I used:
1
3
6
9
10
15
19
22
28
37
42
49
59
Add your name.

Add your copyright and licensing information.

Crop and re-size if you wish.

Save your tag.
♥♥♥


Tuesday, January 31, 2017

Loving Arms


Loving Arms
Written 1/31/2017
This tutorial is meant purely as a guide. Feel free to use your own choice of tube or scrap kit to make your tag unique. If you want your tag to look just like mine them use the same supplies I have used. This tutorial assumes you have a knowledge of paint shop pro. Any resemblance to any other tag or tutorial is completely coincidental.

Supplies Used:
Tube of choice. Preferably one with a close up image. I am using a tube by Chris Pastel. She is called Davina 5. You can purchase this tube at http://scrapsncompany.com/index.php?main_page=product_info&cPath=113_500&products_id=25543
Scrap kit is called Loving Arms and is by Disturbed Scraps. You can purchase this kit at http://scrapsncompany.com/index.php?main_page=product_info&products_id=25564
Mask of your choice. I am using mask #219 by Weescotslass Creations. You can get her masks at http://weescotslasscreations.blogspot.com/2009/04/masks.html
Font of your choice. I am using Sleeplessson Modern Script. This is a PTU font.

Plugins:
NONE
Drop shadow used throughout:
0 0 40 11.00 black

Let's Begin:
Open element 66 and shift+D to duplicate. Close the original. Re-size if you wish. Make your canvas large enough to work with.

Using your magic wand select the inside of the frame. Selections modify and expand by 4. Open paper 9 and copy and paste as a new layer. Drag under the frame. Selections invert and hit delete. Selections invert again.

Open the close up of the tube and copy and paste as a new layer. Position within the selected frame area. Selections invert again and using your eraser tool and erase any bits you have hanging outside of the frame that you don’t want. Once you are done selections select none.

Add a drop shadow to the tube and the frame.

Open paper 14 and copy and paste as a new layer. Drag to the bottom. Apply the mask of your choice. Delete the mask layer and merge the group. Re-size the mask if you need to but you want it where it is just slightly larger than the frame.

Open element 73 and copy and paste as a new layer. Drag down to just above the mask. Move to the top so you can see the circles around the top of the frame. Duplicate and move this duplicate to the bottom so you can see the circles around the bottom of the frame.

Open element 64 and copy and paste as a new layer. Re-size to where it is nearly the same size as the frame. Drag to just above the frame layer. Add a drop shadow.

Now let’s dress the tag up with elements from the kit. I will list the elements I used. Feel free to use other elements to make your tag unique. Placement of the elements is completely up to you. If you want your tag to look just like mine then use my tag for reference.
Elements I used:
2
3
6
8
11
22
23
37
53
72

Add your name.

Add your copyright and licensing information.

Crop and Re-size if you wish.

Save your tag.
♥♥♥

Wednesday, November 2, 2016

The Story


The Story
Written 11/2/2016
This tutorial is meant purely as a guide. Feel free to use your own choice of tube or scrap kit to make your tag unique. If you want your tag to look just like mine them use the same supplies I have used. This tutorial assumes you have a knowledge of paint shop pro. Any resemblance to any other tag or tutorial is completely coincidental.
Supplies Used:
Tube of your choice. I am using the work of Di Halim and this tube is a store exclusive for Scraps N Company. She is called Morti 1. You can purchase her at http://scrapsncompany.com/index.php?main_page=product_info&cPath=305&products_id=23697
The matching scrap kit is by Disturbed Scraps and is called Bella Morte. You can purchase it at http://scrapsncompany.com/index.php?main_page=product_info&products_id=23690
Mask of your choice. I am using mask #31 by Millies PSP Madness. You can get her masks at http://milliespspmadness.blogspot.com/?zx=cf16f4d1876dde2f
Font of your choice. I am using Brandley. This is a PTU font.
Plugins:
NONE
Drop shadow used throughout:
0 0 100 13.50 black

Let's Begin:
Open element 73 and shift+D to duplicate. Close the original. Make the canvas large enough to work with.
Open paper 11 and copy and paste as a new layer and drag under the frame. Apply the mask of your choice. Delete the mask layer and merge the group.
Add a drop shadow to the frame.
Open element 41 and re-size by 75% and then again by 85%. Copy and paste as a new layer and place on the far left of the tag. Add a drop shadow.
Open element 43 and re-size by 60%. Copy and paste as a new layer and position in the center of the frame from the top and in front of the bookshelf. Add a drop shadow.
At this time open your tube and re-size as needed. You want her still larger than the frame but not by much. Copy and paste as a new layer and place her on the far right side. Add a drop shadow.
Open element 45 and copy and paste as a new layer. Drag under the frame and place at the bottom under the bookshelf and add a drop shadow.
Now let’s dress the tag up with elements from the kit. I will list the elements I used. Feel free to use other elements to make your tag unique. Placement of the elements is completely up to you. If you want your tag to look just like mine then use my tag for reference.
Elements I used:
13
14
24
25
27
34
35
54
77
Add your name.
Add your copyright and licensing information.
Crop and save.


Wednesday, July 6, 2016

Sea Maiden


Sea Maiden
Written 7/6/2016
This tutorial is meant purely as a guide. Feel free to use your own choice of tube or scrap kit to make your tag unique. If you want your tag to look just like mine them use the same supplies I have used. This tutorial assumes you have a knowledge of paint shop pro. Any resemblance to any other tag or tutorial is completely coincidental.
Supplies Used:
Tube of your choice. I am using the work of Toriya. It is called My Sweet Mermaid. You can purchase it at http://scrapsncompany.com/index.php?main_page=product_info&cPath=113_320&products_id=20724
The matching scrap kit is called Sea Maiden and is by Disturbed Scraps. You can purchase it at http://scrapsncompany.com/index.php?main_page=product_info&products_id=20761
Mask of your choice. I am using mask #2 from set # 111 by Rachel Designs https://racheldesignsblog.wordpress.com/
Font of your choice. I am using Qaskin.  You can download it at http://www.fontspace.com/m%C3%A5ns-greb%C3%A4ck/qaskin-black-personal-use
Plugins:
NONE
Drop shadow used throughout:
0 0 85 15.00 color from your tag

Let's Begin:
Open paper 10 and shift+D to duplicate. Close the original. Promote the background layer to a raster layer. Make your canvas large enough to work with. Re-size as needed. This will be the base of your tag. Apply the mask of your choice. Delete the mask layer and merge the group.
Open your tube and re-size as needed. Copy and paste as a new layer and position on the masked area. Add a drop shadow.
Now let’s dress the tag up with elements from the kit. I will list the elements I used. Feel free to use other elements to make your tag unique. Placement of the elements is completely up to you. If you want your tag to look just like mine then use my tag for reference.
Elements I used:
10
11
20
24
45
52
53
65
73
Add your name.
Add your copyright and licensing information.
Crop and save.


Tuesday, June 21, 2016

Night To Remember


Night To Remember
Written 6/21/2016
This tutorial is meant purely as a guide. Feel free to use your own choice of tube or scrap kit to make your tag unique. If you want your tag to look just like mine them use the same supplies I have used. This tutorial assumes you have a knowledge of paint shop pro. Any resemblance to any other tag or tutorial is completely coincidental.
Supplies Used:
Tube of your choice. I am using one called Smoking by Andy Cooper. You can get this tube at http://scrapsncompany.com/index.php?main_page=product_info&cPath=113_652_304&products_id=20174
Scrap kit is called Directly from my Heart by Disturbed Scraps. You can get the kit at http://scrapsncompany.com/index.php?main_page=product_info&products_id=20342
Tag Template # 3 by Rachel Designs. You can get it at https://racheldesignsblog.wordpress.com/2016/05/08/tag-template-3-5/
Font of your choice. I am using Sexy Shout which you can get at http://www.dafont.com/sexy-shout.font
Plugins:
NONE
Drop shadow used throughout:
0 0 90 10.00 black

Let's Begin:
Open the tag template and shift+D to duplicate. Close the original. Make the canvas large enough to work with. Remove the following layers from the template: Raster 1 and background. Fill the layers of the template using your colors, gradients and papers from the kit of your choice. Add a drop shadow to each of the layers.
Open your tube and copy and paste as a new layer. Position in the center of the template. Add a drop shadow.
Now let’s dress the tag up with elements from the kit. I will list the elements I used. Feel free to use other elements to make your tag unique. Placement of the elements is completely up to you. If you want your tag to look just like mine then use my tag for reference.
Elements I used:
2
11
12
18
28
37
39
40
58
77
Add your name.
Add your copyright and licensing information.
Crop and save.


Thursday, June 9, 2016

Carnivale


Carnivale
Written 6/8/2016
This tutorial is meant purely as a guide. Feel free to use your own choice of tube or scrap kit to  make your tag unique. If you want your tag to look just like mine them use the same supplies I have used. This tutorial assumes you have a knowledge of paint shop pro. Any resemblance to any other tag or tutorial is completely coincidental.
Supplies Used:
Tube of your choice. I am using a tube called Dolls 2 by Di Halim. You can purchase this tube at http://scrapsncompany.com/index.php?main_page=product_info&cPath=113_133_166&products_id=20080
The amazing scrap kit is called Chasing The Night by Disturbed Scraps. You can purchase it at http://scrapsncompany.com/index.php?main_page=product_info&products_id=20004
Mask of your choice. I am using mask #70 by Insatiable Dreams. You can get her masks at http://insatiabledreams.net under resources.
Font of your choice. I am using Banana Yeti. You can download it at http://www.dafont.com/banana-yeti.font
Plugins:
DSB Flux Linear Transmission
Drop shadow used throughout:
0 0 100 14.00 black

Let's Begin:
Open element 70. Shift+D to duplicate. Close the original. Re-size if you wish. Make your canvas large enough to work with. You can crop and re-size at the end. Using your magic wand select the inside of the frame. There are some open outside edges but you want to leave those open so just do the very very center. Selections modify and expand by 2. Open paper 10 and copy and paste as a new layer. Drag under the frame. Selections invert and hit delete. Selections select none.
Open paper 14 and copy and paste as a new layer and drag to the bottom. Apply the mask of your choice. Delete the mask layer and merge the group.
Add a drop shadow to the frame.
Open your tube and re-size as needed. Copy and paste as a new layer and place in the center of the frame. Duplicate the tube layer. On the bottom tube adjust blur Gaussian blur at 12.00. Apply the DSB Flux Linear Transmission plugin using the following settings:
Slice size 2
Offset 2
Blend 100
Horizontal checked
Add noise at 100% to the linear transmission layer.
Add a drop shadow to this linear transmission layer of 1 -1 100 2.00 black.
Add a drop shadow to the top tube layer.
Now lets dress this tag up with some of the awesome whimsical elements from this kit. I will list the elements I used. Feel free to use any of the other elements that I didn’t use to make your tag unique. Placement of the elements is up to you. If you want your tag to look just like mine then use my tag for reference.
Elements I used:
16
20
21
23
46
50
56
64
 Add your name.
Add your copyright and licensing information.
Crop and save. 


Tuesday, September 29, 2015

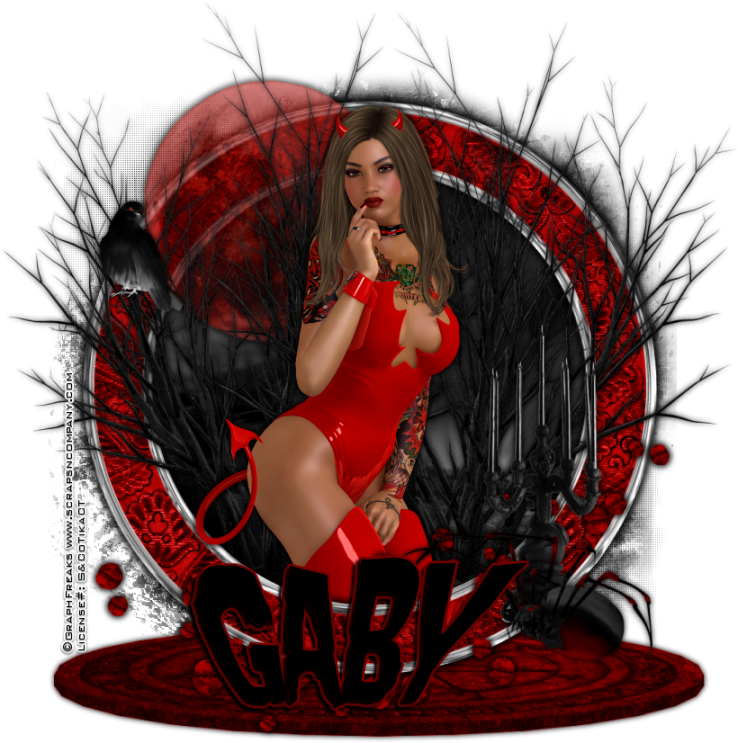
Under The Blood Moon


Under the Blood Moon
written 09/29/15

This tutorial is meant purely as a guide. Feel free to make your tag unique by using your own choice of tube and your own choice of scrap kit. If you want your tag to look just like mine then use the same supplies as I have.

Supplies Used:


Brushes of your choice. You can get some great brushes at http://deviantart.com

Font of your choice. I am using Evil Of Frankenstein. You can get it at http://www.fontspace.com/brain-eaters/evil-of-frankenstein

Plugins:
NONE

Let's Begin:
Open element 72 and shift+D to duplicate.
Close the original.
Re-size as you want.
Make your canvas large enough to work with.
Using your magic wand select the inside of the frame and go to selections modify and expand by 8.
Layers new raster layer and drag under the frame.
Open paper 3 and copy and paste into selection.
Selections select none.
Layers new raster layer and drag to the bottom.
Apply the brushes of your choice around the outside edges of the frame.
Open your half tube and copy and paste as a new layer and position within the frame.
I made mine appear to be coming out of the frame at the top. This is completely up to you. Use your eraser to remove any bits you do not want hanging out of the frame.
Apply a nice dark shadow to the frame.
I will list the elements from the kit that I used.
Placement of the elements is completely up to you.
Use my tag for a reference if needed.
Elements used:
element 14
element 36
element 42
element 44
element 47 – opacity lowered on layer
element 53
element 67
Add your name.
Add your copyright and licensing information.
Crop and save.


My Fur-less Baby


My fur-less baby
written 09/29/15

This tutorial is meant purely as a guide. Feel free to make your tag your own by using your own tubes and scrap kit. If you want your tag to look just like mine use the same supplies that I have.

Supplies Used:


Matching scrap kit by Disturbed Scraps called The Girl Can't Help It. You can get it at http://scrapsncompany.com/index.php?main_page=product_info&products_id=13841

Font of your choice. I am using Butter Kings. You can get it at http://www.dafont.com/butter-kings.font

Plugins:
NONE

Let's begin:
Open element 62 from the kit and shift+D to duplicate.
Close the original.
Re-size if you want/need to.
This is the base of your tag.
Make your canvas large enough to work with.
Add a drop shadow to the element.
Open your tube and copy and paste the half body tube.
Center within the element already on the canvas.
Re-size so it will fit nicely.
Add a drop shadow.
Open element 2 and re-size by 65%.
Copy and paste as a new layer.
Place on the bottom right side of the tag.
Add a drop shadow.
Duplicate.
Image flip horizontal.
Move the duplicate to the bottom left side of the tag.
Merge these 2 layers together.
Open element 7 and re-size by 50% and then again by 65%.
Image flip vertical.
Copy and paste as a new layer and place in the bottom left side of the previous leaves.
Add a drop shadow.
Duplicate and image flip horizontal.
Move the duplicate to the bottom right side of the previous leaves.
Open element 8 and re-size by 60%.
Copy and paste as a new layer and place bottom center of the tag.
Add a drop shadow.
Open element 6 and re-size by 50% and then again by 65%.
Copy and paste as a new layer and drag under the white flower.
Move to the far left side.
Add a drop shadow.
Duplicate and move to the far right side.
Open element 85 and re-size by 90%.
Copy and paste as a new layer. Move to the bottom half of the tag.
Add your name.
Add your copyright and licensing information.
Crop and save.


Tuesday, August 11, 2015

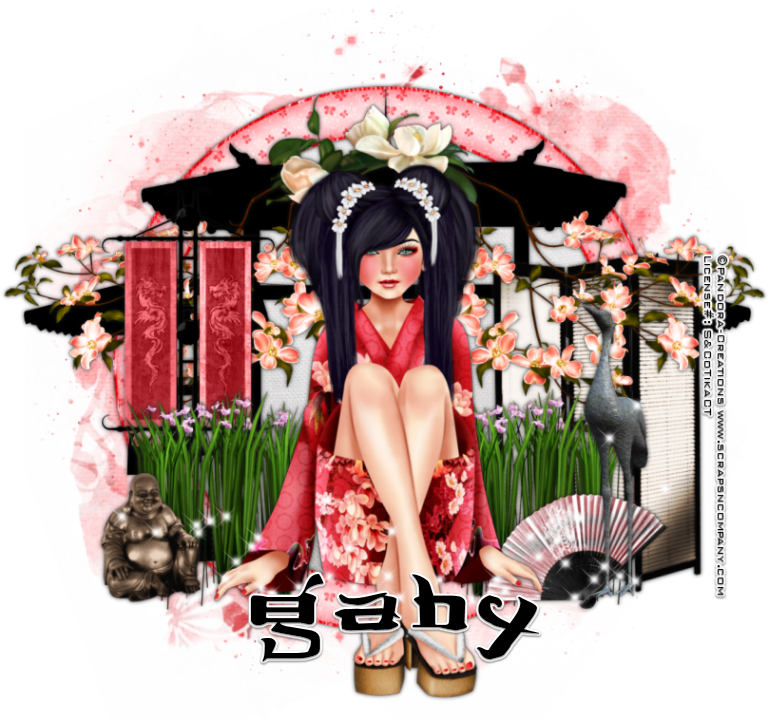
Zen Princess


Zen Princess
written 8/11/2015

This tutorial is meant purely as a guide. Make your tag unique to you by using your own tube and scrap kit. If you want your tag to look just like mine then use the same tube and scrap kit that I am and use my tag as a reference.

Supplies Used:


Mask of your choice. I am using mask 2 in this set from Rachel Designs.

Font of your choice. I am using JSA Lovechinese. You can get it at http://www.dafont.com/jsa-lovechinese.font

Plugins:
NONE

Let's Begin:
Open element 80 and shift+D to duplicate.
Close the original.
Re-size to a size you are happy with. This will be the base of your tag.
Make your canvas large enough to give you plenty of room to work with.
Open paper 4 and copy and paste as a new layer and drag to the bottom.
Apply your mask.
Delete the mask layer and merge the group.
Make your frame layer active and using your magic wand select the inside of the frame.
Selections modify and expand by 8.
Layers new raster layer and drag under the frame.
Open paper 3 and copy and paste into selection.
Selections select none.
Add a drop shadow to the frame.
Open element 52 and copy and paste as a new layer.
Position over the center of the frame.
Add a drop shadow.
Open your tube and copy and paste as a new layer.
Position so she is sitting on the bottom of the frame in the center.
Add a drop shadow.
Now lets dress it up with some elements.
I will list the elements I used.
Placement is completely up to you.
If you want your tag to look just like mine then use my tag as reference for placement of the elements.
Be sure to add a drop shadow to each element.
Elements used:
element 4
element 6
element 9
element 30
element 44
element 45
element 51
element 88
Add your name.
Add your copyright and licensing information.
Crop and save.


Wednesday, August 5, 2015

Into The Summer Sun


Into The Summer Sun
written 8/5/2015

This tutorial is meant purely as a guide. Use any tube and scraps to make your tag unique to you. If you want your tag to look just like mine then use the same supplies that I have. Also use my tag as a reference.

Supplies Used:


Scrap Kit by Disturbed Scraps. You can get it at http://scrapsncompany.com/index.php?main_page=product_info&products_id=12487

Mask of your choice. I am using mask #11 by Vix. You can get her awesome masks at http://www.freewebs.com/vixpsp/

Font of your choice. I am using Karl Wright Script.

Plugins:
None

Let's Begin:
Open element 76 and shift+D to duplicate.
Close the original.
Re-size to a size you are happy with.
This will be the base/frame of your tag.
Make your canvas large enough to work with.
Using your magic wand select the inside of the frame and go to selections modify and expand by 8.
Layers new raster layer and drag under the frame.
Open paper 14 and copy and paste into selection.
Open your tube and copy and paste and position so she is in the frame and erase any bits you do not want hanging out.
Selections select none.
Add a drop shadow to the frame and to your tube.
Open paper 5 and copy and paste as a new layer and then drag to the bottom.
Apply your mask.
Delete the mask layer and merge the group.
Alright lets use some of the great elements found in this kit and dress this tag up.
Again my tutorial is just a guide so I will provide the list of the elements I used.
You can use whatever elements you wish.
If you want your tag to look just like mine then use my tag as a reference for placement.
Elements I used:
element 1 – duplicated and placed randomly around the frame.
Element 12 – duplicated and placed on each side.
Element 14 – duplicated and placed on each side.
Element 23
element 35
element 39
element 40
element 41
element 61
element 63
element 69
Add your name.
Add your copyright and licensing information.
Crop and save.


Sunday, August 2, 2015

Sweet Surprise


Sweet Surprise
written 8/1/2015

This tutorial is meant to simply be a guide. Make your tag your very own by using whatever tubes and scrap kits you want. If you want your tag to look just like mine then use the same supplies that I use and use my tag as a reference.

Supplies Used:


Font of your choice. I am using Simply Glamorous. You can get it at http://www.dafont.com/simply-glamorous.font

Plugins:
NONE

Let's Begin:
Open element 97 and shift+D to duplicate.
Close the original.
Re-size if you wish.
Make your canvas large enough to work with.
Using your magic wand select the inside of the frame and then go to selections modify and expand by 20.
Open paper 7 and copy and paste as a new layer and drag under the frame.
Selections invert and hit delete.
Selections invert again.
Open the close up of your tube and copy and paste as a new layer.
Position her face within the framed area.
Selections invert and hit delete.
Selections select none.
Change the properties of the tube layer to luminance legacy.
Merge down to the paper layer.
Now use your smudge tool and run along the edges to smooth them out and blend them so they don't look so choppy behind the frame.
Add a slight drop shadow to the frame using the pink color.
Open your full size tube and copy and paste as a new layer.
Re-size and then move to the far right side of the frame.
Open element 10 and copy and paste as a new layer.
Re-size so it is within proportion of your tube.
I placed mine so it looked like the tube was standing inside of the cupcake wrapper.
You can do this by erasing bits of the tube.
Add a drop shadow to both the tube and the cupcake wrapper.
Now lets dress the tag up with some of the great elements included in this great kit.
I will simply list the elements I used. Placement is entirely up to you.
Elements used:
element09
element011
element013
element027
element033
element036
element042
element059
Add your name.
Add your copyright and licensing information.
Crop and re-size if needed.
Save.