Showing posts with label St Patricks Day. Show all posts

Wednesday, February 24, 2016

My Favorite Color Is Ireland


Favorite Color Is Ireland
written 2/24/2016

This tutorial is meant purely as a guide. Feel free to make your tag unique by using your own choice of tube and scrap kit. If you want your tag to look just like mine then use the same supplies I have used. Any resemblance to any other tutorial or tag is purely coincidental.

Supplies Used:


Scrap Kit by Lil Mz Brainstorm. You can purchase it at http://scrapsncompany.com/index.php?main_page=product_info&products_id=17752

Font of your choice. I am using Catharsis Macchiato and Celtic Garamond and Celtic Hand.

Plugins:
NONE

Let's begin:
Open element 2 from the kit and shift+D to duplicate.
Close the original.
Re-size if you choose.
Make your canvas large enough to work with.
Using your magic wand select the inside of the frame.
Selections modify expand by 5.
Layers new raster layer and drag under the frame.
Open paper 19 and copy and paste into selection.
Selections select none.
Add a drop shadow to the frame.
Open your tube and re-size so she is just larger than the frame.
Copy and paste as a new layer and move to the far right hand side.
Add a drop shadow.
Open element 18 and re-size.
Copy and paste as a new layer.
Place in the top right hand corner of the frame and drag under your tube.
Add a drop shadow.
Duplicate and image flip horizontal.
Move this duplicate to the top left hand corner.
Open element 34 and copy and paste as a new layer.
Drag down under the frame.
Place at the bottom.
Erase any bits hanging outside of the frame on both sides.
Add a drop shadow.
Open element 89 and re-size.
Copy and paste as a new layer and place at the top center of the frame.
Add a drop shadow.
Open element 93 and re-size.
Image flip horizontal.
Copy and paste as a new layer and place in the lower left corner.
Add a drop shadow.
Open element 90 and re-size.
Copy and paste as a new layer.
Drag under the leprechaun.
Add a drop shadow.
Open element 87 and re-size.
Image free rotate to the right 20 degrees.
Adjust sharpen.
Copy and paste as a new layer and place in the top left area of the frame.
Add a drop shadow.
Add some text if you choose to the inside of the frame at the top.
Add your name.
Add your copyright and licensing information.
Crop and save.


Monday, February 22, 2016

Irish In A Few Beers


Irish In A Few Beers
written 2/22/2016

This tutorial is meant purely as a guide. Feel free to make your tag unique by using your own choice of Tube and Scrap Kit. If you want your tag to look exactly like mine then use the same supplies that I have used. Any resemblance to any other tutorial or tag is purely coincidental.

Supplies Used:

Tube by Amber Kelso. I got this tag when the artist was at CILM. I am not sure where to get her tubes now sorry.

Scrap kit is by Purple Dreams Scraps. It is called Irish and you can purchase it at http://picsfordesign.com/en/catalogue/id_116578_irish.pix

Animation by Love Shack Animations and PSP Tutorials. You can get it at http://loveysshack.blogspot.com.ar/2012/01/st-pattys-day-animations.html

Font of your choice. I am using Sistah Ysse you can get it at http://www.fontspace.com/vvb-designs/sistah-ysse

Plugins:
NONE

Let's Begin:
Open element 18 and shift+D to duplicate.
Close the original.
Image free rotate and rotate in either direction 90 degrees.
Make your canvas large enough to work with.
Using your magic wand select the inside of the frame.
Selections modify and expand by 3.
Open paper 5 and copy and paste as a new layer.
Drag under the frame.
Selections invert and hit delete.
Selections select none.
Add a drop shadow of
4
-2
85
5.00
black
to the frame.
Open your tube and copy and paste as a new layer at the top.
Position at the bottom center of the frame.
Add the same drop shadow to the tube.
Now lets dress it up with some of the fun elements from this awesome kit.
Open element 4.
Image rotate to the right.
Copy and paste as a new layer and drag to just above your frame.
Move to the far right side and make it peeking out from behind your tube.
Duplicate and image flip horizontal.
Move this duplicate to the far left side.
Merge these 2 layers together and add a drop shadow.
Open element 21 and copy and paste as a new layer.
Drag behind your tube.
Move to the far left side bottom.
Re-size as needed.
Add a drop shadow.
Open element 5 and copy and paste as a new layer.
Drag behind your tube.
Re-size as needed.
Place to the far left bottom in front of the cauldron.
Add a drop shadow.
Duplicate and image rotate to the right 90 degrees.
Move this layer above your tube and place in front of the first bottle and your tube.
Duplicate the standing bottle and move to the far right of your tube.
Add some wordart text if you choose.
Add your name.
Add your licensing and copyright information.
Crop.
Merge all layers visible.
Add a new raster layer and drag to the bottom.
Flood Fill with white.
Copy Copy Merged
Open animation shop and right click and paste as a new animation.
Open your animation.
Take note of the number of frames in your animation and duplicate your tag to have the same amount of frames.
Be sure to remove the first frame of the animation that is black.
Re-size the animation if you need to to fit over the top of the pot of gold in your tag.
Select all frames in both the animation and in the tag.
Grab frame 1 of the animation and drag it onto frame 1 of the tag .. Position where you want and drop.
View your animated tag.
If you are happy save. If not undo and repeat until you get it just right.
Save your tag once you are happy.


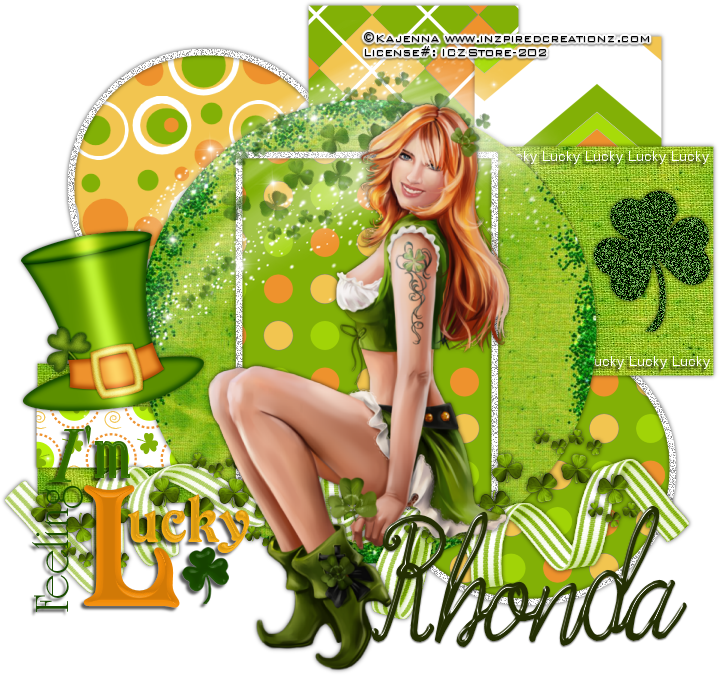
Your Lucky Charm


Your Lucky Charm
written 2/8/16

This tutorial is meant purely as a guide. Feel free to make your tag unique by using your own choice of tube and scrap kit. If you would like your tag to look just like mine then use the same supplies that I have used. Any resemblance to another tag or tutorial is purely coincidental.

Supplies Used:

Tube by Kajenna. I purchased this tube at the Inzpired Creationz Store but I am not sure where to purchase it now.

Scrap kit is a freebie by Melissaz Creationz. You can download it at http://melissazcreationz.blogspot.ca/2015/03/new-st-pattys-kit-st-pattys-party.html

Tag Template by Cakes Creations. You can download it at http://cakescreations.blogspot.ca/2015/02/tag-template-lucky.html?zx=68a952236f881a8

Font of your choice. I am using Accarita. This is a PTU font which you can purchase at https://fontbundles.net/

Plugins:
NONE

Let's Begin:
Open the tag template and shift+D to duplicate.
Close the original.
Delete the info layer.
Make your canvas large enough to give you room to work with.
Start at the bottom and fill each layer of the template using the different papers from the kit except the outline layers.
On the outline layers add noise.
Add a drop shadow to each layer.
Open your tube and copy and paste as a new layer.
Re-size if needed.
Position so she is in the center rectangle.
Add a drop shadow.
Open element 21 and copy and paste as a new layer.
Drag under your tube.
Move to the far left side.
Open element 13 copy and paste as a new layer.
Re-size as needed.
Move to the far left hand side.
Add a drop shadow.
Open element 8 and copy and paste as a new layer.
Drag down under the word art.
Place to the far left.
Duplicate and move this copy to the far right.
Merge together and add a drop shadow.
Open element 5 and copy and paste as a new layer.
Drag under the shamrocks you just placed.
Add a drop shadow.
Add your name.
Add your copyright and licensing information.
Crop and save.

Monday, September 28, 2015

A Touch Of Green


A Touch Of Green
written 2/19/2015

Supplies Needed :
Tube of your choice; preferably one with a close up image. I am using the work of Ismael Rac. You can get his tubes at http://store.xeracx.net/

FTU scrap kit by Dreamland Designs. You can get it at http://dreamlanddesigns.blogspot.com/2013/03/stpaddys-day-2013-ftu-no-cu.html

Mask is by Rocked by Rachel. You can get it at https://rockedbyrachel.wordpress.com/2015/02/16/st-pattys-day-masks/
I am using mask #2 from this set.

Font of your choice. I am using Party Business. You can get it at http://www.dafont.com/party-business.font

Plugins:

Let's Begin:
Open paper 22 and shift+ D to duplicate.
Close the original.
Now re-size the paper to a size you will be happy with.
We will be adding a closeup of your tube and a mask to this paper.
Once you have it re-sized to your liking promote the background layer to a raster layer.
Image canvas size and make your canvas large enough to work with.
Open the close up of your tube and copy and paste as a new layer and center in the paper.
Change the properties of the tube layer to luminance legacy.
Merge the tube layer down to the paper layer.
Apply the mask.
Delete the mask layer and merge the group.
Duplicate this layer.
Then merge the 2 layers together.
Add a drop shadow of
0 0 100 10.00 color green from the paper.
Open clovers element from the kit and re-size so they will fit nicely around your mask area where the clovers in the mask are. Both top and bottom sides.
Add a drop shadow to both using the same settings as you did before.
Open the full size of your tube and copy and paste as a new layer and place on the far right side of the tag.
Add a drop shadow.
Open the hat element from the kit.
Image re-size by 50%.
Copy and paste as a new layer.
Image free rotate to the left 26 degrees.
Adjust sharpen.
Add a drop shadow.
Move to the middle left just at the bottom of the clovers.
Open the horseshoe element from the kit.
Re-size until it is nearly the size of the hat.
Adjust add/remove noise and add noise at 100 uniform and monochrome.
Copy and paste as a new layer.
Image free rotate to the right 26 degrees.
Adjust sharpen.
Add a drop shadow.
Move over near the right of your hat and I erased bits to look like it was both behind and in front of the hat. This is completely up to you.
Open the glitter ribbon and copy and paste as a new layer and place along the bottom of your tag.
Add a drop shadow.
Add your name.
Add your copyright and licensing information.
Crop and save.

 

Thursday, March 12, 2015

Pot O' Gold


Pot O' Gold
written 3/12/2015

Supplies Needed:


Scrap Kit by Ginnibug Designz. You can get it at http://scrapsncompany.com/index.php?main_page=product_info&products_id=8416

Mask of your choice. I am using mask #250 by Vix. You can get it at http://www.freewebs.com/vixpsp/

Font of your choice. I am using Foglihten No07 and you can get it at http://fontspace.com/gluk/foglihtenno07

Drop shadow used:
0 0 50 6.00 black

Plugins:


Let's Begin:
Open a new blank canvas that gives you plenty of room to work with.
Open paper 5 and copy and paste as a new layer.
Apply your mask.
Delete the mask layer and merge the group.
Open your tube and re-size if needed.
Copy and paste as a new layer and place in the center bottom of your mask area.
Add a drop shadow.
Open element 94 and re-size so it will fit nicely along the bottom of the tag.
Copy and paste as a new layer and move into position on the bottom.
I erased bits so her foot was in front of it. This is completely up to you.
Add a drop shadow.
Open element 63 and re-size so it will fit nicely along side of your masked area.
Copy and paste as a new layer and move to the far left side.
Add a drop shadow.
Duplicate and move this copy to the far right side.
Duplicate again and go to image rotate and rotate to the right 90 degrees.
Move this copy to the top and drag under the first 2.
If you have any bits of stem poking out erase it.
Open element 46 and copy and paste as a new layer.
Move to the right side behind your tube.
Add a drop shadow.
Open element 10 and re-size by 50% and then again by 60%.
Copy and paste as a new layer at the top.
Move to the bottom right corner of your tag.
Add a drop shadow.
Open element 6 and re-size by 50%.
Copy and paste as a new layer.
Drag under the hat and move to the bottom right behind the hat.
Add a drop shadow.
Open element 36 and re-size by 50%.
Copy and paste as a new layer.
Drag under your tube.
Place to the far left of the tag.
Add a drop shadow.
Open element 65 and re-size so it will fit nicely across your tag.
Copy and paste as a new layer and move to the bottom.
Add your name.
Add your copyright and licensing information.
Crop and re-size if you wish.
Save.


Tuesday, March 3, 2015

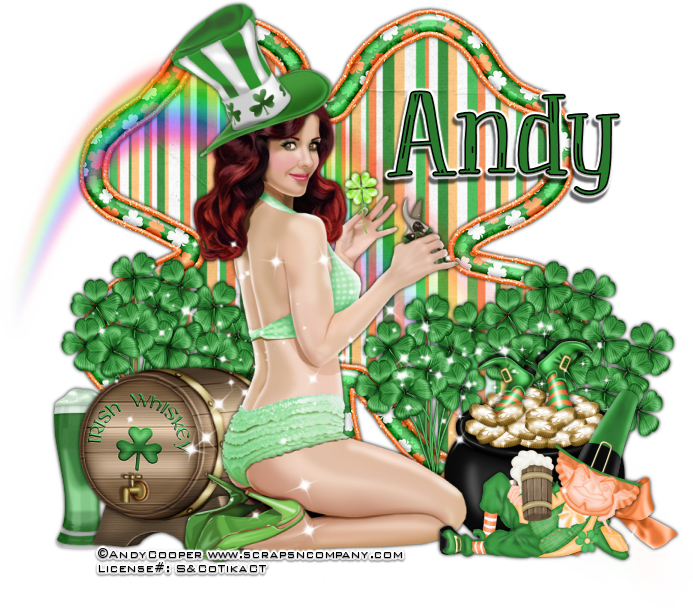
Get Lucky


Get Lucky
written 3/3/2015

Supplies Needed:

Tube of your choice. I am using one by Andy Cooper. You can get it at www.scrapsncompany.com


Font of your choice. I am using Peach. You can get it at http://www.dafont.com/peach.font

Plugins:
None.

Let's Begin:
Open frame 1 and shift+D to duplicate.
Close the original.
Re-size to be the base of your tag.
Make your canvas large enough to work with.
Using your magic wand select the inside of the frame and go to selections modify and expand by 4.
Layers new raster layer and drag under the frame.
Open paper 11 and edit copy and paste into selection.
Selections select none.
Add a drop shadow to the frame.
Open your tube and copy and paste as a new layer.
Place in front of the frame.
Add a drop shadow.
Open Rainbow. Copy and paste as a new layer.
Drag under your tube and place across the frame.
Open Pot O Gold and re-size so it fits nicely on your tag.
Place on the bottom right side at the end of the rainbow.
Add a drop shadow.
Open Leprechaun and re-size so he will fit nicely in front of the Pot O Gold.
Add a drop shadow.
Open Shamrocks and re-size.
Copy and paste as a new layer and you want to drag behind your tube and the pot o gold. Duplicate several times and place randomly on both sides of your tube.
Use my tag for reference if needed.
Open Barrel and re-size so it will fit nicely.
Place on the left side in front of the clovers.
Add a drop shadow.
Open beer and re-size so it will fit nicely next to the barrel.
Copy and paste as a new layer behind the barrel and to the left.
Add a drop shadow.
Open sparkles and copy and paste as a new layer at the top.
Add your name.
Add your copyright and licensing information.
Crop and save.


Tuesday, February 24, 2015

Get Your Irish On


Get Your Irish On
written 2/24/2015

Supplies Needed:


Scrap Kit also by Tammys Welt. You can get it at http://scrapsncompany.com/index.php?main_page=product_info&products_id=7888

Font of your choice. I am using Irish Spaghetti. You can get it at http://www.dafont.com/irish-spaghetti.font

Lets Begin:

Open element 57.
Shift + D to duplicate and close the original.
Re-size by 75%.
Make your canvas large enough to work with.
Using your magic wand select the inside of the frame.
Selections modify and expand by 8.
Layers new raster layer and drag this new layer under the frame layer.
Open paper 6 and copy and paste into selection.
Selections modify and contract by 7.
Open your tube and copy and paste as a new layer within the frame area.
Selections invert.
Using your eraser remove any bits you do not want hanging outside of the frame.
Once happy selections select none.
Add a drop shadow to both the tube and the frame.
Open element 49 and image rotate to the left.
Copy and paste as a new layer.
Drag under your tube but on top of your frame.
Position along the edges of your frame.
I used my eraser tool at the bottom and removed bits of my tube to make it look like it was behind the shamrocks at the bottom but above them at the top.
This is completely up to you.
Add a drop shadow to the shamrocks.
Open element 78 and re-size by 75% 2x.
Copy and paste as a new layer and place in the bottom right corner of the frame.
Add a drop shadow.
Open element 80 and re-size by 75%.
Copy and paste as a new layer.
Place so the right side is ending in the pot of gold.
Open element 11 and re-size by 75% 2x.
Copy and paste as a new layer and place on the left side so the top barrel hides the end of the rainbow.
Open element 35 and re-size by 50%.
Copy and paste as a new layer and drag under the barrel layer.
Move to the far left and make it peek out from behind the top of the left bottom barrel.
Add a drop shadow.
Duplicate and move to the bottom right of the barrels.
Open element 63 and re-size by 75%.
Copy and paste as a new layer and move to the bottom in front of the barrels.
Add a drop shadow.
Open element 53 and copy and paste as a new layer.
Drag to the bottom of the tag.
Add a drop shadow.
Add your name.
Add your copyright and licensing information.
Crop and save.