Showing posts with label VeryMany. Show all posts

Wednesday, June 22, 2022

Cream And Coffee


Cream and Coffee

Written on 6/22/2022

This tutorial is meant purely as a guide. Feel free to use your own choice of tube or scrap kit to make your tag unique.

If you want your tag to look just like mine, then use the same supplies I have used. This tutorial assumes you have a knowledge

of paint shop pro. Any resemblance to any other tag or tutorial is completely coincidental.


Supplies Used:

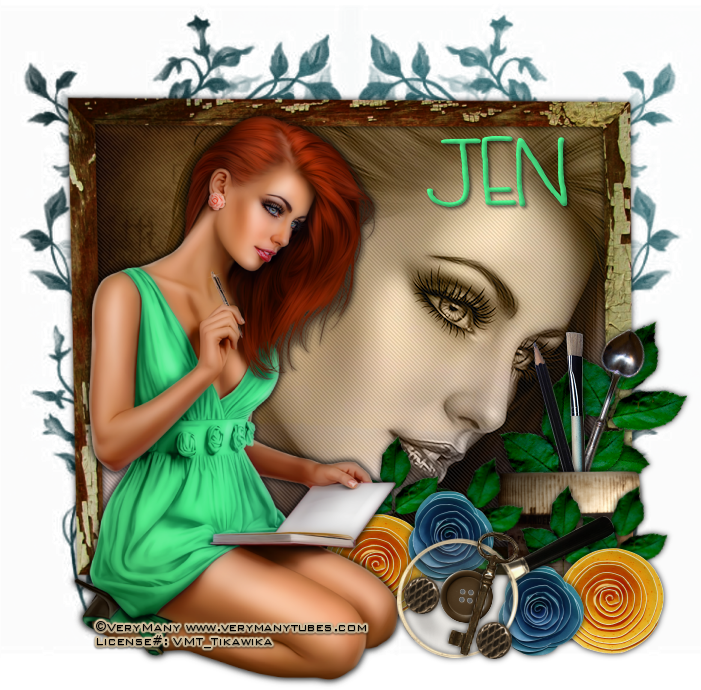
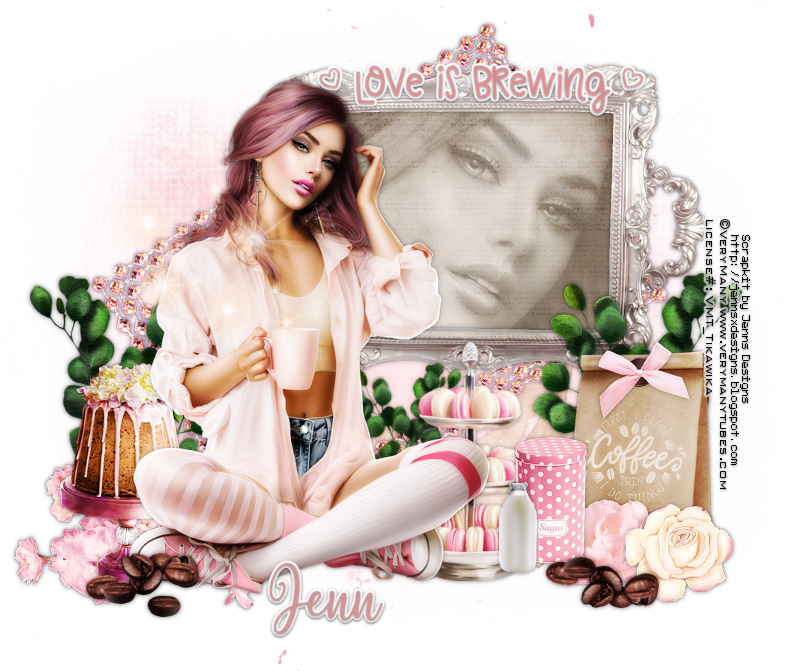
Tube of your choice; preferably one with a close up. I am using a tube called Cup of tea 8 by VeryMany. You can purchase this tube at www.verymanytubes.com

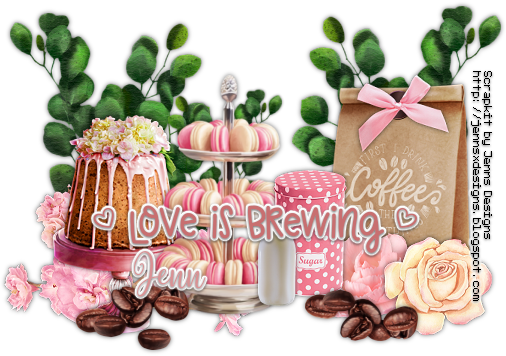
Scrap kit is called Cream and Coffee by Jenns Designs. You can purchase this kit at www.jennsxdesigns.com

Mask of your choice. I am using Mask #27 by Rachey. You can get her masks at http://scrapsofenchantment.blogspot.com

Font of your choice. I am using Beauty Boutique.


Plugins: (plugins are most generally optional)

Xero Radiance


Let's Begin:

Open paper 3. Shift+D to duplicate. Close the original. Promote the background layer to a raster layer. Make your canvas large enough to give you plenty of room to work with. Apply the mask of your choice. Delete the mask layer and merge the group.

Open element 50. Copy and paste as a new layer. Resize by 80%. Adjust sharpen. Move to the top right of your tag. Using your magic wand select the inside of the frame and selections modify and expand by 5. Layers new raster layer. Drag under the frame. Open paper 6 and copy and paste into selection.

LEAVE SELECTED.

Open the close up of your tube and copy and paste as a new layer. Resize as needed and move to where the face is inside of the frame. Selections invert delete then selections select none. Change the properties of this layer to luminance legacy and lower the opacity to 40. Merge the tube down to the paper. Add a drop shadow to the frame and merge the frame down to the tube/paper layer.

Open your main tube. Copy and paste as a new layer. Resize as needed. Place to the left of the framed image. Add a drop shadow.


Now let’s dress the tag up with elements from the kit. I will list the elements I used. Feel free to use other elements to make your tag unique. Placement of the elements is completely up to you. If you want your tag to look just like mine, then use my tag for reference.

Elements I used:

1

6

8

31

38

41

42

60

74

84

85

103

118

122

Merge visible.

Apply the Xero Radiance filter using the following settings::
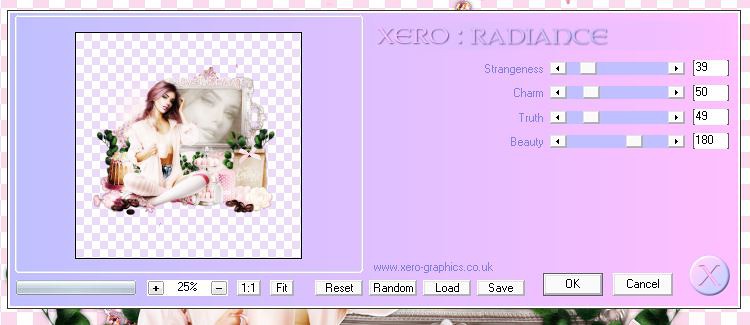


Add your name.

Add your copyright and licensing information.

You can make a 3 piece set like I have by simply using elements from your tag and creating an avatar.

Thank you for trying my tutorial.

XoXoXo


Friday, January 4, 2019

This is Your Year


This Is Your Year
Written 1/4/2019
This tutorial is meant purely as a guide. Feel free to use your own choice of tube or scrap kit to make your tag unique.
If you want your tag to look just like mine, then use the same supplies I have used. This tutorial assumes you have a knowledge
of paint shop pro. Any resemblance to any other tag or tutorial is completely coincidental.

Supplies Used:
Tube by Very Many Tubes. This tube is called Blaze. You can purchase it at verymanytubes.com
You must have a license to use this tube.  If you choose not to use this tube, then use a tube that preferably has a close up.
Scrap Kit is by Me. It is a kit that is exclusive to The Taggers Lounge Forum. You can get this kit for free simply by being a member and earning loot and purchasing it from the Shoppe.
Mask is by Weescotslass Creations. It is mask #125. You can get her great masks at http://weescotslasscreations.blogspot.com/search/label/Masks
Font I am using is Cataleya.
Plugins: (plugins are most generally optional)
Let's Begin:
Open frame 2 from the kit.
Shift+D to duplicate.
Close the original.
Resize the frame by 80%.
Make your canvas larger to give you plenty of room to work with by going to image – canvas size. I set mine to 900x900 but only because I like lots of room and then will crop or resize when I am all done with the tag.
Open PP1 and copy and paste as a new layer. Drag under the frame. Apply the mask. Delete the mask layer and merge the group.
Open glitter bunch from the kit and copy and paste as a new layer. This should be between your mask layer and the frame. Resize by 85%. Add noise to this layer at 100%. Add a slight drop shadow. I used V-1 H-0 Opacity-60 Blur-2.00 Color- black
Make your frame layer active. Using your magic wand select the inside of the frame. Selections modify and expand by 4. Layers new raster layer and drag under the frame layer. Open PP4 and copy and paste into selection.  Selections modify and contract by 3.
Open the close up of your tube and copy and paste as a new layer under the frame layer. Resize if you need to and position most of the face inside of the framed area. Selections - invert – hit delete on your keyboard. This will clear any of the excess tube that is outside of the frame. Selections select none.  
Duplicate your tube layer. On the top copy go to adjust-blur-gaussian blur and add a blur of 9.00. Set the properties of this layer to screen. Merge the 2 tube layers together. Add a drop shadow of V-0 H-0 Opacity-50 Color-Black
Add this same drop shadow to the frame layer.
Now let’s dress the tag up with elements from the kit. I will list the elements I used. Feel free to use other elements to make your tag unique. Placement of the elements is completely up to you. If you want your tag to look just like mine, then use my tag for reference.
Elements I used:
Candles
Glasses – I added noise to these at 50% but that is completely up to you.
Mask
Star bunch small
Streamer – I rotated this to the left 90 degrees but that is completely up to you.
Add a drop shadow to all of your elements.
Add your name to the tag.
Add your copyright and licensing information.
Crop. Resize if you want to.
Save.


Sunday, February 19, 2017

Just For You


Just For You
Written 2/11/2017
This tutorial is meant purely as a guide. Feel free to use your own choice of tube or scrap kit to make your tag unique. If you want your tag to look just like mine then use the same supplies I have used. This tutorial assumes you have a knowledge of paint shop pro. Any resemblance to any other tag or tutorial is completely coincidental.

Supplies Used:
Tube of your choice. Preferably one with a close up. I am using a tube by Very Many called Memories. You can purchase this tube at http://verymanytubes.com

Scrap kit is a little freebie from K Designs Scrap. You can get it at http://kdesignsscrap.blogspot.ca/2012/11/happy-dsd-saleslittle-gift.html

Mask of your choice. I am using mask #139 by Vix. You can get her awesome masks at her website under goodies. You can find them at http://www.freewebs.com/vixpsp/

Font of your choice. I am using Thrift Shop Sans Light. This is a PTU font.

Plugins:
Xero Porcelain
Penta.com Jeans

Let's Begin:
Open element 2 and shift+D to duplicate. Close the original. Re-size as you wish. Make your canvas large enough to work with.

Using your magic wand select the inside of the frame. Selections modify and expand by 4. Layers new raster layer and drag under the frame layer. Open paper 4. Copy and paste into selection.

LEAVE SELECTED

Open the close up of your tube and copy and paste as a new layer. Position her face within the selected area. Selections invert and hit delete. Selections select none. Apply the Xero Porcelain filter using the default settings. Change the properties of this layer to luminance legacy. Merge the tube layer down to the paper layer. Apply the Penta.com Jeans filter but change the top number to 20.
Add a drop shadow to the frame.

Open paper 1 and copy and paste as a new layer. Drag to the bottom. Apply the mask of your choice. Delete the mask layer and merge the group. Duplicate the mask layer. Merge these 2 together. This just helps it be darker a bit.

Open your tube and copy and paste as a new layer. Re-size as needed. Place towards the far left side. Apply the Xero Porcelain filter again. Add a drop shadow.

Open element 1 and copy and paste as a new layer. Re-size as needed. Move to the bottom right hand corner. Add a drop shadow.

Open element 7. Copy and paste as a new layer. Re-size as needed. You want it to look like it is inside the pot so size appropriately. Move this layer under the pot layer. Now place the leaves sticking out of the pot. Duplicate. Image free rotate to the right 22 degrees. Move up and over to the right a bit. Add a drop shadow to both sets of leaves.

Open element 13 and copy and paste as a new layer. Re-size as needed so it will fit within the pot also. Image flip vertical so the heart is at the top. Image free rotate to the right by 19 degrees. Adjust sharpen. Place in the pot and to the right hand side. Add a drop shadow.

Open element 16 and copy and paste as a new layer. Re-size as you have above. Image free rotate to the left 90 degrees so the brush is standing up. Adjust sharpen. Move to it is in the pot and next to the heart spoon. Add a drop shadow.

Open element 17 and repeat the above steps as you did with the brush. But once you get the pencil standing free rotate to the left another 15 degrees. Move to inside the pot next to the brush. Add a drop shadow.

Open element 10 and copy and paste as a new layer. Re-size as needed. Move to down in front of the pot to far right. Add a drop shadow.

Duplicate. Move this copy to behind your tube a bit but to the right of it so it is between your tube and the pot but still behind your tube some.

Open element 11 and copy and paste as a new layer. Re-size as needed so it is slightly smaller than the yellow flower. Move to down in front of the pot and the yellow flower but to the left. Add a drop shadow.
Duplicate. Move this one to up in front of the other yellow flower but to the right of it also.
Open element 9 and copy and paste as a new layer. Re-size as needed. Image flip horizontal. Move down to between the 2 sets of flowers. Add a drop shadow.
Open element 14 and copy and paste as a new layer. Re-size. Image free rotate to the right 9 degrees. Adjust sharpen. Move to in front of the magnifying glass. Add a drop shadow.

Grab your set of leaves that is up in the pot that is standing straight up and duplicate. Re-size by 70%. Move down to behind the flowers. Duplicate several times and move so they are scattered behind the flowers. Rotate some of them left or right to give some dimension.

Open element 4 and copy and paste as a new layer. Re-size. Move down to on top of the magnifying glass by the key. Add a drop shadow. Duplicate and place somewhere else if you wish.

Repeat with element 5.

Add your name.

Add your copyright and licensing information.

Crop and re-size if you wish.

Save your tag.
♥♥♥


Sunday, January 29, 2017

Chocolate Sweetie


Chocolate Sweetie
Written 1/18/2017
This tutorial is meant purely as a guide. Feel free to use your own choice of tube or scrap kit to make your tag unique. If you want your tag to look just like mine them use the same supplies I have used. This tutorial assumes you have a knowledge of paint shop pro. Any resemblance to any other tag or tutorial is completely coincidental.

Supplies Used:
Tube of your choice. Preferably one with a close up but if not I will show you how to make it work without a close-up. I am using a tube by Very Many Tubes called Elsie. You can purchase this tube at http://verymanytubes.com/
I am using a freebie scrap kit by Gina’s Gems Scraps. It is called Chocolate Cherries Add On. You can get it at http://ginasgemsscraps.blogspot.ca/2012/05/chocolate-cherries-free-add-on.html
Mask of your choice. I am using mask# 351 by Insatiable Dreams. You can find her masks at http://insatiabledreams.net
Font of your choice. I am using 2Peas Fragile. This is a PTU font.
Plugins:
NONE
Drop shadow used throughout:
0 0 55 12.00 black

Let's Begin:
Open paper 9 from the kit. Shift+D to duplicate. Close the original. Re-size if you wish. Promote your background layer to a raster layer. Apply the mask of your choice. Delete the mask layer and merge the group. Make your canvas large enough to give you plenty of room to work with. You will be able to crop and/or re-size when you are finished.
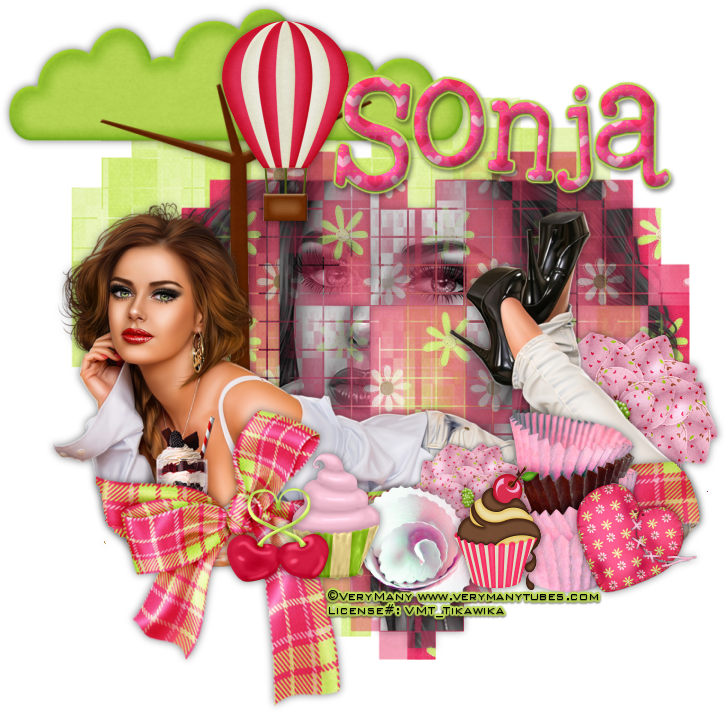
Open paper 4 from the kit and copy and paste as a new layer. Apply the same mask again. Delete the mask layer and merge the group. Re-size this mask by 80%. Move down and to the right a little bit. Selections select all float and defloat. Now open the close-up of your tube and copy and paste as a new layer. Position in the selected area. Selections invert and hit delete. Selections select none. **If you do not have a close up then use your tube and once you copy and paste as a new layer you can re-size greater than 100% to help it fill the selected area** Adjust hue and saturation colorize and set both values to 0. Add a drop shadow.
Open  your tube and copy and paste as a new layer. Re-size as needed. Position in the center of the masks near the bottom. Not all the way to the bottom. Add a drop shadow to your tube.
Open the GGS-CandyWrappers from the kit and copy and paste as a new layer. Re-size until appropriate with the tube that you used. Place over to the far right. Add a drop shadow.
Open GGS_Tree from the kit and copy and paste as a new layer. Again re-size until appropriate with your tube and tag. Move behind your tube and to the far left. Mine is just above her shoulders. Add a drop shadow.
Open GGS_TornHeart from the kit and copy and paste as a new layer. Again re-size. Image free rotate to the right 24 degrees. Adjust sharpness sharpen. Move to the bottom right slightly in front of the candy wrappers to the right of them. Add a drop shadow.
Open GGS_Hot air balloon from the kit. Copy and paste as a new layer. Again re-size. Place near the top of the tree on the right side of the trunk. Add a drop shadow.
Open GGS_Cupcake with cherries from the kit. Copy and paste as a new layer. Again Re-size. Move to the bottom in front of the candy wrappers but to the left slightly overlapping. Add a drop shadow.
Open GGS_Heart cherries from the kit. Copy and paste as a new layer. Again re-size. Place along the bottom with the other elements. Mine is over near her hand. Add a drop shadow.
Open GGS_Hortensia flower from the kit and copy and paste as a new layer. Again re-size. I placed 2 of these on my tag. One is behind her legs at the far right and its larger. I then duplicated it and re-sized this duplicate and placed it along the bottom behind the cupcake with cherries. Add a drop shadow to both of them.
Open GGS_cupcake. Copy and paste as a new layer. Again re-size. Place along the bottom with the other elements. Mine is over behind the heart cherries but to the right of them. Add a drop shadow.
Open GSS_Rolled bloomie from the kit. Copy and paste as a new layer. Again re-size. Move to the bottom with the other elements mine is between the 2 cupcakes. Add a drop shadow.
Now that you have most everything placed we are going to add a ribbon/bow to the tag that will take a little work. Open the GGS_Satin Bow wrap from the kit. Copy and paste as a new layer and drag down to just above your tube in your layer palette. Now re-size so it is just longer/larger than your tube on both sides. Now lower the opacity of the ribbon so you can see your tube through it. Using your eraser set on a size that is comfortable for you and zoom in if you need to but erase any bits of the ribbon that are NOT on your tube just at the sides. Be careful to not erase any of the bow. You can keep raising the opacity to check your work if you need to. Once you are done and happy add a drop shadow.
Add your name to your tag.
Add your copyright and licensing information.
Crop and Re-size if you wish.
Save your tag.
♥♥♥


Thursday, August 25, 2016

Good Bye Summer Hello Fall


Goodbye Summer Hello Fall
Written 8/24/2016
This tutorial is meant purely as a guide. Feel free to use your own choice of tube or scrap kit to make your tag unique. If you want your tag to look just like mine them use the same supplies I have used. This tutorial assumes you have a knowledge of paint shop pro. Any resemblance to any other tag or tutorial is completely coincidental.
Supplies Used:
Tube of your choice. I am using the work of Very Many. This tube is called Angelica. You can purchase her at http://verymanytubes.com/
The beautiful scrap kit is by Tiny Turtle Designs. The kit is called Alisa. You can purchase it at http://tinyturtledesigns.com/store/
Template by Millie’s PSP Madness. You can download it at http://milliespspmadness.blogspot.com/2016/03/template-808-and-tag-w-zlatas-new-tube.html
Font of your choice. I am using Marbelia Evolutions. This is a PTU font.
Plugins:
NONE
Drop shadow used throughout:
0 0 80 10.00 black

Let's Begin:
Open the template and shift+D to duplicate. Close the original. Remove Millie’s information layer from the template. Make your canvas large enough to work with.
Fill each of the layers of the template using your choice of papers from the kit and/or colors and gradients. Add a drop shadow to each layer.
Open your tube and copy and copy and paste as a new layer. Position in the center of the middle circle. Add a drop shadow to the tube.
Now let’s dress the tag up with elements from the kit. I will list the elements I used. Feel free to use other elements to make your tag unique. Placement of the elements is completely up to you. If you want your tag to look just like mine then use my tag for reference.
Elements I used:
1
3
11
16
23
38
40
46
52
65
81
92
96
104
Add your name.
Add your copyright and licensing information.
Crop and save.

Friday, July 22, 2016

Beware Of Pirates


Beware Of Pirates
Written 7/22/2016
This tutorial is meant purely as a guide. Feel free to use your own choice of tube or scrap kit to make your tag unique. If you want your tag to look just like mine them use the same supplies I have used. This tutorial assumes you have a knowledge of paint shop pro. Any resemblance to any other tag or tutorial is completely coincidental.

Supplies Used:
Tube of your choice. I am using one by Very Many Tubes. You can purchase this tube at http://verymanytubes.com/
The awesome scrap kit is by Amy Marie’s Kits. You can purchase it athttp://amymarieskits.com/store/
Font of your choice. I am using Anchor Steam NF. You can download it at http://www.fontspace.com/nicks-fonts/anchor-steam-nf
Plugins:
NONE
Drop shadow used throughout:
0 0 60 6.50 black

Let's Begin:
Open a new blank canvas that is going to give you plenty of room to work with. You can always crop and re-size when we are done.
Open paper 4 and set it as your background color. Turn off your foreground color.  Using your preset elipse shape tool draw out a fairly large oval in the center of your canvas. Once you are happy convert to a raster layer.
Selection select all float and defloat. Open the close up of your tube or if your tube does not have a close up just your tube will do and copy and paste as a new layer. Position her face within the selected area. Once happy selections invert and hit delete. Leave selected.
Layers new raster layer and drag under the background shape layer. Selections invert again. Selections modify and expand by 5. Flood fill your layer with a color or gradient of your choice. Adjust add remove noise and add noise at 100. Selections select none. Make the tube layer active and go to adjust hue and saturation colorize and set both values to 0. Lower the opacity of this layer to 40. Merge down to the background layer. Add a drop shadow to the bottom noise layer. Merge all layers together.
Open your tube and copy and paste as a new layer and move to the far right side. Add a drop shadow.
Now let’s dress the tag up with elements from the kit. I will list the elements I used. Feel free to use other elements to make your tag unique. Placement of the elements is completely up to you. If you want your tag to look just like mine then use my tag for reference.
Elements I used:
12
18
27
38
39
71
72
80
128
Add your name.
Add your copyright and licensing information.
Crop and and save.


Tuesday, July 12, 2016

Crown Jewel


Crown Jewel
Written 7/12/2016
This tutorial is meant purely as a guide. Feel free to use your own choice of tube or scrap kit to make your tag unique. If you want your tag to look just like mine them use the same supplies I have used. This tutorial assumes you have a knowledge of paint shop pro. Any resemblance to any other tag or tutorial is completely coincidental.

Supplies Used:
Tube of your choice. Preferably one with a close-up in it. I am using the work of Very Many Art. This tube is called Princess. You can purchase her at http://verymanytubes.com/
Scrap Kit is called Jewel by Amy Marie’s Kits. You can purchase this kit at http://amymarieskits.com/store/
Mask of your choice. I am using mask #298 by Insatiable Dreams. You can get her masks at http://insatiabledreams.net
Font of your choice. I am using The Heart Of Everything. You can download it at http://www.fontspace.com/mistis-fonts/the-heart-of-everything-demo

Plugins:
NONE
Drop shadow used throughout:
0 0 85 11.00 Black

Let's Begin:
Open paper 24 and shift+D to duplicate. Close the original. Promote the background layer to a raster layer. Make your canvas large enough to work with. Re-size the paper layer if you wish. This will be the base of your tag. Apply the mask of your choice. Delete the mask layer and merge the group.
Open the close-up of your tube. Copy and paste as a new layer. Apply the mask again to your tube layer. Delete the mask layer and merge the group. Re-size if you need to. Move so the masked tube is in the center of the bottom mask layer. Change the properties of the tube layer to Luminance Legacy. Merge these 2 layers together. Add a drop shadow – I used 2 -2 85 3.00 Black.
Open your full tube and copy and paste as a new layer. Re-size as needed so she is just slightly bigger or close to the same size as the mask base. Position where you want her and add a drop shadow.
Open element 17 and copy and paste as a new layer. Place at the bottom of your tube so it is covering her legs and wraps around her. Erase any bits that cover your tube at the top. Add a drop shadow.
Open element 84 and re-size by 85%. Copy and paste as a new layer and drag under your tube. Move to the far right side so it is coming out from behind your tube. Add a drop shadow.
Use some of the jewels from the kit to dress up your tag along the bottom and right side. Re-size them and rotate them as you wish. Once you are done add a drop shadow to each of them.
Now we are going to place some text on a path. I am sure there are many ways to do this but I am going to explain how I do it. If you know of another way feel free to do it your way. What matters is the end result.
Using your pen tool; turn off your background color and set your foreground color to something you can see fairly easily on your tag. Set the pen tool to draw freehand and check create on vector. Width doesn’t matter as we will delete this layer once we have the text on. Draw a vector line of your choosing about the middle of your tag around the flowers, jewels and your tube. It doesn’t have to be perfect but you may have to try it a few times to get the shape how you want it. I usually have to do it a few times as my hand is not that steady with a mouse <lol> …. Now using the font of your choice set to floating type out some text on your vector path. Once you have it typed out promote your floating selection to a rather layer and selections select none. Delete the vector path layer it is no longer needed. Add a drop shadow to your text.
Add your name.
Add your copyright and licensing information.
Crop and save.