
Showing posts with label FTU. Show all posts

Saturday, September 19, 2026

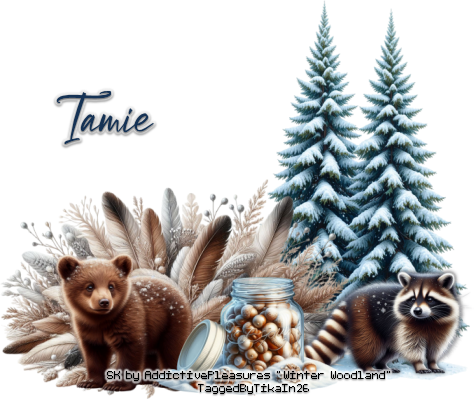
Fairy Winter Woodland Set


Fairy Winter Woodland

Written 9/17/2026

This tutorial is meant purely as a guide. Feel free to use your own choice of tube or scrap kit to make your tag unique.If you want your tag to look just like mine, then use the same supplies I have used. This tutorial assumes you have knowledgeof paint shop pro. Any resemblance to any other tag or tutorial is completely coincidental.


Supplies Needed:

Tube of your choice. You can get the tube I used at Tags by Tika: Winter Fairies AI Tubes


Scrapkit is a freebie from Addictive Pleasures. You can get this kit at  ★Addicitve ♥ Pleasures ★: Winter Woodland


Font of your choice. I am using Reebbett.


Plugins:

Mura Meister Copies

Penta.com Color dot


Lets Begin:

Open frame of your choice from the kit. I used frame 6.

Shift+D to duplicate. Close the original. Resize as needed. Make your canvas large enough to work with. You will crop at the end.

I use a canvas of 1050x1050 but I like lots of room.

Using your magic wand set to point to point select around the middle of your frame.

Layers new raster layer.
Open paper of your choice. I used paper 6. Use the default settings but change the value to 25.

Now open your tube and copy and paste as a new layer. Place where you want. Mine is to the left of the frame.

Now we are going to begin to build the tag up.

Open a group of flowers of your choice and copy and paste as a new layer. Resize by 50% and then again by 75%. Mura Meister Copies and select encircle. Use the default settings.

Drag this layer to the bottom of your layer palette.

Now I will tell you what elements I used however you do not have to use the same elements. This is where you can make the tag your own. If you want your tag to look just like mine then use my tag for reference.

Elements Used:

Winter Woodland Tree 3

Winter woodland animal 4

Winter woodland Birdhouse 3

Winter woodland bird 3

Winter woodland bush 2


Make sure you drop shadow everything. It gives it dimension and makes it look better. I am using a drop shadow of  0 0 75 8.50 black

Add your copyright and licensing information. Make sure you give Tamie credit for the scrapkit as its respectful to do so.

Add your name.

Crop and save.


I did make a set out of mine and its easy to do so just choose some elements that you want from the kit and build a banner and av.


Tuesday, September 15, 2026

Female Elegance BCA Set


Female Elegance BCA

Written 9/15/2026

This tutorial is meant purely as a guide. Feel free to use your own choice of tube or scrap kit to make your tag unique.If you want your tag to look just like mine, then use the same supplies I have used. This tutorial assumes you have knowledgeof paint shop pro. Any resemblance to any other tag or tutorial is completely coincidental.

Supplies Needed-

Female Elegance BCA kit by Sacrament Designs. You can find this kit on her blog https://sacramentdesigns.blogspot.com/2026/09/female-elegance-bca.html  Check out the rest of her blog as she has some great stuff.

Mask 2 by Jinxx’d by Jessica. You can get this mask https://jinxxdbyjessica.blogspot.com/2014/03/butterfly-flower-mask-freebies.html

Font of your choice – I used one called Jasuke Sweet.

Lets Begin –

Open frame 4 from the kit. Shift+D to duplicate. Close the original.

Make your canvas larger. I always go with 1050x1050 because I like lots of room to work with. You can crop and resize at the end.

Resize the frame to your liking. I like bigger tags so I resized mine by 80% 2x.

Using your magic wand select the inside of the frame. Go to selections modify and expand by 5. Layers – New raster layer. Drag this layer under the frame layer. Open the paper of your choice from the kit and copy and paste into selection. I used paper 7. Selections select none.

Open another paper of your choice. This will be for your  mask layer. I used paper 17. Copy and paste as a new layer and drag to the bottom. Resize as you wish. I resized by 80% and then again by 85%. Find KK_Mask 2 and apply to your paper layer. Delete the mask layer and merge the group. Duplicate the mask layer if you choose. I did because I wanted the mask layer to be darker. If you duplicate then merge down to 1 layer. This is to keep your layer palette clean.

Make your frame layer and active and using your magic wand select inside the frame. Selections modify expand by 1.

Open a tube or angel of your choice. She has given plenty of both to choose from. I used Angel 16. Copy and paste as a new layer the top of your layer palette. Resize as needed. Position on the frame area wherever you would like to. Duplicate and drag the duplicate under the frame layer. Selections invert and hit delete. Make your top tube layer active and using your eraser tool erase any bits hanging out of the frame that you do not want. I erased bits at the bottom so that she looks like she is coming out of the frame. Make sure you get all of the bits so that it doesn’t cause you issues down the road in the tag. When you are happy selections select none.

Add a drop shadow of your choice to both the frame and the top tube layers. I used a shadow of V-0 H-0 Opacity 60 Blur 10.00 and medium gray as the color. I chose this color because this is a feminine tag and black to me is just too harsh but it is your choice.

Alright now we are going to move on to building our tag with the elements. I am not going to tell you where to place each element. This is where you get creative freedom and can make your tag look how you want. If you want it to look just like mine just use my image as an example. However I will tell you which elements I used.

Elements:

40

50

72

91

98

123

Make sure you add a drop shadow to each element.


Add your copyright information

Always make sure you are giving credit where credit is due.

You can find her copyright information in the TOU file.

Add your name. Crop and save.

I did make mine into a 3 piece set which you can do also. Super easy just use elements of your choice from the kit and make a little banner and av.


Monday, January 29, 2024

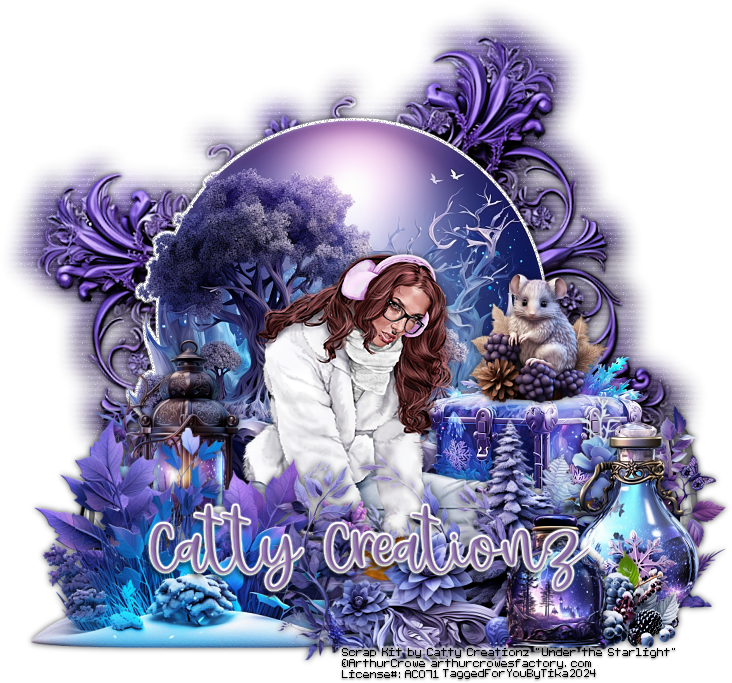
Magical Ice Set Crowe FTU


Magical Ice

Written 1/29/2024
This tutorial is meant purely as a guide. Feel free to use your own choice of tube or scrap kit to make your tag unique.
If you want your tag to look just like mine, then use the same supplies I have used. This tutorial assumes you have knowledge
of paint shop pro. Any resemblance to any other tag or tutorial is completely coincidental. 

Supplies Used:

Tube is by Arthur Crowe. He is no longer selling. You must have a license to use his artwork.

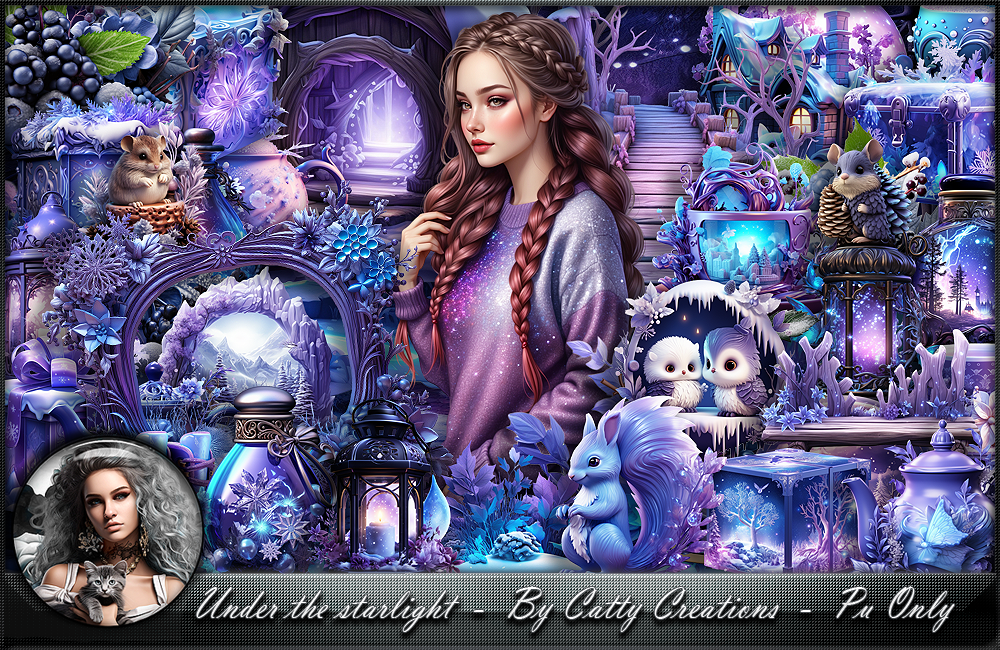
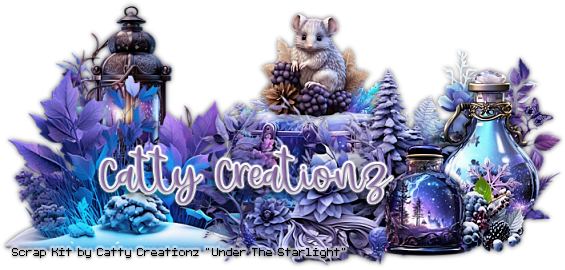
Scrap kit is by Catty Creationz. It is called Under The Starlight and you can find it on her blog https://cattycreationsdezines.blogspot.com/

Font of your choice. I am using Lightshot

Plugins: (plugins are most generally optional)

Photo Effex Scanlines 

Let's Begin:

Open a new canvas that will give you plenty of room to work with. I usually use 900x900 and then crop and resize when I am all finished.

Open frame 4 and copy and paste as a new layer on to your blank canvas. Resize to your liking. This going to be part of your background base and not an actual frame that is a focal point so you don’t want it too large.

Using your magic wand select the inside of the frame and go to selections modify and expand by 10.

Layers new raster layer and drag under the frame layer.

Open any of the papers of your choice from the kit and copy and paste into selection. Selections select none.

Add a drop shadow of your choice to your frame and then merge visible.

Image rotate free rotate to the left 20 degrees.

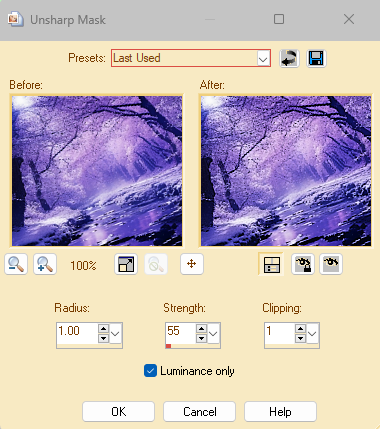
Adjust sharpeness unsharp mask. I use the following settings:

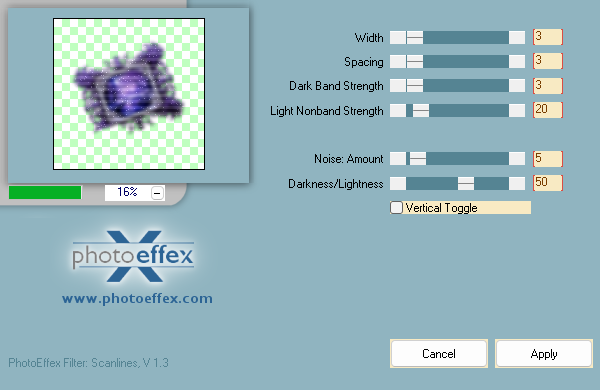
Duplicate. On the bottom original layer go to adjust blur gaussian blur and blur by 10. Then apply Photo Effex Scanlines with the following settings:

Open element 7.
Copy and paste as a new layer and resize to your liking. You want it small enough to be the focal point in the center and also to see the first framed image behind it. Don’t forget to sharpen when you resize.
Selections select all float defloat selections modify and expand by 3.
Layers new raster layer.
Drag under this layer.
Flood fill with white.
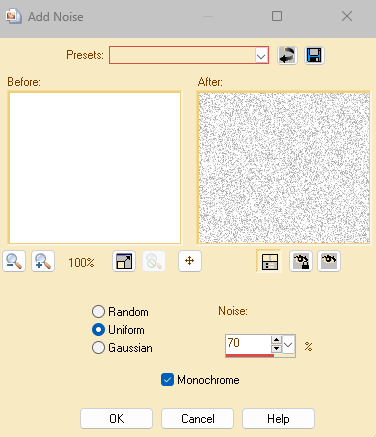
Adjust add noise using the following settings:
Selections select none.
Make your top layer active and merge down.
Add a drop shadow of your choice to this layer.
At this time I like to add my tube so I can build the rest of the tag around it.
Copy and paste your tube as a new layer. Position where you choose. Mine is nearly center within the tag.
Add a drop shadow of your choice to your tube. 

Now let’s dress the tag up with elements from the kit. I will list the elements I used. Feel free to use other elements to make your tag unique. Placement of the elements is completely up to you. If you want your tag to look just like mine, then use my tag for reference.

Elements I used:

5
8
16
20
25
32
47
51
59
65
Add your name and copyright information. Make sure you include your license # and any credits that need to be on your tag.
Crop and resize if you would like.
I made mine a 3 piece forum set and you can do that very easily on your own.
Thanks for trying my tutorial.

Wednesday, February 13, 2019

Believe In The Magic

Believe In the Magic
Written by Tika on 1/11/2019
This tutorial is meant purely as a guide. Feel free to use your own choice of tube or scrap kit to make your tag unique.
If you want your tag to look just like mine, then use the same supplies I have used. This tutorial assumes you have a knowledge
of paint shop pro. Any resemblance to any other tag or tutorial is completely coincidental.
Supplies Used:
Tube I am using is by Alex Prihodoko. This tube is called Star Fairy. You can purchase it at http://picsfordesign.com
You must have a license to use this tube.
Scrap kit is a freebie by With A Russian-Dutch Heart. It is called Believe in the Magic. You can download it at https://smiekeltje.blogspot.com/2018/06/some-photos-of-garden-at-last.html
The font I am using is Jaquilane. This is a PTU font.
Mask of your choice. I am using a mask by Designs By Vaybs. I am using mask #72 and you can get her masks at http://designsbyvaybs.blogspot.com/
Plugins: (plugins are most generally optional)
Let's Begin:
Open paper 7 and re-size as needed to your liking. You are going to apply the mask to this layer. Promote your background layer to a raster layer. Make your canvas large enough to work with. You can crop and re-size when we are finished. Apply the mask to this layer. Delete the mask layer and merge the group. Duplicate your mask layer and merge the 2 together.
Open element 24 and copy and paste as a new layer. Re-size by 50% and then again by 75%. Make sure it is in the center of your mask.
Open your tube and copy and paste as a new layer. Re-size as needed. Position in the center area of the mask. Add a drop shadow to the tube. I used V-0 H-0 Opacity – 55 Blur 9.00 Color- Black Shadow on new layer NOT checked.
Open element 12 and copy and paste as a new layer. Re-size to your liking. Place on the far-right side of your tube at the bottom. Add the same drop shadow.
Open element 11 and copy and paste as a new layer. Re-size to your liking. Place behind the tree stump but showing all around it. Duplicate 2 more times and place these copies where you wish along the bottom of the tube. Add the same drop shadow.
Open element 10 and copy and paste as a new layer. Re-size to your liking. Move to the bottom in the middle of all the other leaves. Add the same drop shadow.
Open element 9 and copy and paste as a new layer. Re-size to your liking. Place on the far-left under all the other leaves and your tube so you can see it kinda going up the left side of your tag. Duplicate and Image Mirror Horizontal and move to behind the tree stump. Add the same drop shadow to both.
Open element 8 and copy and paste as a new layer. Re-size to your liking. Move behind the tree stump but poking out the right side. Add the same drop shadow. Duplicate and Image Mirror Horizontal and move this one over towards the left side but all the way to the left.
Open element 7 and copy and paste as a new layer. Re-size to your liking. Move the right side behind the tree stump poking out of the top. Add the same drop shadow.
Open element 5 and copy and paste as a new layer. Re-size to your liking. Move behind the tree stump at the bottom and poking out of the left side. Duplicate and Image Mirror Horizontal and move to the far-left side of your tag at the bottom. Add the same drop shadow.
Open element 4 and copy and paste as a new layer. Re-size to your liking. Move behind the purple rose by the tree stump. Duplicate and move this one behind the purple rose on the left side of your tag. Add the same drop shadow to both.
Open element 3 and copy and paste as a new layer. Re-size to your liking. Image free rotate to the right 90 degrees. Adjust sharpen. Move to the bottom far-right behind the stump poking out the right side. Duplicate Image Mirror Horizontal. Move this one to the left side but poking out from behind the purple rose to the right. Add the same drop shadow to both.
Open element 19 and copy and paste as a new layer. Re-size to your liking. Move so it looks like it is collecting nectar from the tall flowers on the far-right side above the tree stump. Add the same drop shadow.
Add your name.
Add your copyright and licensing information.
Crop and Re-size if you wish.
Save.

Friday, January 4, 2019

This is Your Year


This Is Your Year
Written 1/4/2019
This tutorial is meant purely as a guide. Feel free to use your own choice of tube or scrap kit to make your tag unique.
If you want your tag to look just like mine, then use the same supplies I have used. This tutorial assumes you have a knowledge
of paint shop pro. Any resemblance to any other tag or tutorial is completely coincidental.

Supplies Used:
Tube by Very Many Tubes. This tube is called Blaze. You can purchase it at verymanytubes.com
You must have a license to use this tube.  If you choose not to use this tube, then use a tube that preferably has a close up.
Scrap Kit is by Me. It is a kit that is exclusive to The Taggers Lounge Forum. You can get this kit for free simply by being a member and earning loot and purchasing it from the Shoppe.
Mask is by Weescotslass Creations. It is mask #125. You can get her great masks at http://weescotslasscreations.blogspot.com/search/label/Masks
Font I am using is Cataleya.
Plugins: (plugins are most generally optional)
Let's Begin:
Open frame 2 from the kit.
Shift+D to duplicate.
Close the original.
Resize the frame by 80%.
Make your canvas larger to give you plenty of room to work with by going to image – canvas size. I set mine to 900x900 but only because I like lots of room and then will crop or resize when I am all done with the tag.
Open PP1 and copy and paste as a new layer. Drag under the frame. Apply the mask. Delete the mask layer and merge the group.
Open glitter bunch from the kit and copy and paste as a new layer. This should be between your mask layer and the frame. Resize by 85%. Add noise to this layer at 100%. Add a slight drop shadow. I used V-1 H-0 Opacity-60 Blur-2.00 Color- black
Make your frame layer active. Using your magic wand select the inside of the frame. Selections modify and expand by 4. Layers new raster layer and drag under the frame layer. Open PP4 and copy and paste into selection.  Selections modify and contract by 3.
Open the close up of your tube and copy and paste as a new layer under the frame layer. Resize if you need to and position most of the face inside of the framed area. Selections - invert – hit delete on your keyboard. This will clear any of the excess tube that is outside of the frame. Selections select none.  
Duplicate your tube layer. On the top copy go to adjust-blur-gaussian blur and add a blur of 9.00. Set the properties of this layer to screen. Merge the 2 tube layers together. Add a drop shadow of V-0 H-0 Opacity-50 Color-Black
Add this same drop shadow to the frame layer.
Now let’s dress the tag up with elements from the kit. I will list the elements I used. Feel free to use other elements to make your tag unique. Placement of the elements is completely up to you. If you want your tag to look just like mine, then use my tag for reference.
Elements I used:
Candles
Glasses – I added noise to these at 50% but that is completely up to you.
Mask
Star bunch small
Streamer – I rotated this to the left 90 degrees but that is completely up to you.
Add a drop shadow to all of your elements.
Add your name to the tag.
Add your copyright and licensing information.
Crop. Resize if you want to.
Save.