
Fluent
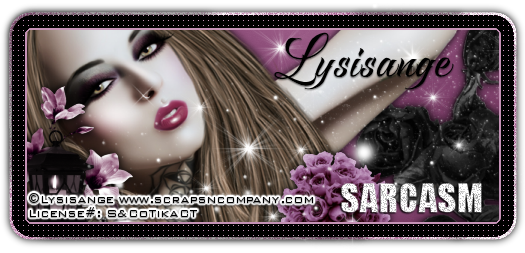
Sarcasm – Forum Set
written
5/2/2016
This
tutorial is meant purely as a guide. Feel free to use your own choice
of tube and scrap kit to make your tag unique. If you want your tag
to look just like mine then use the same supplies I have used. This
tutorial assumes you have a knowledge of paint shop pro. Any
resemblance to any other tag or tutorial is purely coincidental.
Supplies
Used:
Tube is by
Lysisange. This tube is part of a wonderful collab at Scraps N
Company. All you have to do is spend $12.50 at the store and you can
get this collab as a free gift. Lots of great goodies in it. Check
out the collab at
http://scrapsncompany.com/index.php?main_page=product_info&cPath=587_144&products_id=19502
Scrap Kit
is by Design By Joan. It is also part of the above collab.
Tag
template is by Sylly Creationz. You can download it at
http://syllycreationz.blogspot.ca/2016/02/new-forum-set-templates-pack-sarcasm.html?zx=cc8bb177d4a1064
Font of
your choice. I am using Raven Script. You can download it at
http://www.fontspace.com/mikrojihad-font/raven-script-demo
Plugins:
NONE
Drop
shadow used throughout:
0 0 100
12.00 black
Let's
Begin:
Open all
of your supplies.
We are
going to start with the large tag first.
Shift+D to
duplicate the template and close the original.
Delete the
watermark and text pixel right and left layers off the template.
Fill all
of your layers of the tag template using papers from the kit.
Colorize
any layers you wish to colorize to match your tube.
I also
added noise to the white layers but this is completely up to you.
I used
settings of :
uniform
monochrome and 75%.
Select the
black square right layer and selections select all float and defloat.
Open your
tube and copy and paste as a new layer.
Re-size as
needed.
Position
so the face of your tube is within the selected area.
Selections
invert and hit delete
Selections
select none.
Merge
together all of the layers that go with the black square right.
I added a
drop shadow of
1 -1 100
3.00 black
to the
color stripe before I merged but this is completely up to you.
Repeat
with the black square left layers.
Add a drop
shadow to these merged layers.
Merge
toether all of the layers that go with the center word art.
Once
merged add a drop shadow to it
Merge
together all layers that have to do with gradient small oval and add
a drop shadow.
Repeat
with gradient large oval.
Make your
blk square top right layer active and selections select all float and
defloat.
Open your
tube and copy and paste as a new layer.
Re-size as
needed.
Position
so your face is in the selected area.
Selections
invert and hit delete.
Selections
select none.
Adjust hue
and saturation colorize and set both values to 0.
Lower the
opacity of the tube layer to 60.
Merge
these 2 layers together.
Repeat
with the blk square bottom left layer.
Once you
are done add a drop shadow to both layers.
Add a drop
shadow to the remaining layers.
Now lets
dress this tag up with some of the awesome elements from the kit.
I will
simply list the elements I used.
Placement
is up to you.
Feel free
to use elements I did not use.
Use my tag
for reference if you wish.
Elements I
used:
6
8
9
10
14
17
30
32
34
Add your
name to the 2 stripes across the smaller squares.
Add your
copyright and licensing information.
Crop and
re-size if you wish.
Save.
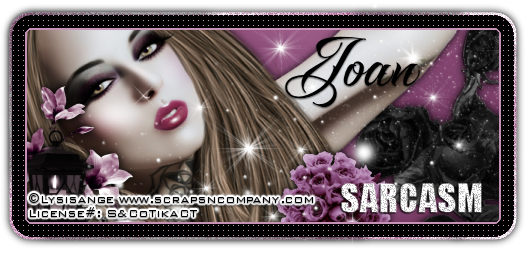
Lets move
onto the banner style tag.
Open that
template and shift+D to duplicate.
Close the
original.
Delete the
watermark and the text pixel layer.
Make your
canvas larger if you need to.
Colorize
the following layers to match your tube:
gradient
border , pink inner border and black dotted border.
Make the
black background layer active and selections select all float and
defloat.
Open paper
5 and copy and paste as a new layer.
Selections
invert and hit delete.
Selections
invert again.
Open your
tube and copy and paste as a new layer.
Re-size if
needed.
Position
within the selected area.
Selections
invert and hit delete.
Add a drop
shadow.
Add a drop
shadow to the bottom gradient layer.
Add some
noise to the word art.
Add a drop
shadow to it.
Now lets
add some elements to this tag.
I again
will list the elements I used and placement is up to you.
Feel free
to use other elements.
Elements I
used:
6
8
10
14
17
Add your
name.
Add your
copyright and licensing information.
Save.
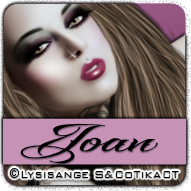
Now lets
move onto the avatar:
Remove the
watermark layer.
Make the
black background layer active and selections select all float and
defloat.
Open paper
5 and copy and paste as a new layer.
Selections
invert and hit delete.
Selections
invert again.
Open your
tube again and copy and paste as a new layer.
Re-size as
needed.
Position
within the selected area and selections invert and hit delete.
Selections
select none.
Colorize
the pink rectangle to match your tube.
Add a drop
shadow to the tube and the rectangle layer.
Add your
name.
Add your
copyright and licensing information.
Save.