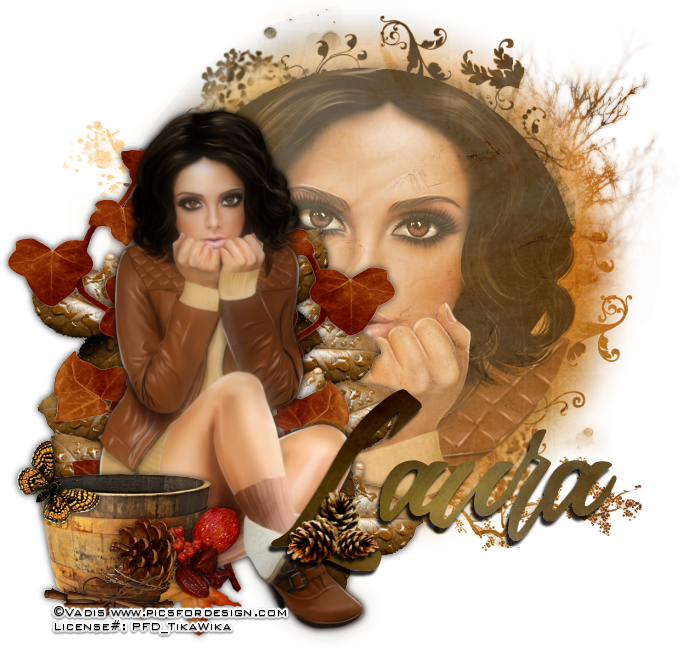
As The Weather Changes
Written 9/1/2016
This tutorial is meant purely as a guide. Feel free to
use your own choice of tube or scrap kit to make your tag unique. If you want
your tag to look just like mine them use the same supplies I have used. This tutorial
assumes you have a knowledge of paint shop pro. Any resemblance to any other
tag or tutorial is completely coincidental.
Supplies Used:
Tube of your choice. I am using the work of Vadis.
This tube is called Warmth and Tenderness and can be purchased at http://picsfordesign.com
The scrap kit is called Adel and is by Tiny Turtle
Designs. You can purchase it at http://tinyturtledesigns.com/store/
Mask of your choice. I am using mask #53 by Moonbeams
and Spiderwebs. You can get it at http://moonbeamsandspiderwebs.blogspot.com/search/label/Masks
Font of your choice. I am using Sunday Morning. You
can download it at http://www.1001fonts.com/sunday-morning-personal-use-font.html
Plugins:
NONE
Drop shadow used throughout:
0 0 80 10.00 Black
Let's Begin:
Ok lets start off by preparing our base for our tag.
Open paper 35 from the kit. You will notice that there
is a circle object in the center. We are going to place a mask around that and
then add our tube. So find a circle mask that is going to work for you or use
the one I am using. Shift+D on the paper and close the original. Promote the
background layer to a raster layer. Re-size if you wish. Apply the mask of your
choice. Delete the mask layer and merge the group. Make your canvas large
enough to work with. Selections select all float and defloat. Open your tube
and copy and paste as a new layer. Position her face within the selected area.
Selections invert. Hit delete on your keyboard 3 or 4 times. Selections select
none. Lower the opacity of the tube to 60. Merge the tube and the mask
together.
Copy and paste your tube again. Re-size as needed to
fit nicely next to the mask. Place on either side. Duplicate your tube layer.
On the top layer go to adjust blur Gaussian blur and blur by 10.00. Lower the opacity
on this blur layer until you are happy. Each tube looks differently so you have
to play with this setting and also depends on your preference. Add a drop
shadow to the bottom tube. You can merge the 2 tube layers together if you want
if you like to keep your layer palette clean like I do. Touch of OCD there LOL
Using element 6 you want to copy and paste as a new
layer and re-size by 50% 2x. Now drag behind your tube. Now you are going to
duplicate several times and also rotate some of them but you want to place them
behind your tube on both sides. Add a drop shadow to each of them.
Open element 72 and re-size by 75%. Copy and paste as
a new layer. Place behind your tube but on top of the other leaves. Position on
the right side of your tube so you can see it coming out from behind the tube.
Duplicate and image flip horizontal and move to the opposite side of the tube.
Add a drop shadow.
Open element 96 and copy and paste as a new layer.
Re-size so it is proportioned with your tube. Move to the lower side of your
tube. Use my tag for reference if needed. Add a drop shadow.
Open element 94 and re-size by 50% 2x. Copy and paste
as a new layer and position in front of the barrel. Add a drop shadow.
Open element 88 and re-size by 50% 3x and copy and
paste as a new layer and place on the top edge of the barrel. Add a drop
shadow.
Open element 82 and re-size by 50% 2x. Copy and paste
as a new layer and place in front of the barrel at the bottom. Add a drop
shadow.
Add your name.
Open element 81 and re-size to fit in front of your
name. Copy and paste as a new layer and position in front of your name. Add a drop shadow.
Add your copyright and licensing information.
Crop and save.


No comments:
Post a Comment