

Soul Music
This tutorial is meant purely as a guide. Feel free to use your own choice of tube or scrap kit to make your tag unique.
If you want your tag to look just like mine, then use the same supplies I have used. This tutorial assumes you have a knowledge.
of paint shop pro. Any resemblance to any other tag or tutorial is completely coincidental.
Supplies Used:
Tube is by Lia http://linmida.com Lia’s tubes are free to use.
Scrap kit by Michelle’s Myths. It is called Punk Rock Girl and you can find it at http://picsfordesign.com
Font of your choice. I am using Advocate Script
Plugins: (plugins are most generally optional)
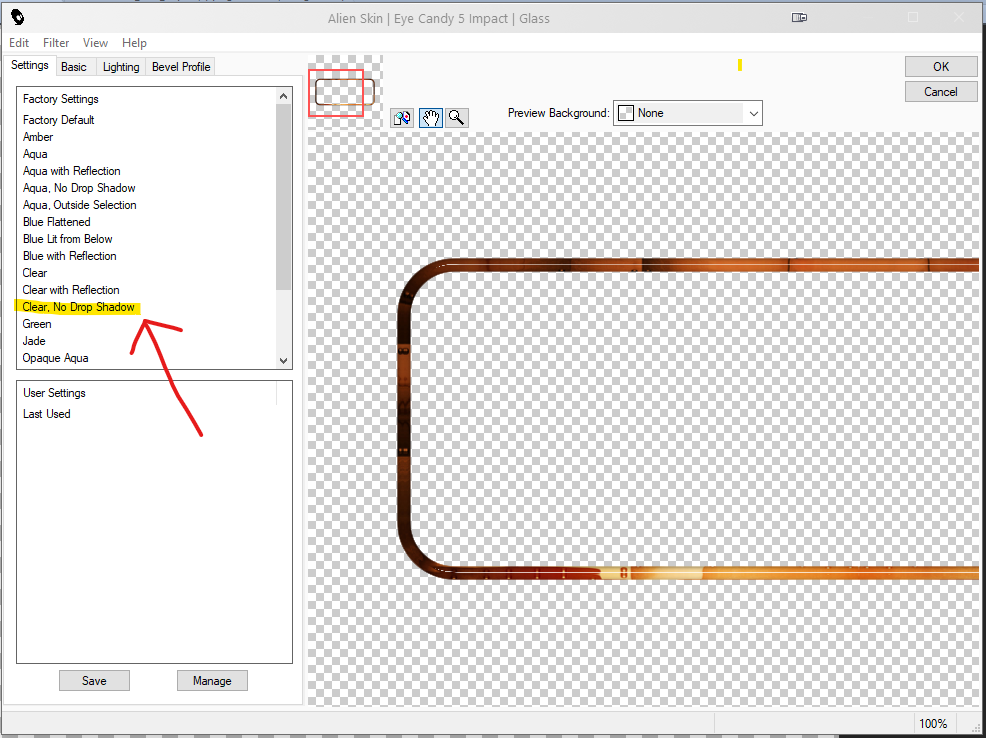
Eye Candy 5 Impact Glass
Pixelate Sector Mosaic
Let's Begin:
Open a blank canvas that will give you plenty of room to work with. I am using 900x900. You can resize and crop when we get to the end.
Open paper 1. Set your foreground color in your materials palette to the paper. No angle and scale at 100.
Turn off your background color in the materials palette.
Now using your rectangle preset shape with the following settings:
Show nodes and Create on vector checked.
Horizontal radius: 50.00
Vertical radius : 50.00
Width: 15.00
Anti alias checked
Miter Limit 15
This will give your rectangle rounded corners. My friend Vix has turned me on to these rounded corners and I am loving them. Hopefully you will too.
Now draw out a rectangle as long and as wide as you want. Objects Align Center in canvas. Convert to a raster layer. Apply the Eye Candy 5 Impact Glass filter using the following settings:
Using your magic wand select the inside of the frame.
Selections modify and expand by 2.
Layers new raster layer and drag this under the frame.
Open paper 10. Copy and paste into selection.
Selections select none.
Duplicate the paper layer.
On the bottom(original) adjust blur gaussian blur 5.
Using the blinds effect in psp apply it using the following settings:
Width – 2
Opacity – 8
Color – black
Horizontal and light from left/top checked
On the top paper layer (duplicate) apply the Pixelate Sector Mosaic plugin using the default settings of 25 and 25.
Lower the opacity of this layer to 30
Effects Edge Effects Enhance More
Add a drop shadow of your choice to the frame.
Copy and paste your tube as a new layer.
Add a drop shadow of your choice to the tube layer.
Now let’s dress the tag up with elements from the kit. I will list the elements I used. Feel free to use other elements to make your tag unique. Placement of the elements is completely up to you. If you want your tag to look just like mine, then use my tag for reference.
Elements I used:
2
5
7
15
41
42
60
65
78
84
104
Once you have everything where you want it add your name.
Add your copyright and licensing information if required.
Crop your tag and save.
Thanks for trying my tutorial ♥
No comments:
Post a Comment