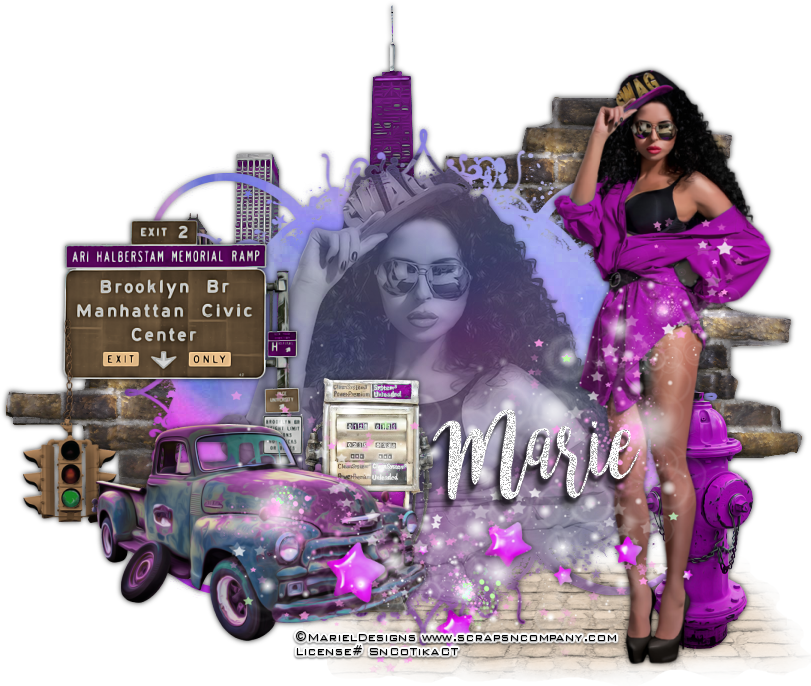
Swag In
The City
written
2/26/2016
This
tutorial is meant purely as a guide. Feel free to make your tag
unique by using your own choice of tube and scrap kit. If you want
your tag to look just like mine then use the same supplies I have
used. Any resemblance to any other tag or tutorial is purely
coincidental.
Supplies
Used:
Tube by
Mariel Designs. You can purchase it at
http://scrapsncompany.com/index.php?main_page=product_info&cPath=112_571_570&products_id=17686
Matching
scrap kit by Mariel Designs and you can purchase it at
http://scrapsncompany.com/index.php?main_page=product_info&products_id=17726
Mask of
your choice. I am using mask #424 by Vix. You can get her awesome
masks at http://www.freewebs.com/vixpsp/
Font of
your choice. I am using Bromello. You can download it at
http://www.fontspace.com/alit-design/bromello
Plugins:
Xero
Porcelain
Let's
Begin:
Open paper
8 and shift+D to duplicate.
Close the
original.
Promote
background layer to a raster layer.
Make your
canvas large enough to give you plenty of room to work with.
Apply your
mask to the paper layer .
Delete the
mask layer and merge the group.
On your
mask layer selection select all float and defloat.
Open your
tube and copy and paste as a new layer.
Position
her face within the selected area.
Selections
invert and hit delete.
Selections
select none.
Adjust hue
and saturization/colorize and set both values to 0.
Apply the
Xero Porcelain filter using the default settings.
Lower the
opacity of this tube layer to 60.
Add a drop
shadow to both the tube and the mask.
Merge
these 2 layers together.
Open
element 2 and copy and paste as a new layer.
Drag under
the mask layer.
Place so
the buildings peek out at the top and sides.
Add a drop
shadow.
Open your
tube again and copy and paste as a new layer at the top.
Re-size so
she is just bigger than the mask layer.
Move to
the far right side.
Add a drop
shadow.
Open
element 34-1 and copy and paste as a new layer.
Re-size by
60%.
Move to
the lower left corner and add a drop shadow.
Open
element 7-2 and copy and paste as a new layer.
Re-size by
60%.
Drag under
the truck layer.
Move to
the center part of the truck.
Add a drop
shadow.
Open
element 13-2 and copy and paste as a new layer.
Re-size by
50% and then again by 75%.
Move to
the far left of the sign and add a drop shadow.
Open
element 14-2 and copy and paste as a new layer.
Re-size by
50% and move to the right side of the truck behind it.
Add a drop
shadow.
Open
element 44-1 and copy and paste as a new layer.
Re-size by
75% and move to the bottom of the tag.
Add a drop
shadow.
Open
element 51 and copy and paste as a new layer.
Re-size by
50%.
Drag under
your tube.
Move to
the far right side of your tube behind and peeking out.
Add a drop
shadow.
Open
element 67 and copy and paste as a new layer layer.
Re-size by
50% and drag to the bottom.
Place
behind your tube's head.
Duplicate
and move down and to the right so it peeks out behind your tube and
the fire hydrant.
Duplicate
again and move to the far left so it peeks out behind the sign and
truck.
Add a drop
shadow to each of these layers and then merge them together.
Open
element 78 and copy and paste as a new layer.
Drag to
the bottom.
Move to
the bottom of the tag so it appears the tube is standing on it along
with the fire hydrant.
Open
element 68 and copy and paste as a new layer.
Image flip
horizontal.
Place at
the top across the tube and the truck.
Add your
name.
Add your
copyright and licensing information.
Crop and
save.


No comments:
Post a Comment