

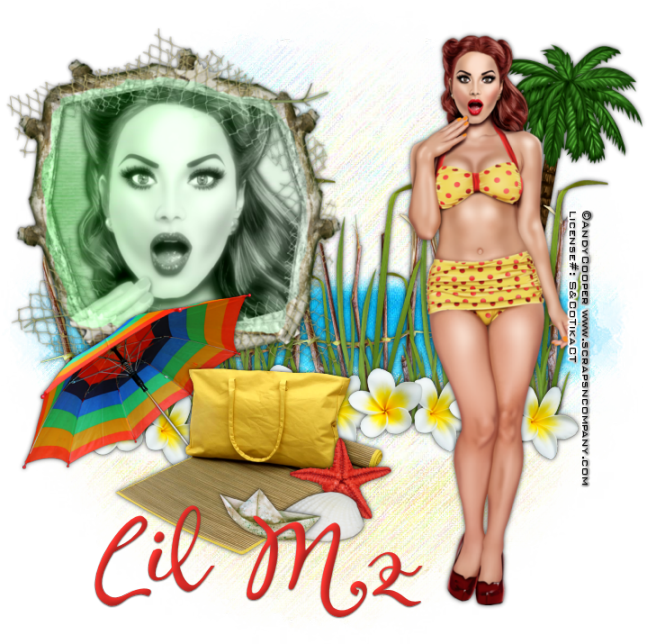
Beach Me
written
3/17/2016
This
tutorial is meant purely as a guide. Feel free to make your tag
unique by using your own choice of tube and scrap kit. If you want
your tag to look just like mine then use the same supplies that I
have used. This tutorial assumes you have a knowledge of paint shop
pro. Any resemblance to any other tag or tutorial is purely
coincidental.
Supplies
Used:
Tube by
Andy Cooper. This tube is part of the “Pretty Colors” collab
which can be purchased at
http://scrapsncompany.com/index.php?main_page=product_info&cPath=587_144&products_id=18282&zenid=4k6tc72d27p8uequ28ot4kips2
Scrap Kit
by Lil Mz Brainstorm. This kit is also part of the collab above.
All you
need to do is spend $11.00 at Scraps N Company and you can get the
entire collab for free which contains some awesome goodies.
Mask of
your choice. I am using mask #451 by Vix. You can get her awesome
masks at http://www.freewebs.com/vixpsp/
Font of
your choice. I am using Fruitella.
Drop
shadow used throughout
0 0 70
7.50 black
Plugins:
NONE
Let's
Begin:
Open
element 11 and shift+D to duplicate. Close the original.
Re-size so
it is a medium to large size.
Make your
canvas large enough to work with.
Using your
selection tool set on freehand draw around the frame.
Open paper
3 and copy and paste as a new layer and drag under the frame.
Selections
invert and hit delete.
Selections
invert again.
Open your
tube or the close up if your tube if it has one.
Copy and
paste as a new layer.
Drag under
the frame.
Position
the face within the framed area.
Selections
invert and hit delete.
Selections
select none.
Duplicate
the tube layer.
On the
bottom copy change the layer properties to luminance legacy.
On the top
copy go to adjust blur gaussian blur and blur at 4.00
Change the
property of this layer to screen.
Add a drop
shadow to the bottom layer and the frame.
Merge
these layers together.
Move this
frame to the upper left corner of your tagging area.
Open paper
5 and copy and paste as a new layer and drag under the framed image.
Apply your
mask.
Delete the
mask layer and merge the group.
Open your
full sized tube and copy and paste as a new layer. \
Re-size as needed.
Re-size as needed.
Place to
the right of your tagging area.
Add a drop
shadow.
Now lets
dress this beauty up with some elements from this wonderful kit.
I will
list the elements I used and if you choose to use the same ones thats
great.
If not
feel free to use whatever elements you wish.
Placement
is entirely up to you however if you want your tag to look just like
mine then use my tag for reference.
Elements I
used:
5
6
10
12
13
15
20
25
26
Add your
name.
Add your
copyright and licensing information.
Crop and
save.

No comments:
Post a Comment