

Bathed In
Moonlight
written
5/2/2016
This
tutorial is meant purely as a guide. Feel free to make your tag
unique by using your own choice of tube and scrap kit. If you want
your tag to look just like mine then use the same supplies I have
used. This tutorial assumes you have a knowledge of paint shop pro.
Any resemblance to any other tag or tutorial is purely coincidental.
Suuplies
Used:
The
beautiful tube is by Queen Uriel and it is called Drowning. You can
purchase it at http://www.queenuriel.com/loja/index.asp
The
gorgeous scrap kit is by Amy Marie. It is called Roses are Blue and
you can purchase it at http://amymarieskits.com/store/
Font of
your choice. I am using Lavanderia. You can get it at
http://www.losttype.com/font/?name=lavanderia
Plugins:
Xero
Porcelain
Alien Skin
Xenofex 2 Constellation
Drop
shadow used throughout:
0 0 75
9.00 black
Let's
Begin:
Open
element 82 and shift+D to duplicate.
Close the
original.
Make your
canvas large enough to work with.
Set your
foreground color to a color from your tube.
Turn off
your background color.
Using your
preset rectangle shape tool with the width set to 6.50 draw out a
rectangle around this element 82.
Giving it
some room on each side.
Convert
this frame to a raster layer.
Using your
magic wand select the inside of the frame.
Selections
modify and expand by 2.
Open paper
10 and copy and paste as a new layer.
Drag to
the bottom.
Selections
invert and hit delete.
Move the
element to the far left side of the frame area.
Add a drop
shadow to the element.
Open your
tube and copy and paste as a new layer.
Position
within the frame area and move to the far right.
Apply the
Xero Porcelain filter using the default settings.
Add a drop
shadow to the tube.
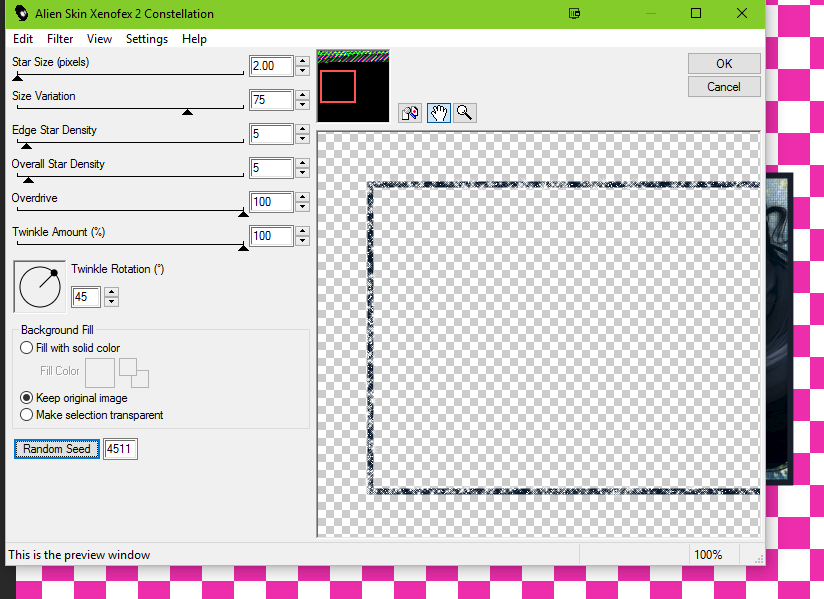
Make the
frame layer active and apply the Alien Skin Xenofex 2 Constellation
plugin with the following settings:
Add a drop
shadow to the frame.
Open
element 105 and copy and paste as a new layer.
Re-size by
75%.
Place on
the far left side of the tag area.
Duplicate
and move this copy to the far right.
Merge
these 2 together and add a drop shadow.
Open
element 84 and copy and paste as a new layer.
Re-size by
50%.
Move to
the top far left corner of the tag area.
Open
element 80 and copy and paste as a new layer.
Place to
the bottom of the tag and to the far right.
Duplicate
and move this copy slightly to the left.
Merge
these 2 layers together.
Open
element 70 and copy and paste as a new layer.
Re-size by
50% 2x.
Drag under
the leaves.
Place to
the far left in front of the tuft of grass.
Add a drop
shadow.
Duplicate
and move this copy to the far right area.
Repeat
with element 71.
Repeat
with element 86.
Open
element 87 and image flip horizontal.
Copy and
paste as a new layer.
Re-size by
50% and then again by 75%.
Move to
the top left corner.
Using your
pick tool rotate to the right a bit so its on an angle.
Adjust
sharpen.
Add a drop
shadow.
Open
element 78.
Copy and
paste as a new layer and drag to the bottom.
Move to
the far left so it is peeking around the top bottom and side of the
tag.
Duplicate
and image flip horizontal.
Move this
copy to the right side.
Merge
these 2 layers together and add a drop shadow.
Open
element 108 and copy and paste as a new layer.
Center in
the tag.
Add your
name.
Add your
copyright and licensing information.
Crop and
save.

No comments:
Post a Comment