
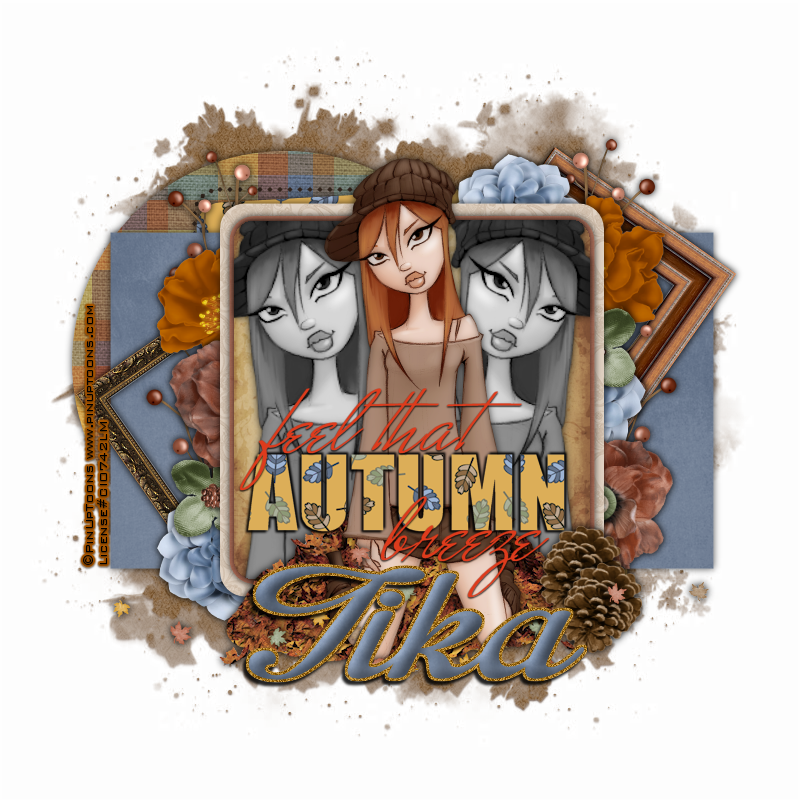
Autumn Breeze
Written 11/17/2016
This tutorial is meant purely as a guide. Feel free to
use your own choice of tube or scrap kit to make your tag unique. If you want
your tag to look just like mine them use the same supplies I have used. This
tutorial assumes you have a knowledge of paint shop pro. Any resemblance to any
other tag or tutorial is completely coincidental.
Supplies Used:
Tube of your choice. I am using one by Pinup Toons. I
purchased this tube when they were with CILM(which is now closed) but you can
purchase their tubes at http://cdoestore.com/
Scrap kit is a freebie add on kit by Manipulated by
Magik. It is called Shabby Autumn. You can download it at http://manipulatedbymagik.blogspot.com/2016/09/shabby-autumn-freebie-add-on-kit.html?zx=360c408fd0a908f
Tag template is by Millies PSP Madness. You can download
it at http://milliespspmadness.blogspot.ca/2014/11/template-711-and-tags-with-arthur-crowe.html?zx=cb4c2b2de0403e08
Mask is by Rachel Designs. You can download it at https://racheldesignsblog.wordpress.com/2016/10/14/mask-set-132/
Font of your choice. I am using Impregnable. You can
download it at http://www.fontspace.com/m%C3%A5ns-greb%C3%A4ck/impregnable-personal-use-only
Plugins:
Xero Greyscaler
Xero Porcelain
Drop shadow used throughout:
0 0 70 11.00 black
Let's Begin:
Open your tag template and shift+D to duplicate. Close
the original. Remove the cr and background layers. Make your canvas large
enough to work with.
Fill each layer of the tag template using either
papers from the kit, colors of your
choice, gradients of your choice or textures of your choice.
Add a drop shadow to each of the text layers and merge
them together.
Add a drop shadow to each of the other layers.
On the center top square of the template selections
select all float and defloat. Open your tube and copy and paste as a new layer.
Move to far left of the square. Selections invert and hit delete. Selections
select none. Apply Xero Greyscaler using the default settings. Apply Xero
Porcelain using the default settings. Add a drop shadow. Duplicate. Image flip
horizontal and move to the far right side of the square area. Merge these 2
layers together.
Open your tube again and copy and paste as a new
layer. Position in the center. Apply the Xero Porcelain filter using the
default settings. Add a drop shadow.
Move the wordart/text to the center of the tag.
Open paper 4 and copy and paste as a new layer. Drag
to the bottom. Apply the mask of your choice. Delete the mask layer and merge
the group. I added a slight drop shadow to the mask to help is stand out a bit
.. this is completely up to you.
Now let’s dress the tag up with elements from the kit.
I will list the elements I used. Feel free to use other elements to make your
tag unique. Placement of the elements is completely up to you. If you want your
tag to look just like mine then use my tag for reference.
Elements I used:
Berry branch 2
Flower 1
Flower 2
Flower 3
Flower 4
Pine cone
Leaf scatter
Frame 4
Frame 2
Add your name.
Add your copyright and licensing information.
Crop and save.

Such a cute tutorial.
ReplyDeleteThank you so much for the free tutorial. I will have a go at this one later tonight.
ReplyDelete