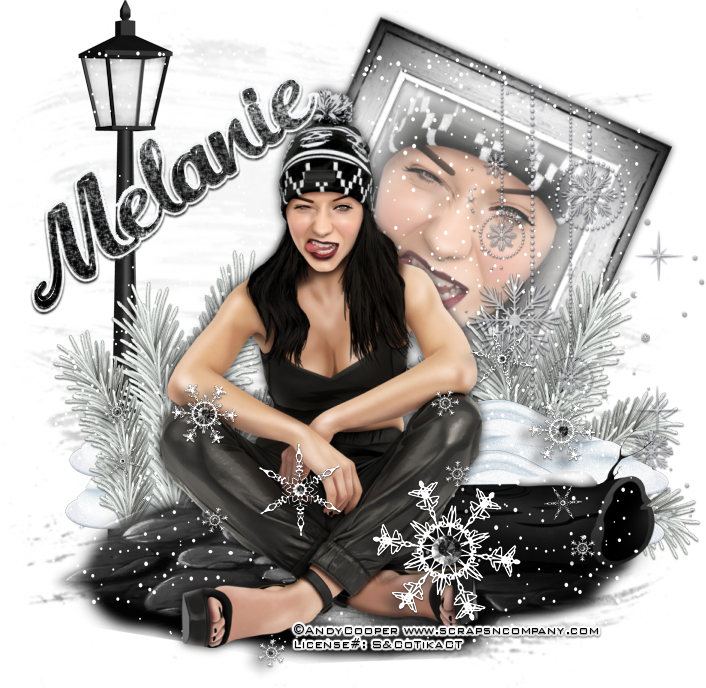
Rebel Winter
Written 1/15/2017
This tutorial is meant purely as a guide. Feel free to
use your own choice of tube or scrap kit to make your tag unique. If you want
your tag to look just like mine them use the same supplies I have used. This
tutorial assumes you have a knowledge of paint shop pro. Any resemblance to any
other tag or tutorial is completely coincidental.
Supplies Used:
Tube of your choice. I am using a tube called Rebel Girl
by Andy Cooper. You can purchase this tube at http://scrapsncompany.com/index.php?main_page=product_info&cPath=113_652_304&products_id=25314
The awesome matching scrap kit is also called Rebel
Girl by Blissful Designs. You can purchase this scrap kit at http://scrapsncompany.com/index.php?main_page=product_info&products_id=25323
Mask of your choice. I am using mask # 161 by
Insatiable Dreams. You can get her masks at http://insatiabledreams.net
Font of your choice. I am using Blanche de la
Fontaine. You can download it at http://www.fontspace.com/octotype/blanche-de-la-fontaine
Plugins:
Eye Candy 5 Nature Snowdrift (optional – I used on my
name)
Drop shadow used throughout:
0 0 85 14.00 black
Let's Begin:
Open paper 7 and shift+D to duplicate. Close the
original. Promote the background layer to a raster layer. Re-size if you wish.
Apply the mask of your choice. Delete the mask layer and merge the group.
Open your tube and copy and paste as a new layer.
Re-size as needed. Position at the bottom of the mask in the center. Add a drop
shadow to the tube.
Open element 14 and copy and paste as a new layer. Re-size
by 75%. Layers new raster layer and drag under the frame. Now we are going to
clone part of your tube into the frame using the clone tool. I just learned
this nifty trick (Thanks Vix A Roo) in all the years of psp’ing I have never
used the clone tool and now I will be cloning everything LOL .. OK let me walk
you through it.
Ok Open your tube or whatever image you want to clone
into the frame. Open your clone tool and select a brush shape that you want. I
used a rounded square one so it would fit inside the frame. Set the settings
like below : (thanks Vix again for the settings)
Size 200
Step 32
Opacity 50
Right click on the area of your tube that you want to
clone. You will see an outline around the area with an x in the middle. Go back
to your tag. Make sure you are on the blank new layer under the frame. Left
click and it will place the area that you cloned. You can left click multiple
times if you wish to make the image darker. This part is completely up to you.
Add a drop shadow to the frame. Merge the frame and
tube together. Image free rotate to the right by 24 degrees. Adjust sharpen.
Move under your main tube and place near the top so you can see the framed
image from behind the tube.
Now let’s dress the tag up with elements from the kit.
I will list the elements I used. Feel free to use other elements to make your
tag unique. Placement of the elements is completely up to you. If you want your
tag to look just like mine then use my tag for reference.
Elements I used:
4
11
40
68
69
70
74
85
Add your name.
Add your copyright and licensing information.
Crop and re-size if you wish.
Save your tag.
♥♥♥


No comments:
Post a Comment